Pleased as I was with my iron-pipe tables, I ended up with some parts that I knew would make a great lamp. In particular this size reducer:
so it’s about 18 months later and we’re in lockdown, so I try to modify the USB charger that I built on my TV side table to add the lamp.
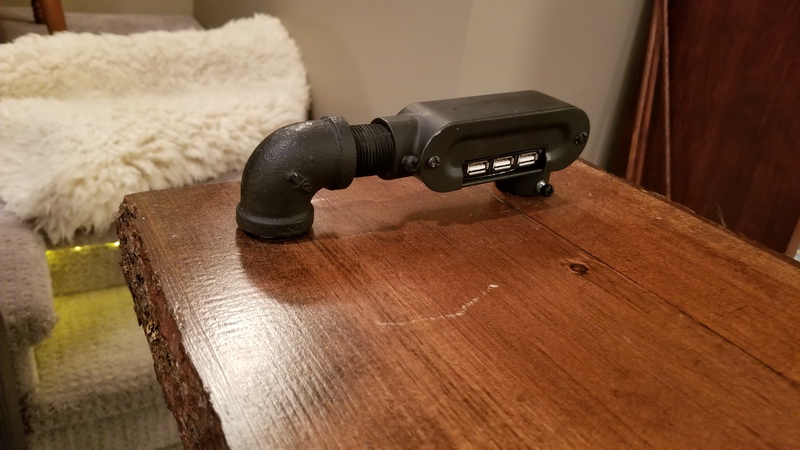
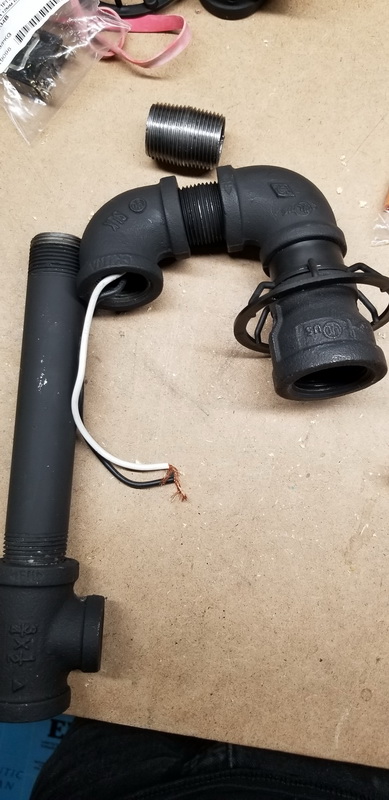
Here’s the USB charger as I have it currently:
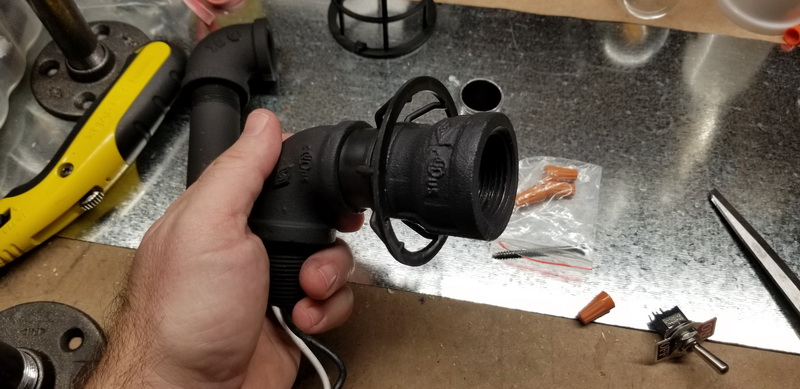
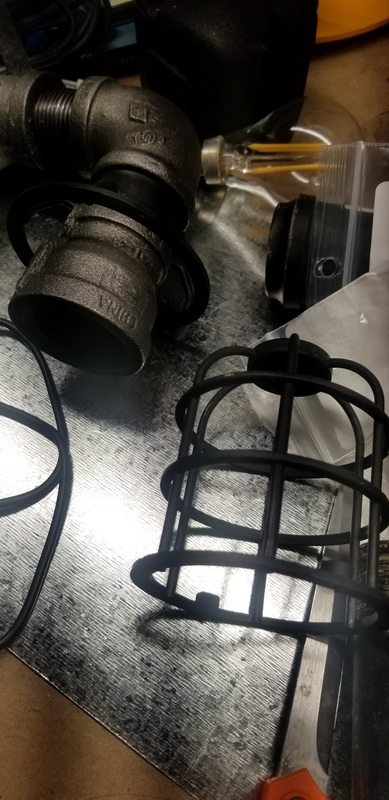
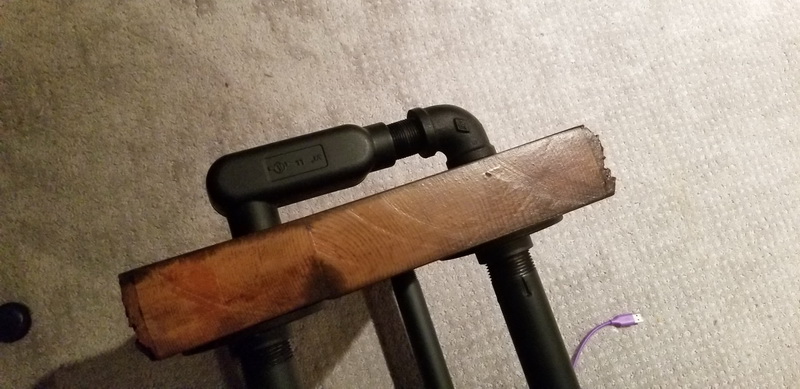
and it looks like i can jam the collar of a faux bulb-protection-basket thingy right above the reducer:
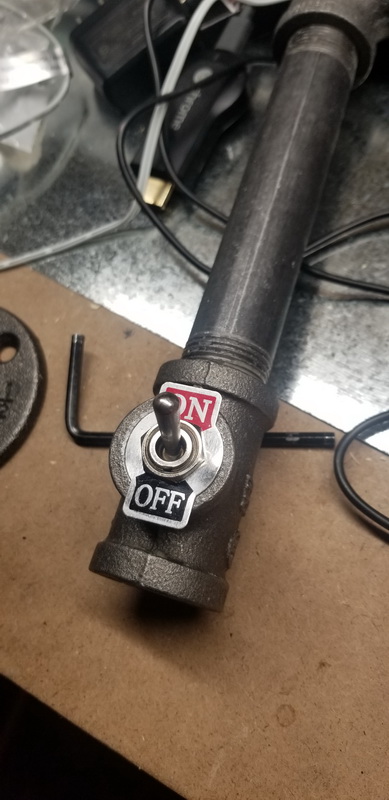
Found a switch big enough to fit into a T-connection:
it actually fit perfectly and almost screwed right in!
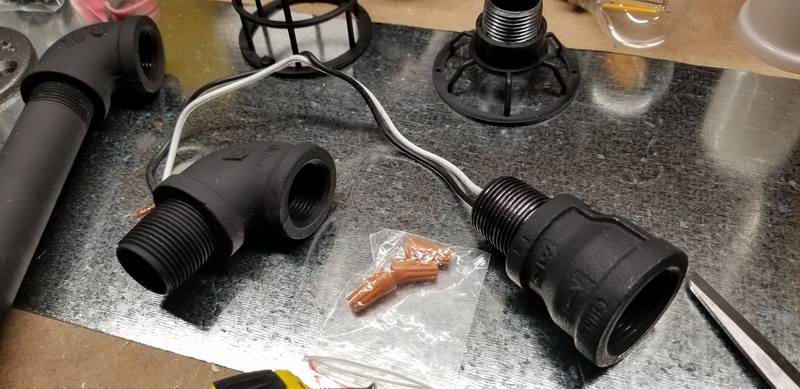
Dang – wires from the bulb pigtail are too short. Gonna be a pain getting marettes in there:
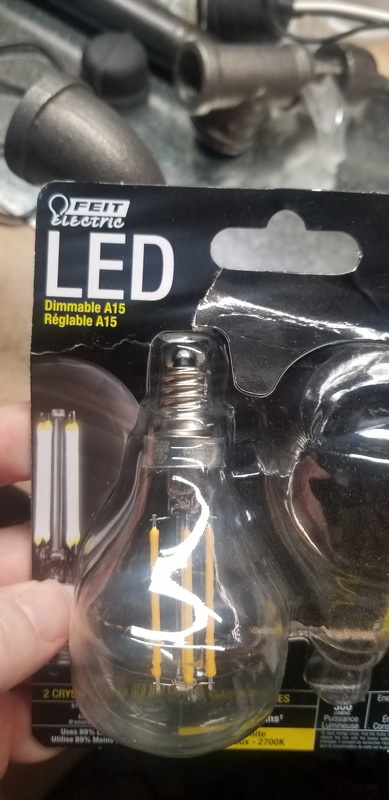
A normal globe bulb won’t quite fit – need a longer neck. These work and look the part:
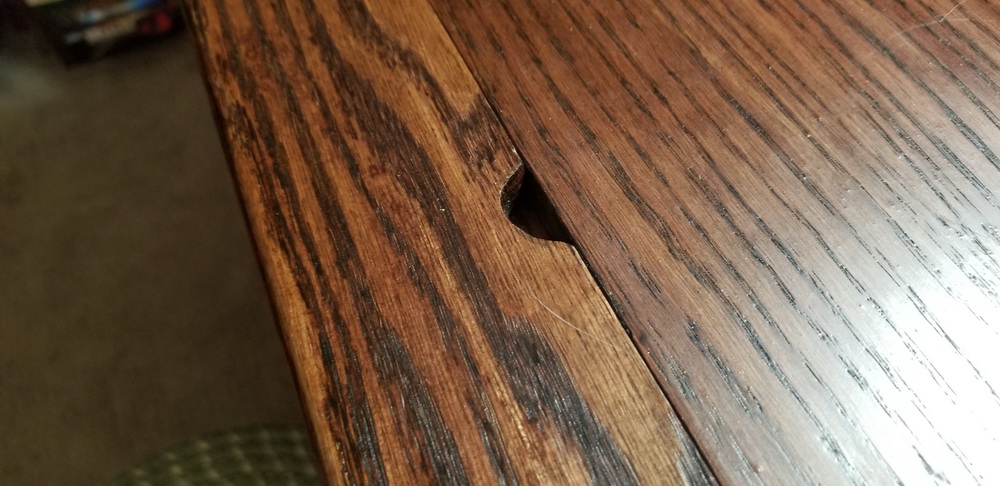
Unfortunately getting the existing elbow out wasn’t easy (and the wire goes through it to the ground). In the end there was some forcing and a little damage to the wood. Oh well – call it vintage LOL
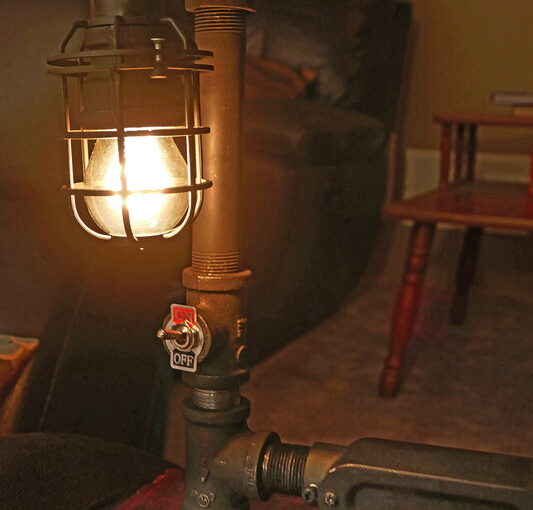
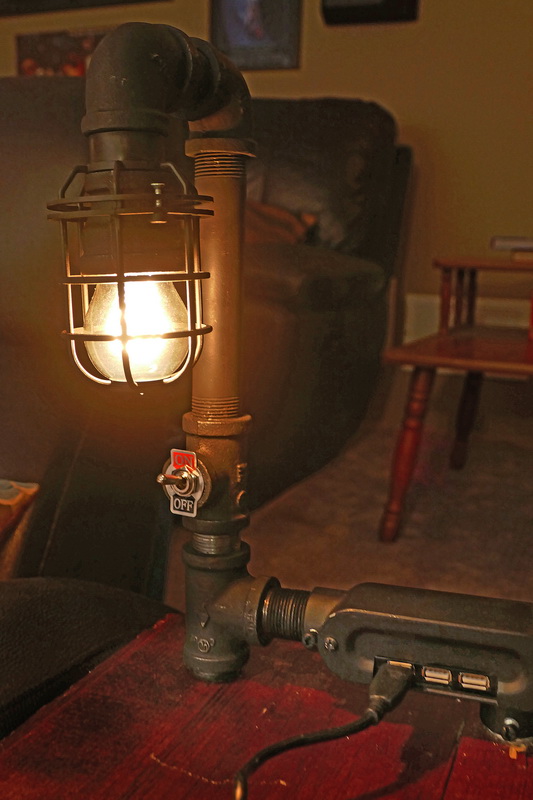
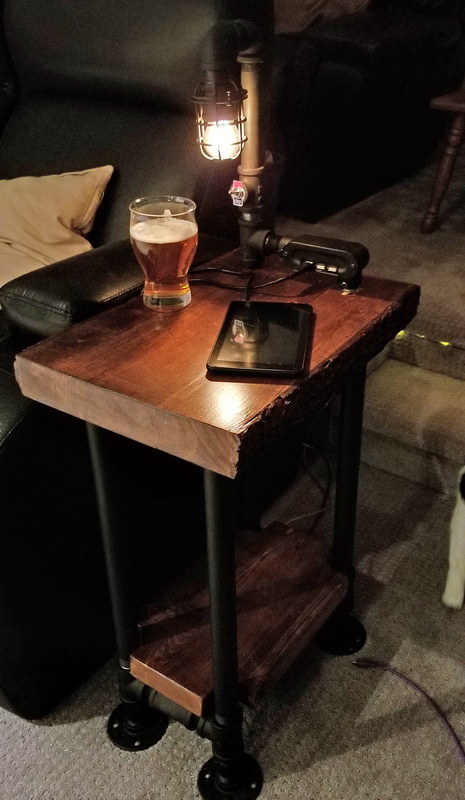
All assembled !
Looks awesome !
and the obligatory beer shot:
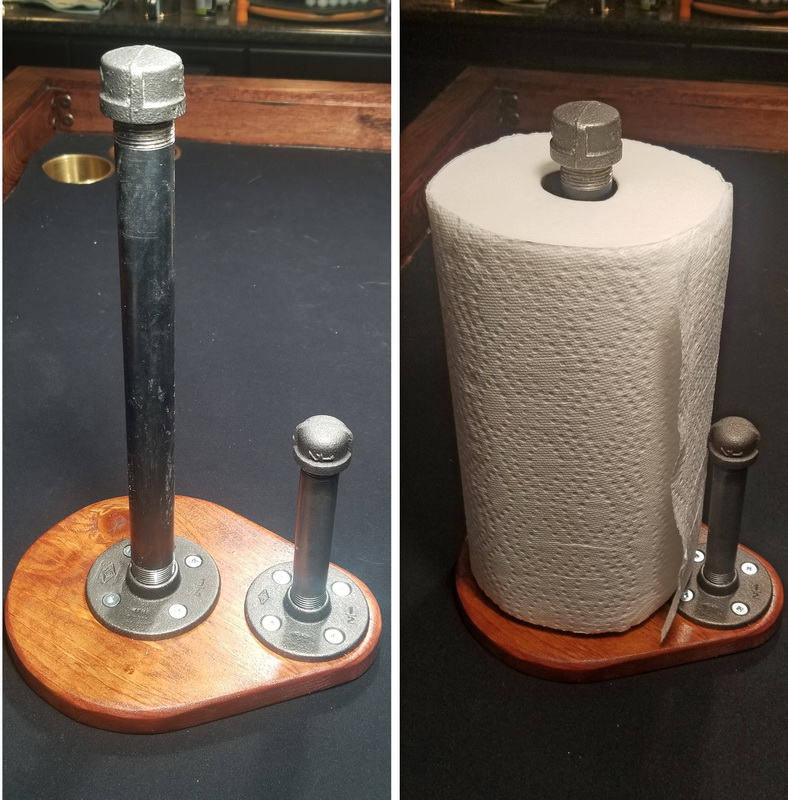
one last thing … (for now) … use left over pipe to make the paper-towel dispenser for the bar:
For some reason I like the look of wood+iron, and it is easy to put together something that looks good … and is incredibly sturdy!
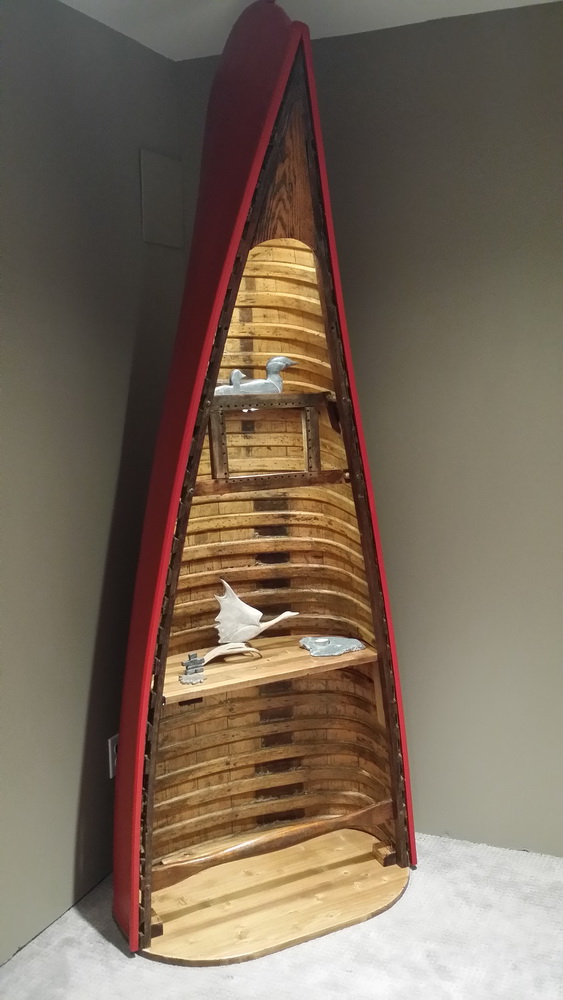
At some point in the mid to late 90’s, we came into the possession of an old canoe. Although it probably still floated and you could probably have taken it out on the water for a paddle, it was in terrible shape. Particularly the gunwales. So when we moved from the country to the suburbs in the mid 2000’s it was time to commit to this thing being a future shelf and not a mode of transport.
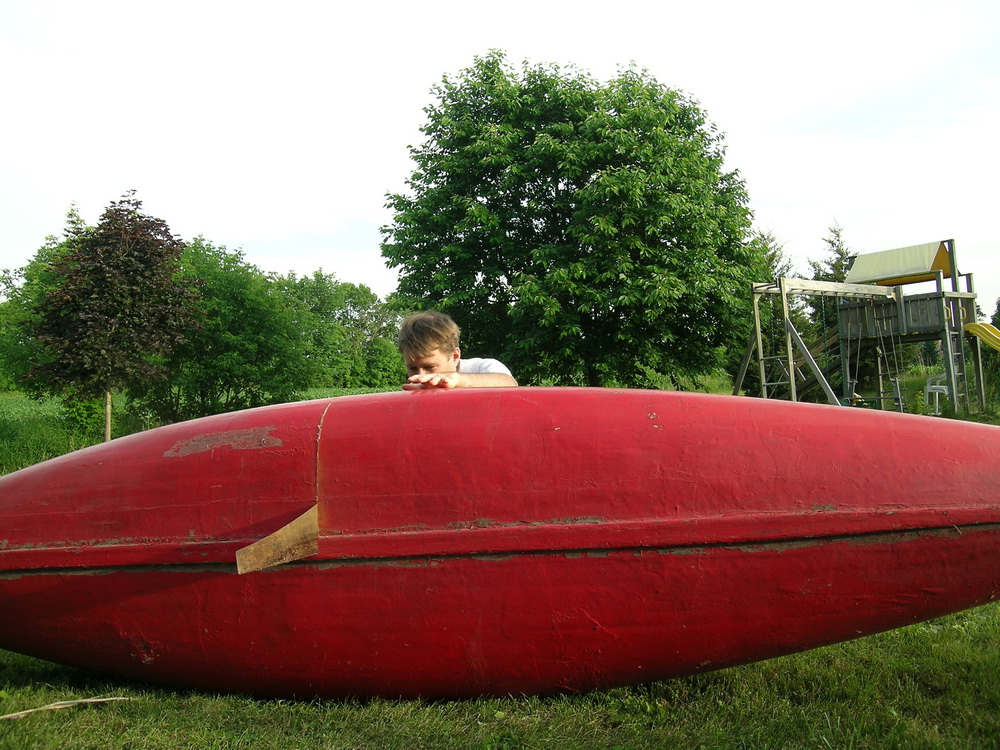
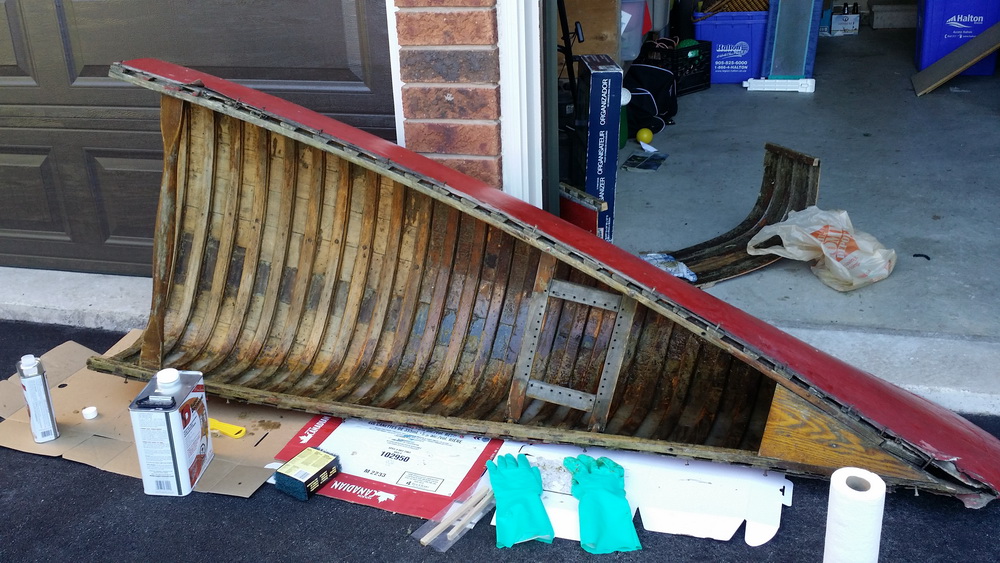
So I cut it into two pieces, about 60:40 so it would be easier to move :
This was possibly the longest spanning project procrastination I had. Case in point, in this photo I have lots of hair and that kid is now in University:
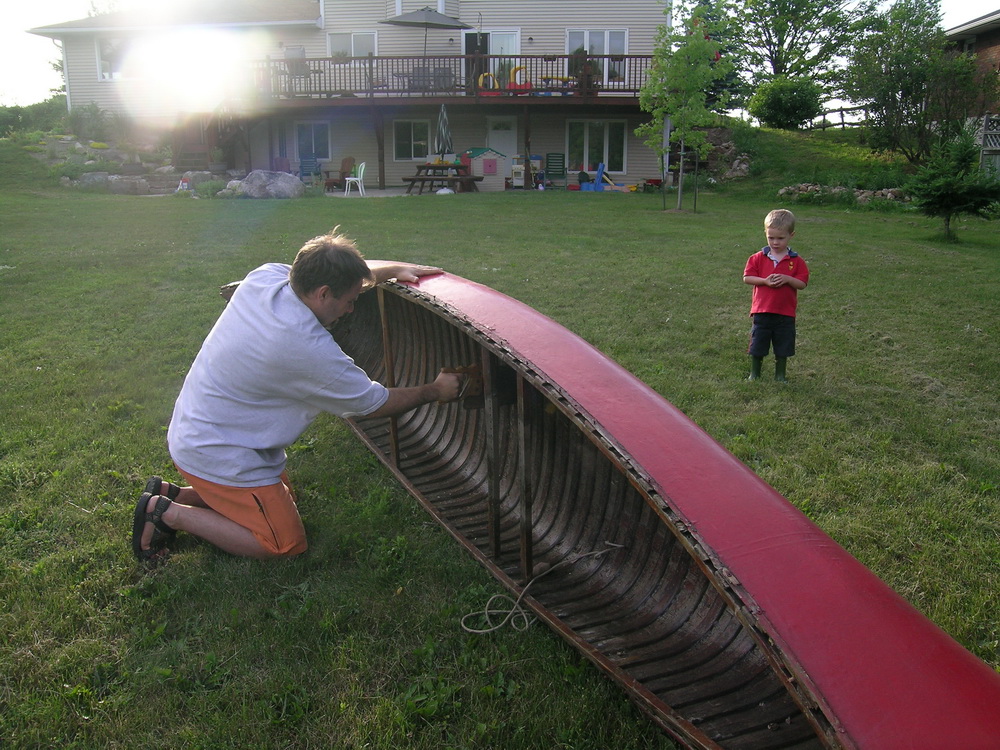
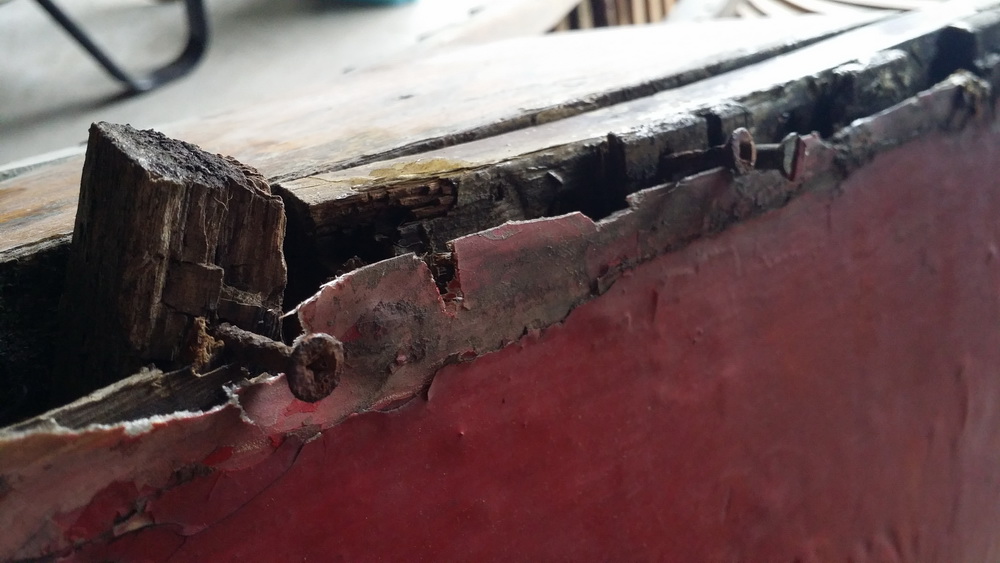
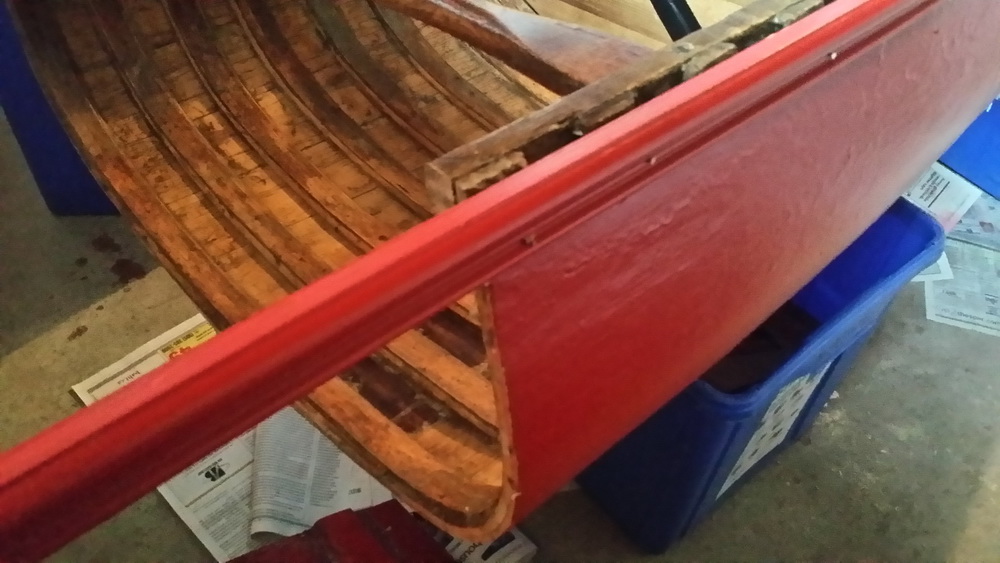
As you can see, it was quite rough around the edges but I used parts from both ends to build “one good half”. The gunnys are a write-off:
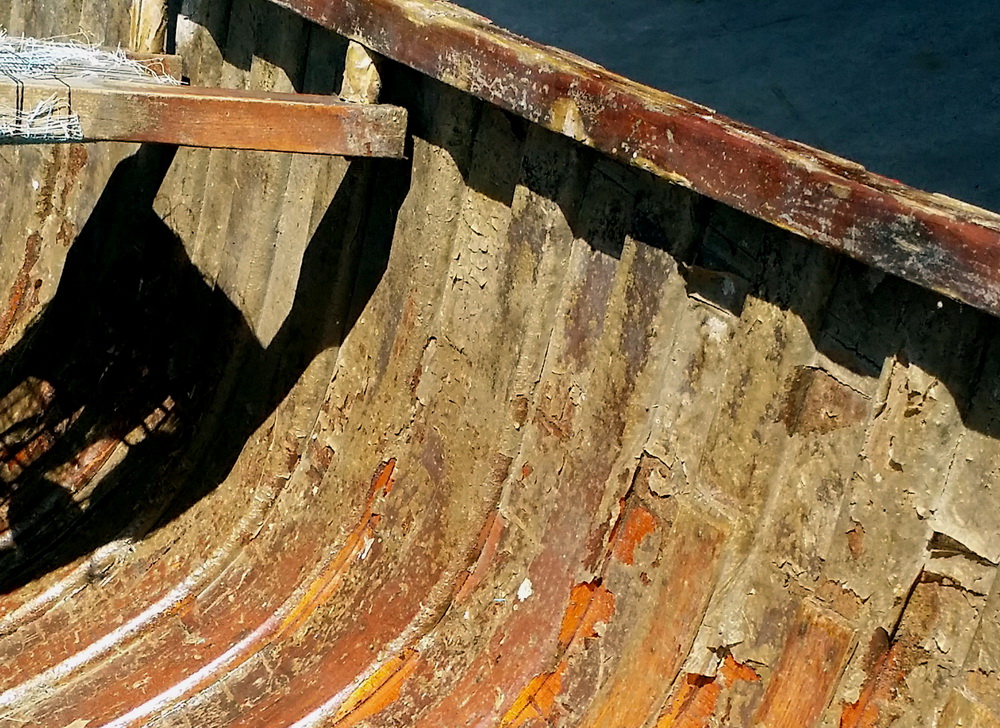
And the years have not been kind to the many coats of shellac that was on the inside. That will all have to come off:
So finally in 2014 – almost another 10 years later – with the canoe sections strangely at the side of our house in cramped suburbia, I promised my wife I would actually buckle down and make the canoe shelf for her. No real idea how I was going to go about it – just one step at a time.
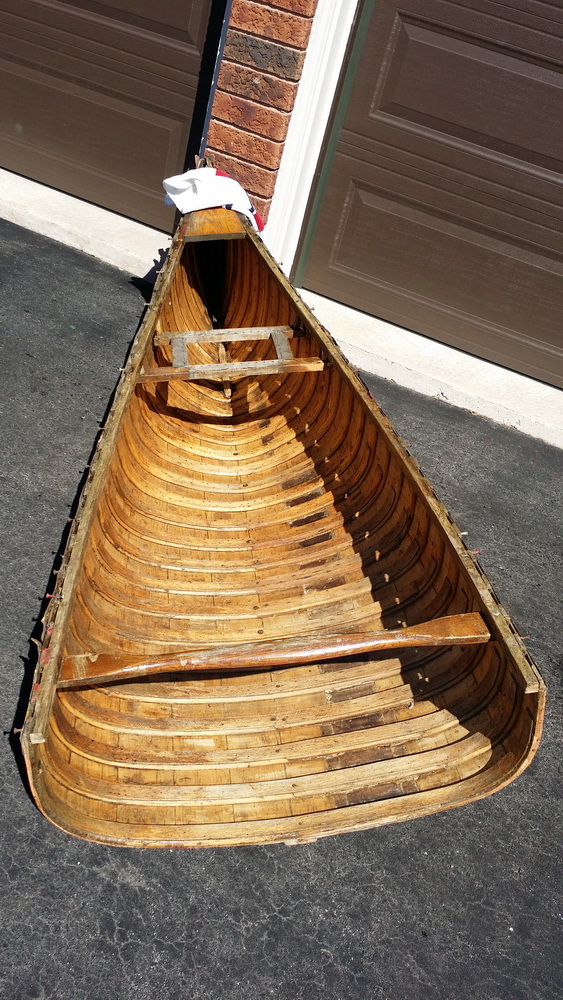
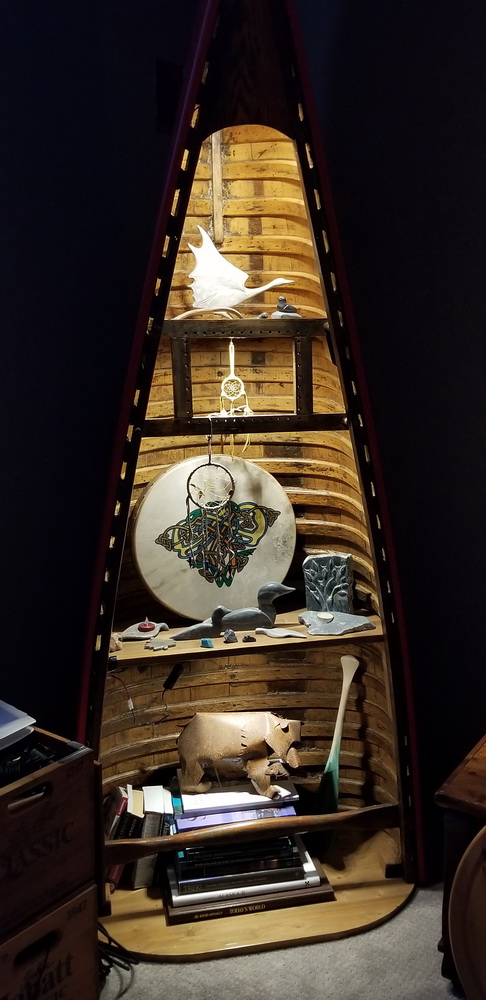
I left the stern seat in because I thought it might make a good built-in picture frame:
And the chemical warfare began. This stuff was nasty!
Lots of scrubbing and slowly the wood begins to emerge:
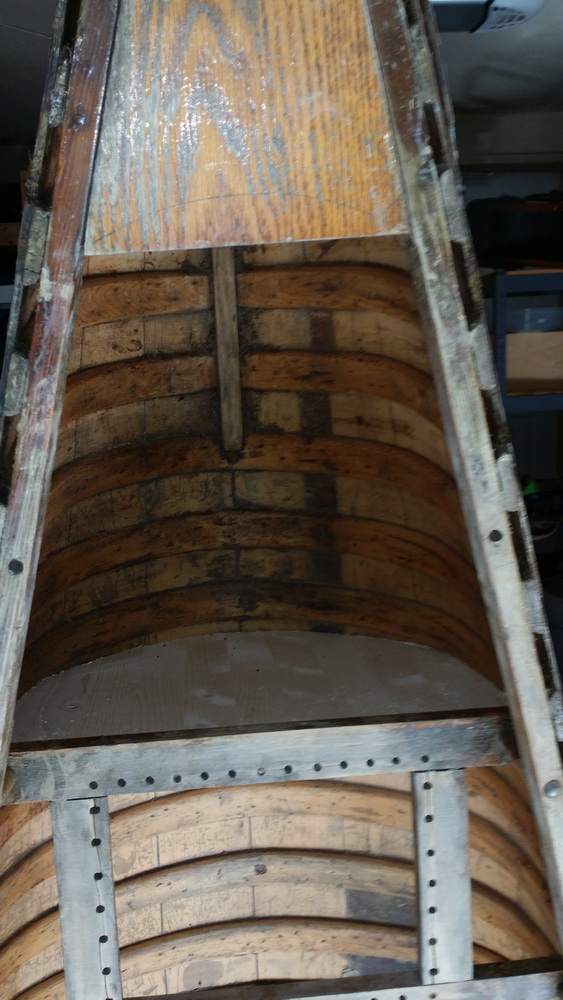
Wow – what a difference! The insides look great:
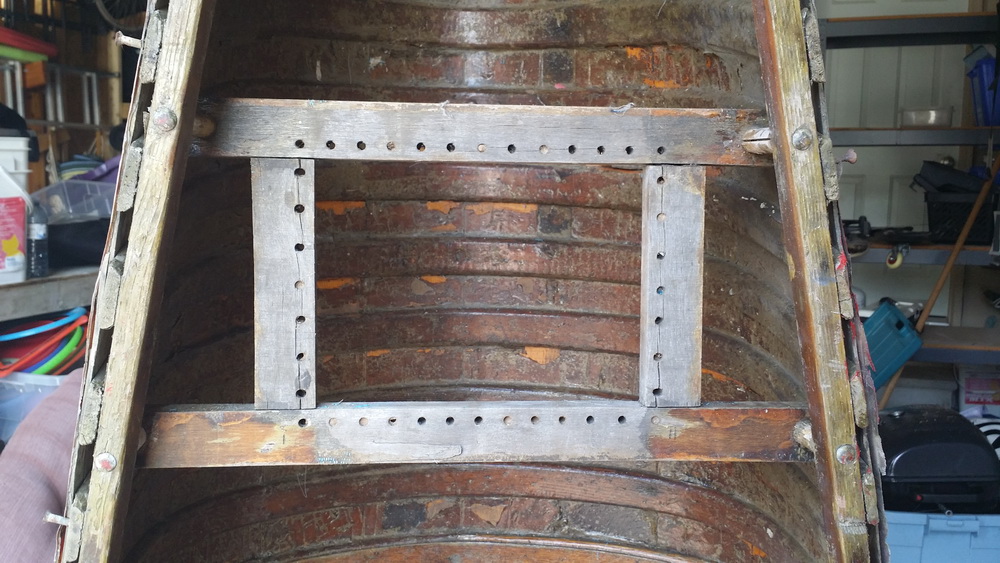
Now to work on the gunnys. I ended up filling a small box of rusted screws and rotted wood:
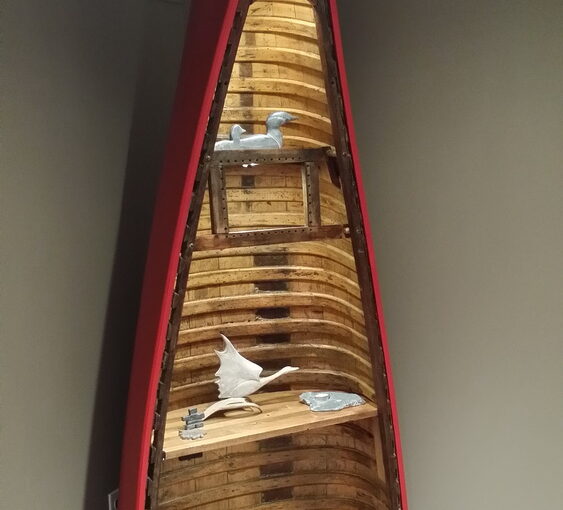
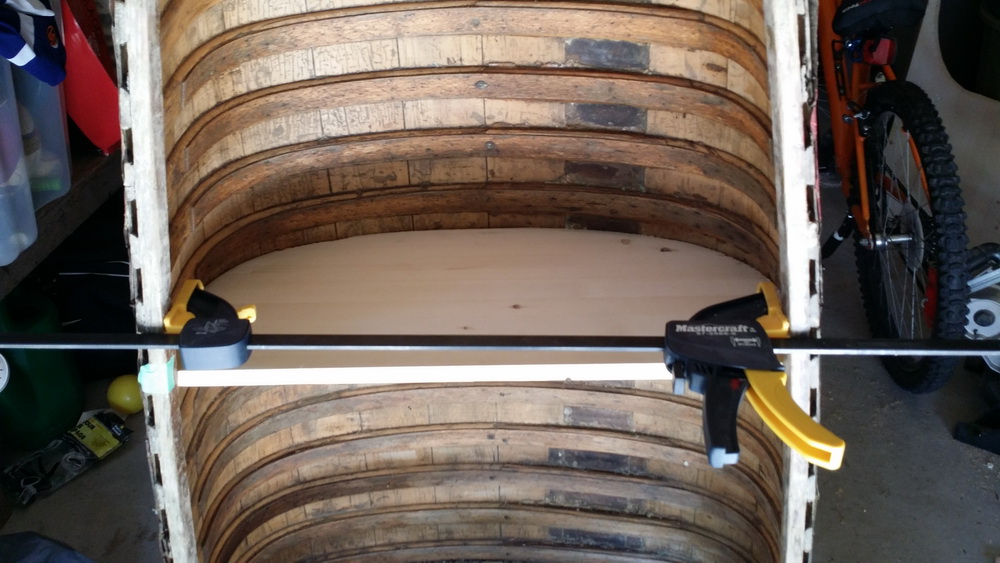
Now that it is reasonably safe to work without fear of getting stabbed, I cut some wood for the shelves. This one fits so perfectly between the ribs I won’t need anything to secure it. (I used the clamp to force the canoe wider to get the shelf in):
and a little upper shelf:
Some body restoration:
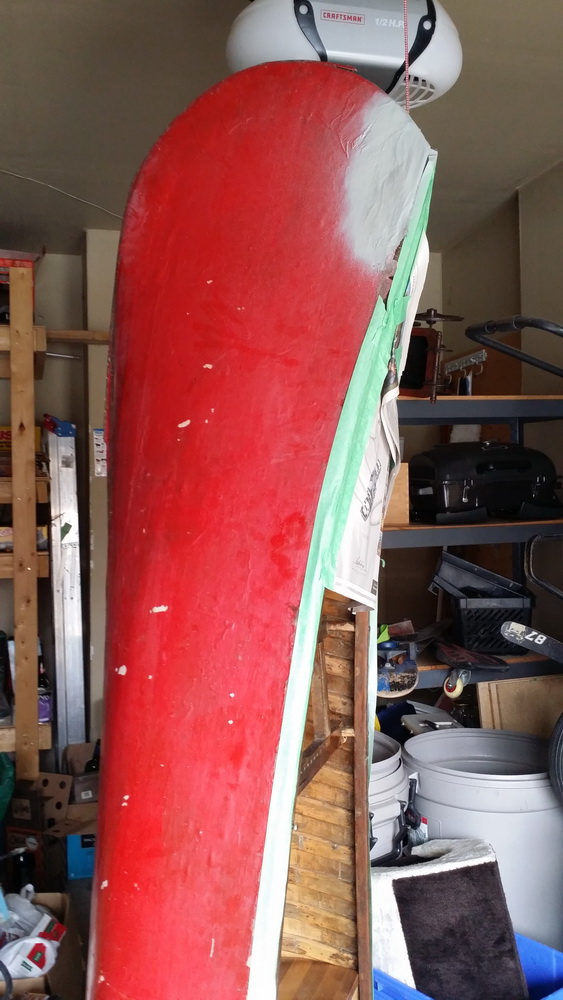
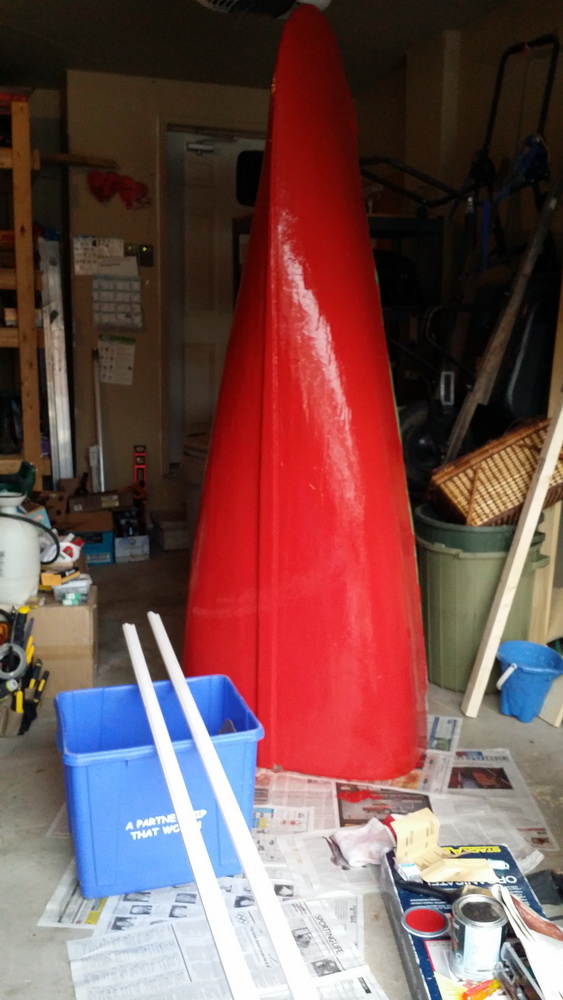
and a fresh coat of paint for the body:
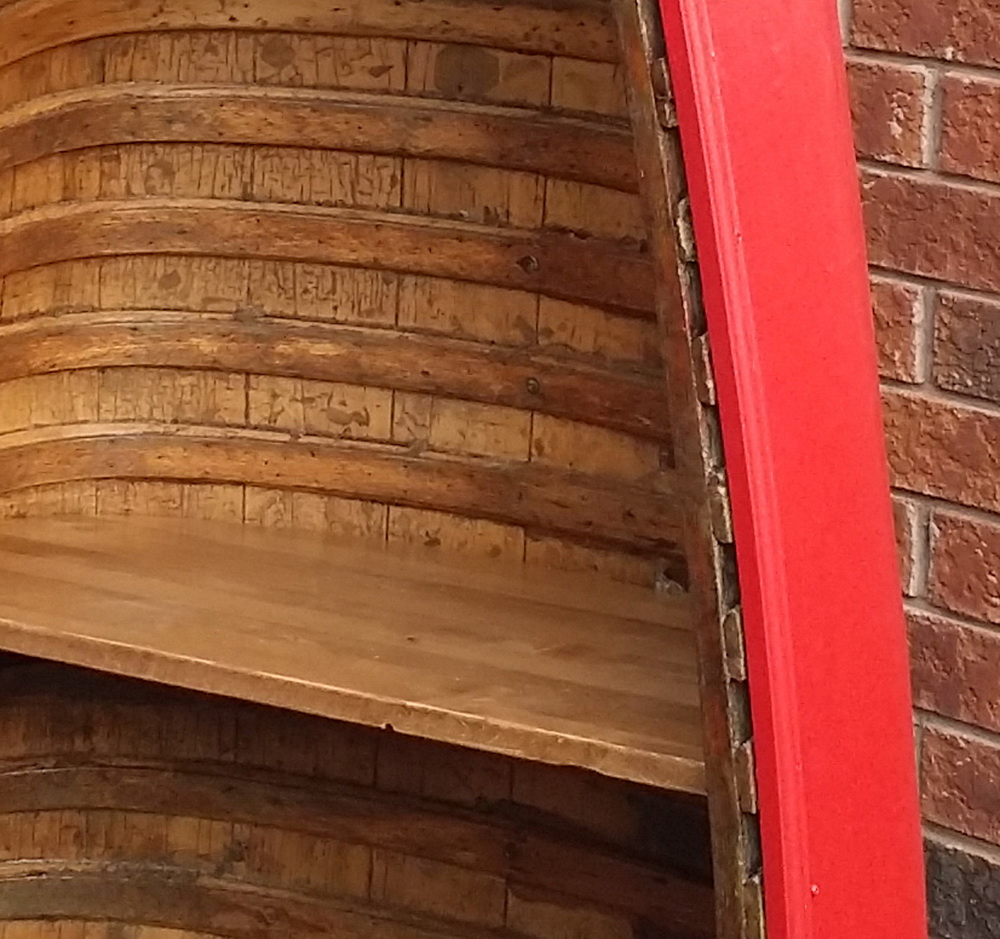
by this time I had found some trim that I could use to replace the gunwales:
the top part was a little tricky:
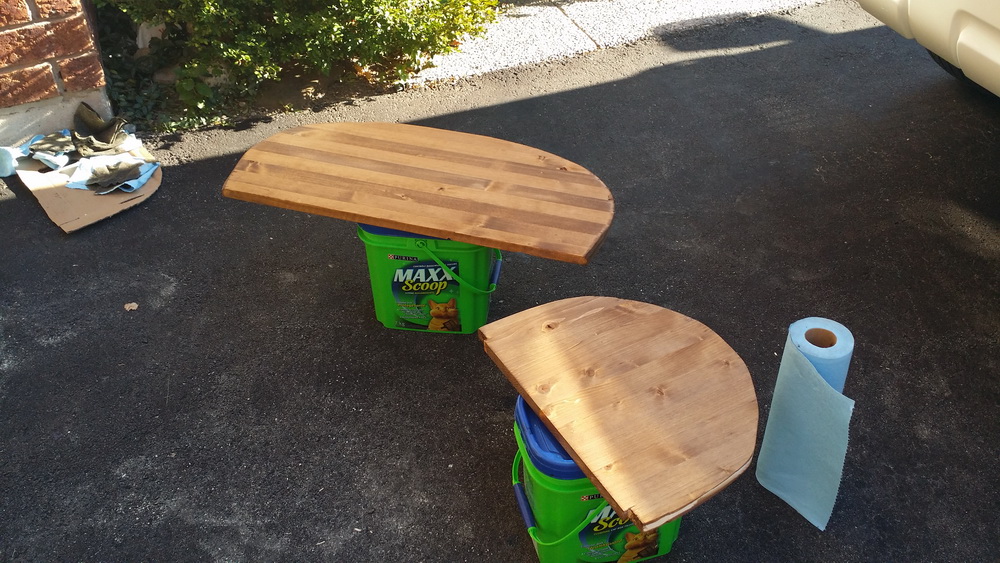
staining the shelves:
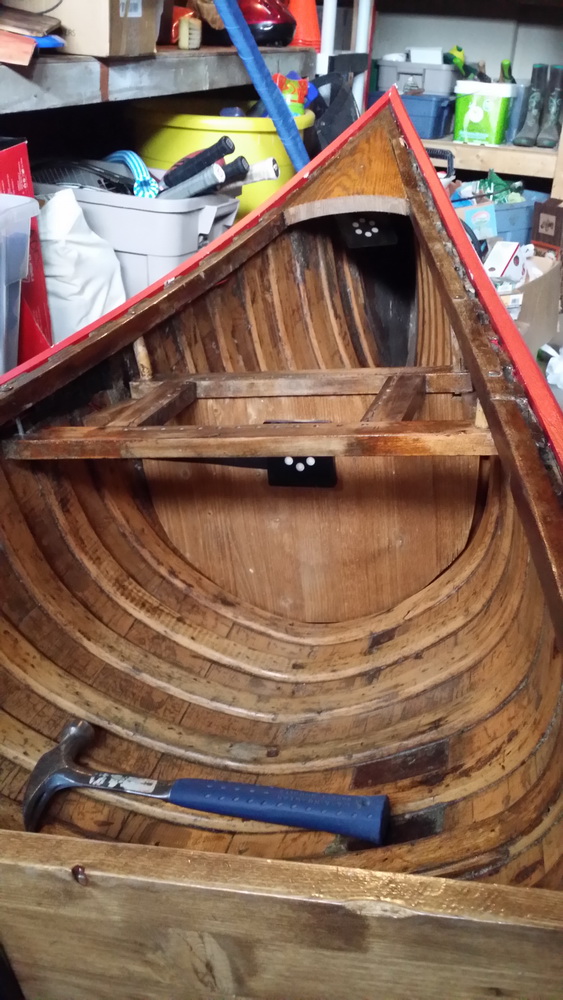
.. and putting them in for good. Looks awesome !
Now to wire it up and add some LED lights:
And somehow we got it down the stairs into the basement. Really happy with it:
Eventually I decided not to go with the photo in the seat frame because the back lighting would end up making it just a black shadow.
Once I started working on it, it only took a month or so (interspersed with life etc). Glad we lugged it around for a couple of decades ! LOL
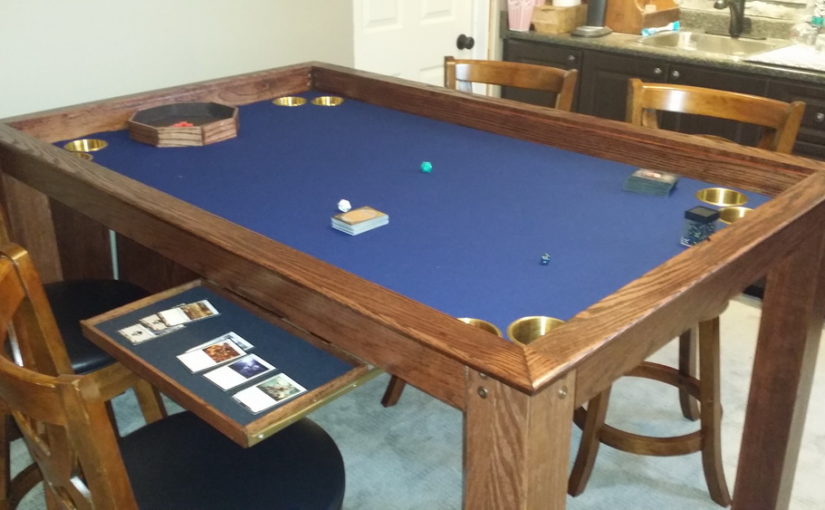
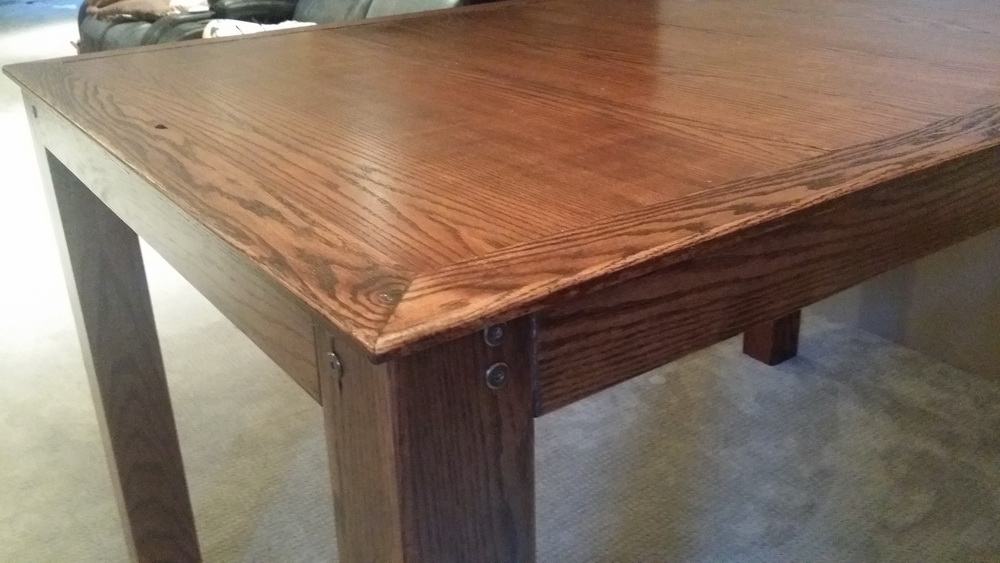
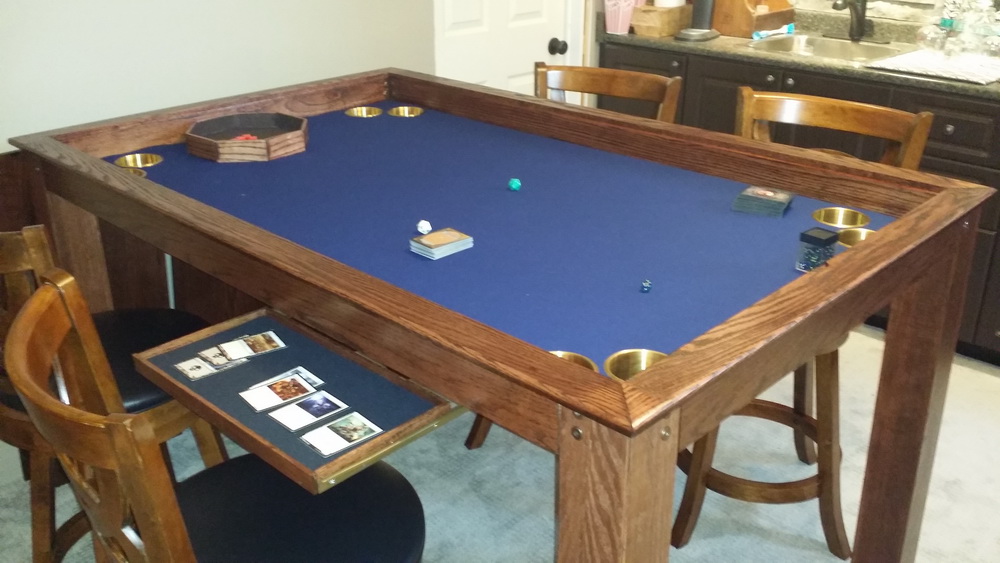
We like playing board games as a family, and when we finished the basement we had an area for playing games (and I couldn’t afford to put in the bar 🙂 ). We used a simple IKEA table for a while but it was small, and dice bounced off the table, and every other excuse I could think of in my head after seeing these gorgeous gaming tables on line. These things were amazing, and cost an amazing US$3,000 and up. Uh… no. For that price, I can make one of those ! (I think. I mean, I haven’t really made furniture before …)
Key features I want:
soft playmat – to make it easier to pick up cards, quieter while rolling dice
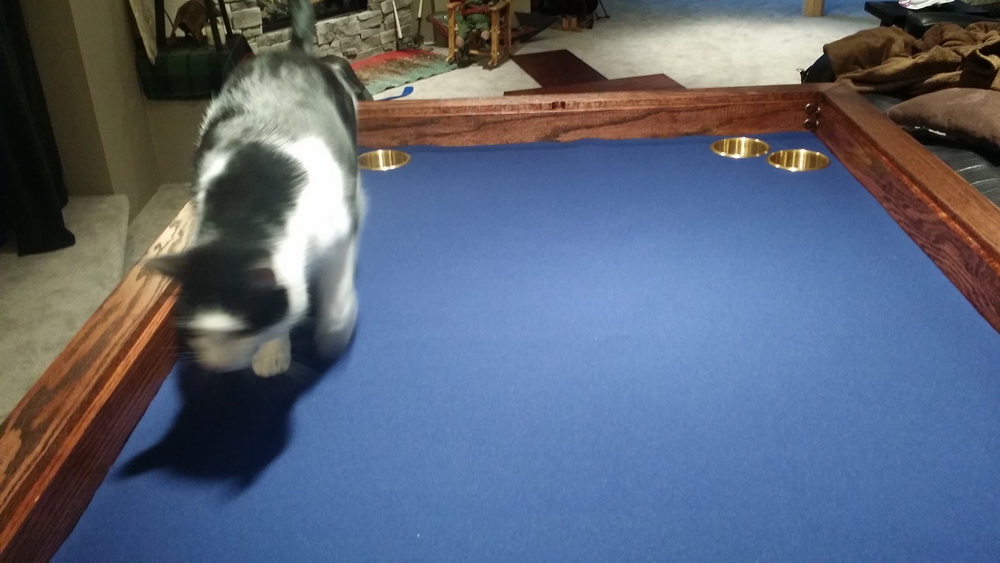
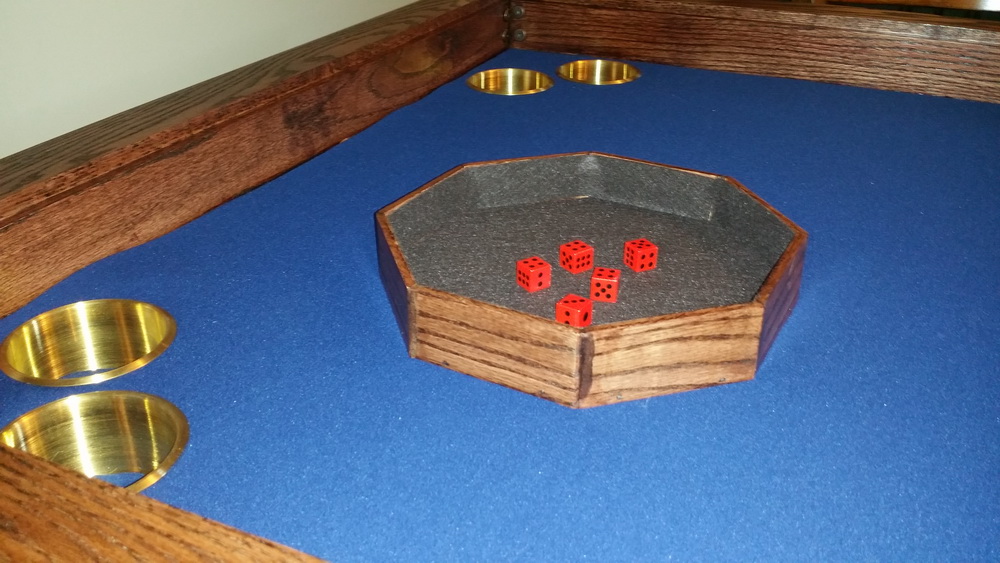
recessed game play area – so you can cover up a game-in-progress and come back another day and not find a cat sprawled all over your game board. Also keeps dice and rolly-bits from escaping.
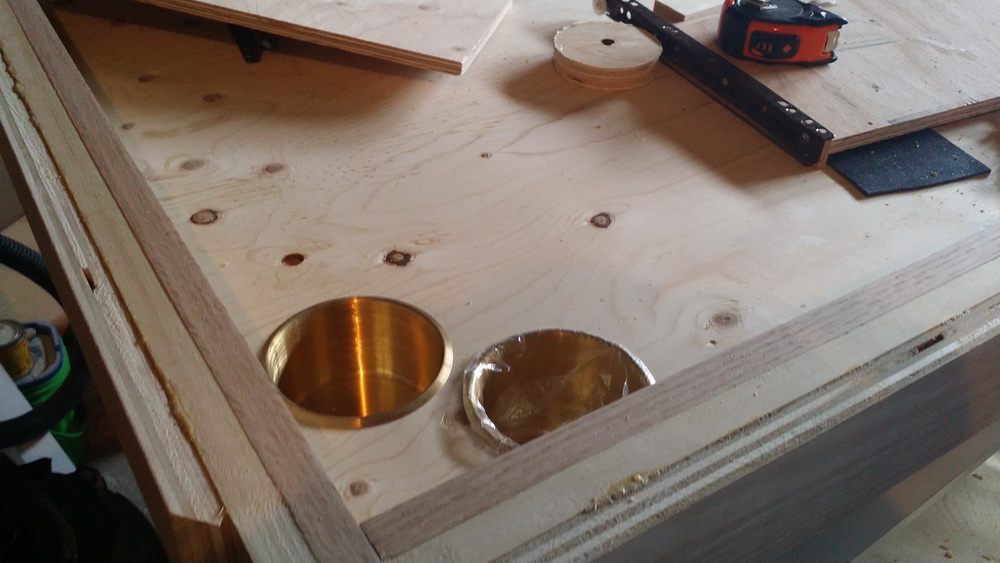
drink holders. ’nuff said about that.
big enough to hold the common entry-level games we were playing at the time (like Catan)
sliding drawers for players to hold their secret cards/components.
There were other cool ideas that I liked (LED lights, charging ports, flip compartments etc) but I was already thinking I was biting off more than I could chew.
Design
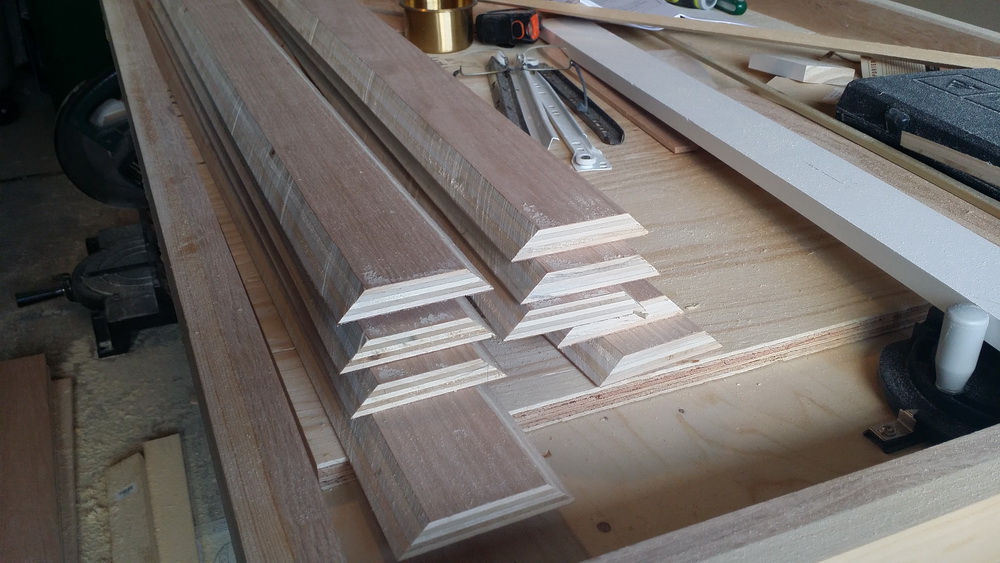
I built some rough mock ups of the table to try out ideas. A key design consideration was using standard width boards so I didn’t have to rip long pieces of lumber.
I liked this table top style because there are fewer seams for liquids to fall through if someone spills a drink when the table is closed. However the depth of the gaming cavity was too shallow (tall game pieces on boards wouldn’t fit)This one had a much better cavity depth, but a full covering table top would make it overall too tall, so I tried it with the table top as an insert. Another bonus of this design is that I will need less Red Oak (what i am using for outside layers) and probably don’t have to sand and finish as much. The edge is also wider so there is more to lean your elbows on.
Let’s get building …
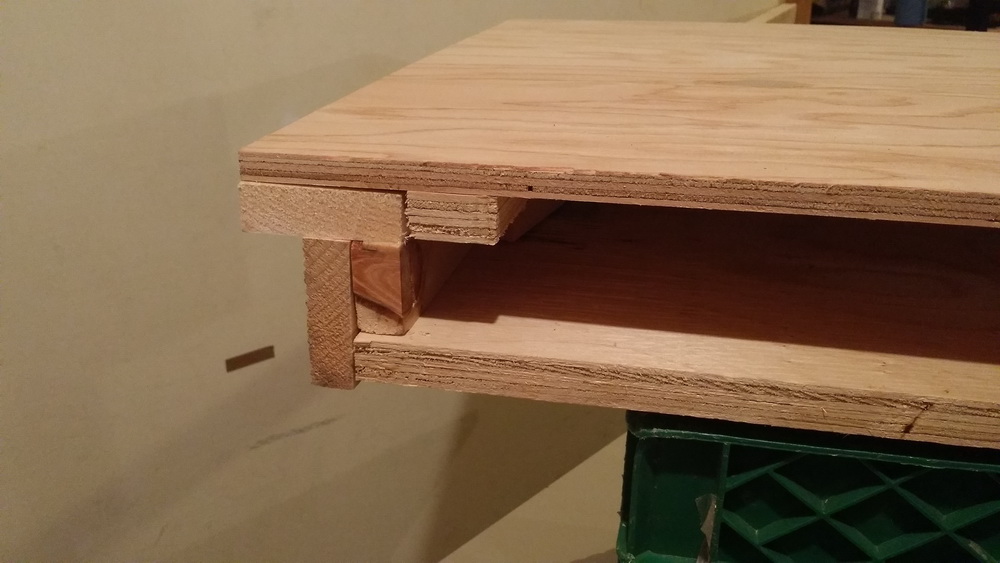
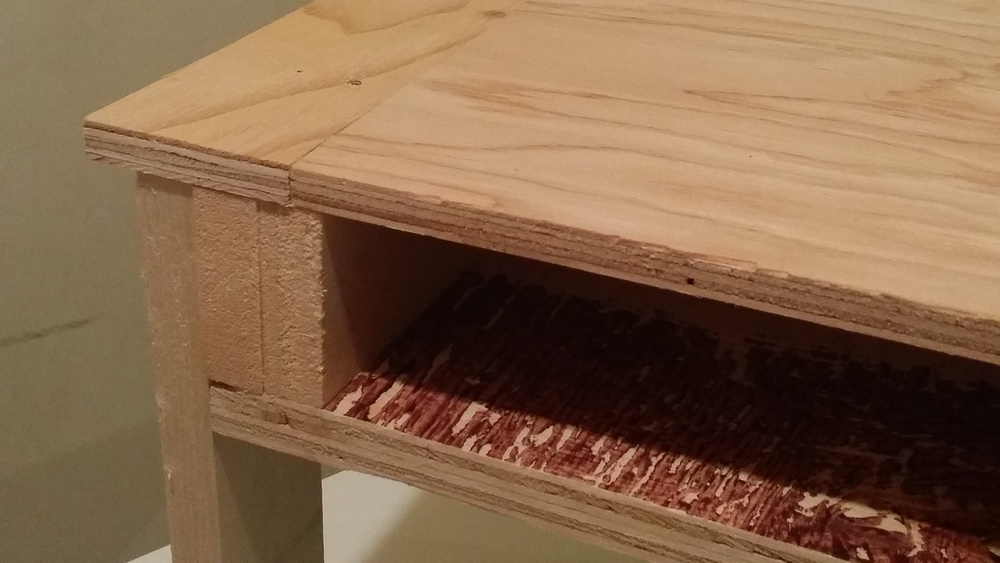
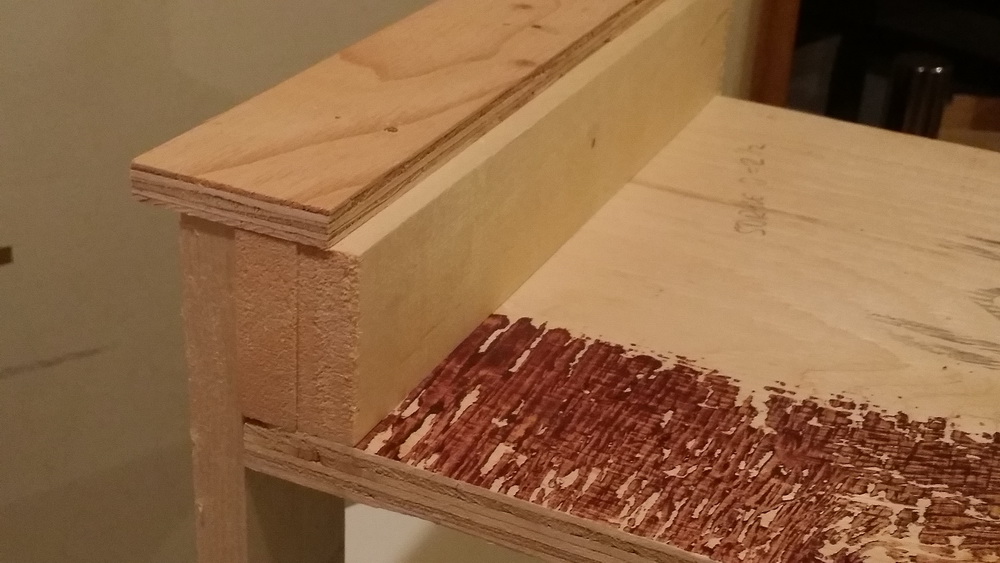
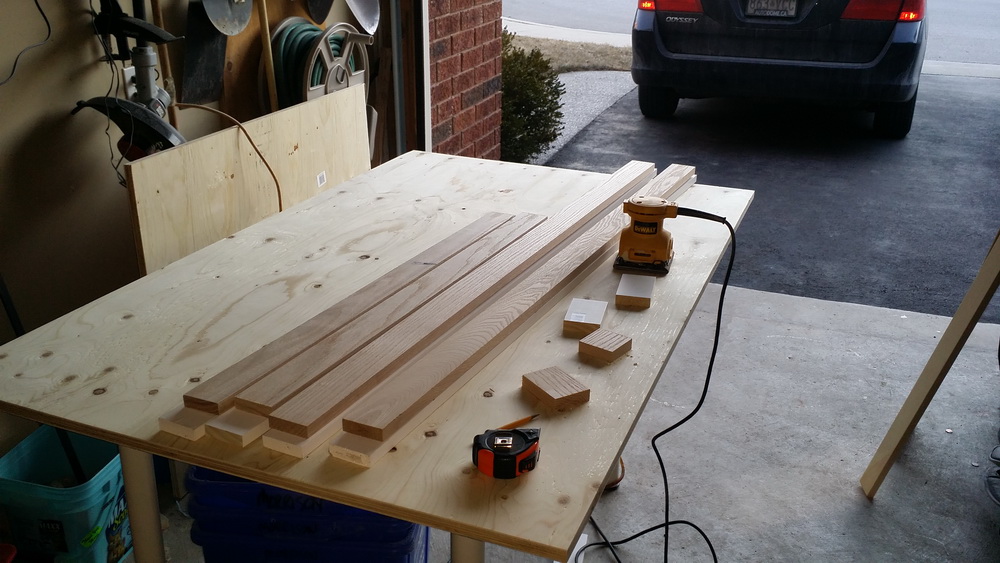
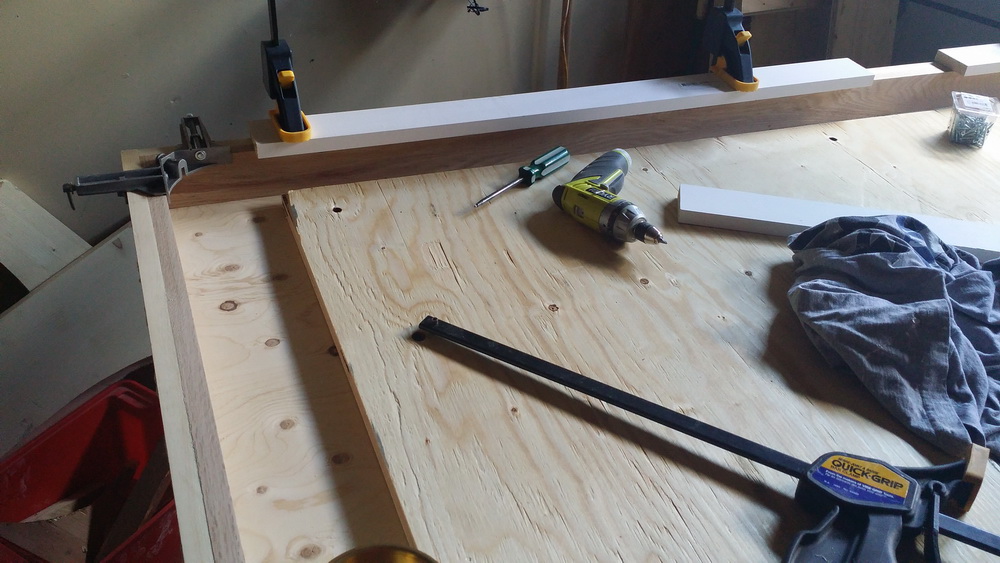
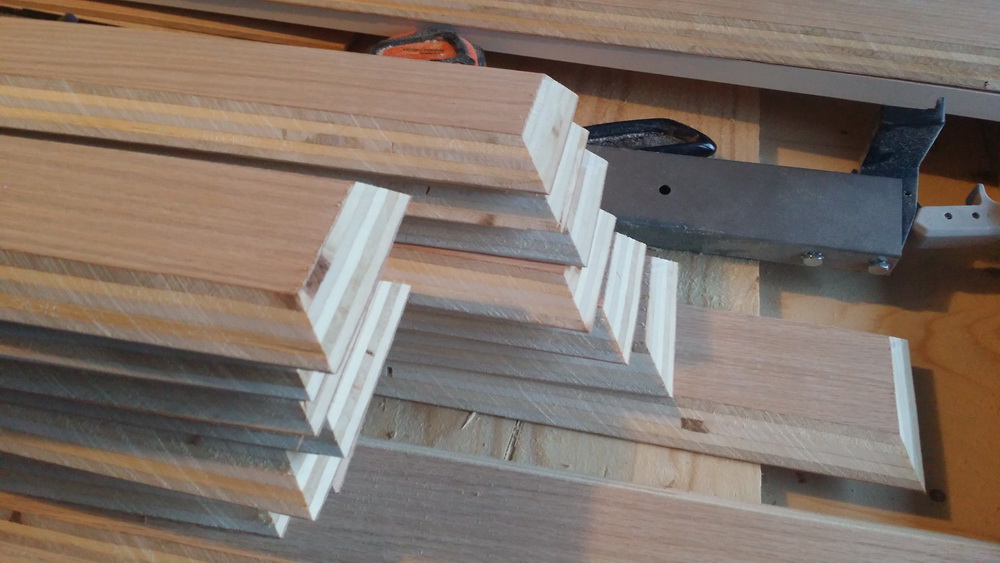
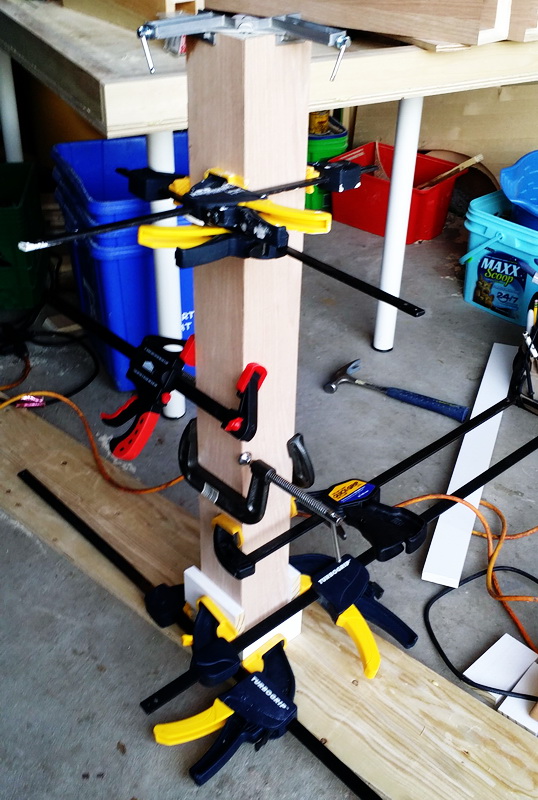
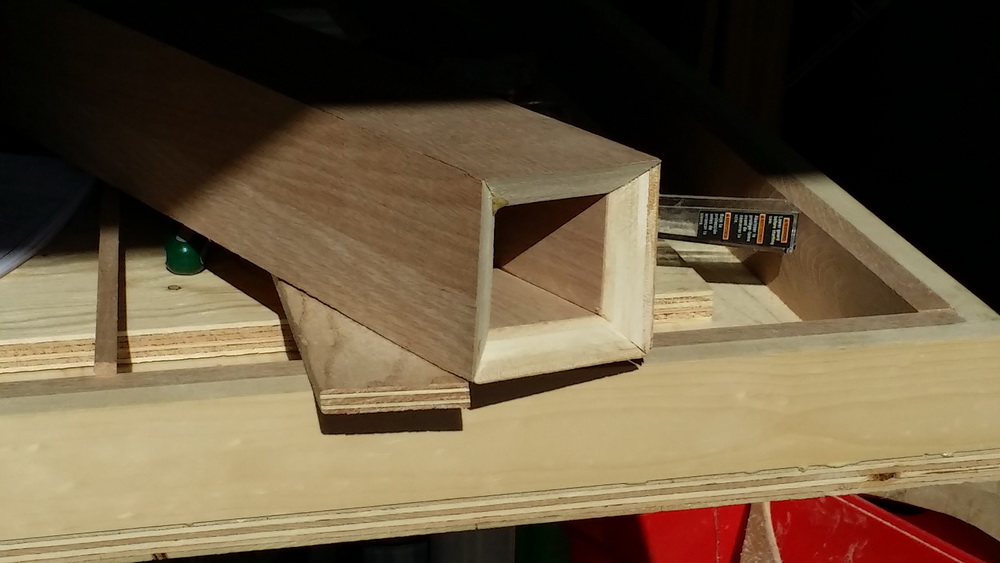
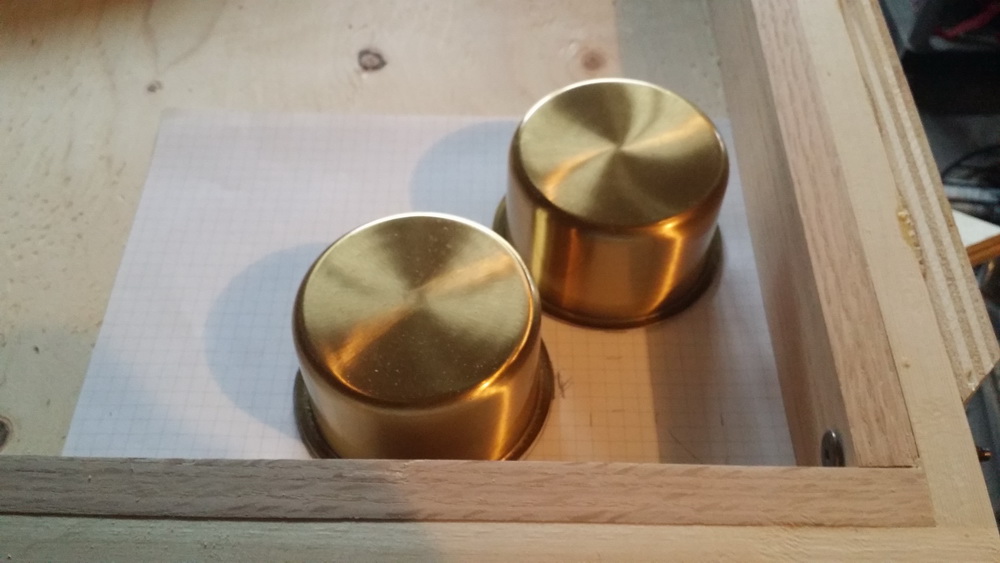
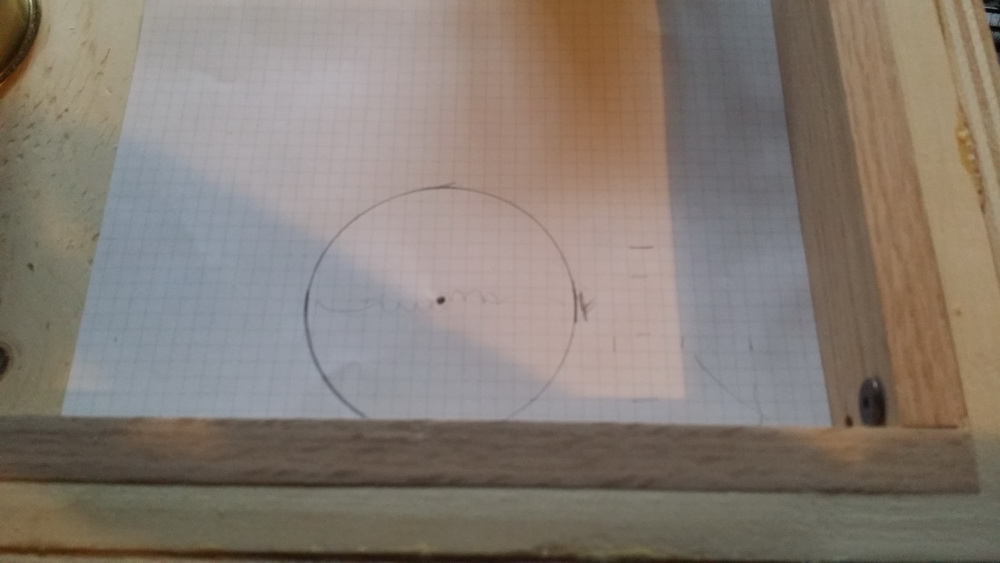
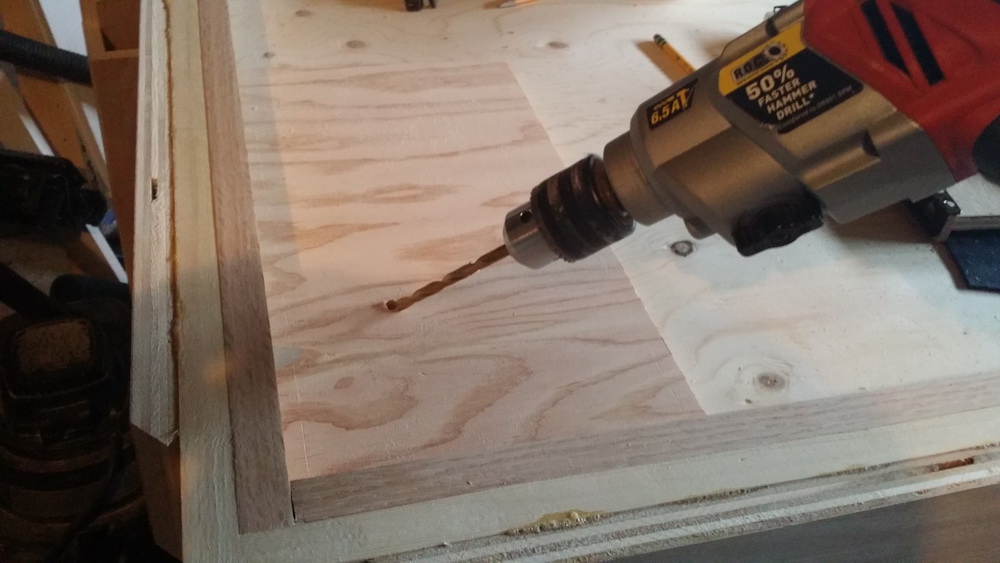
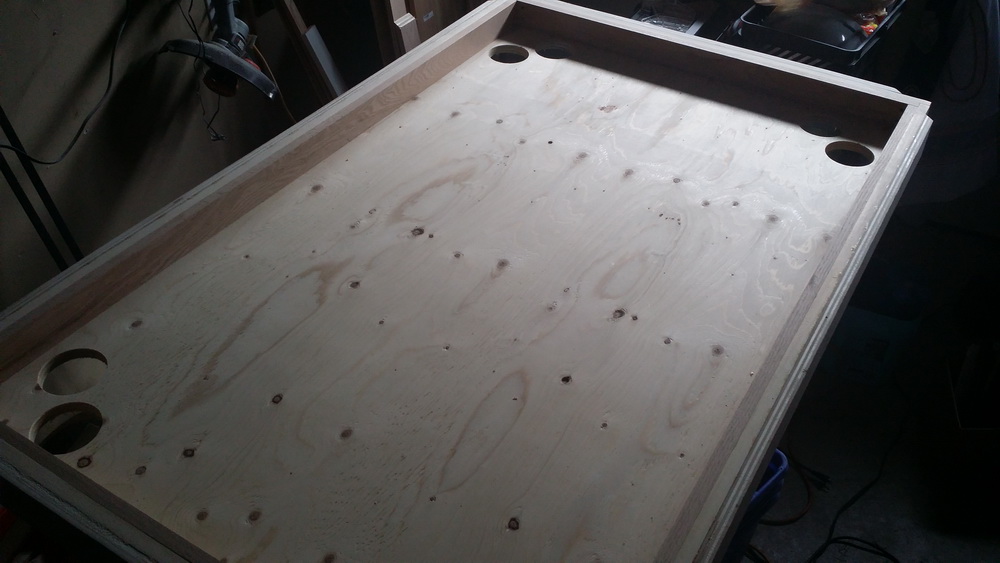
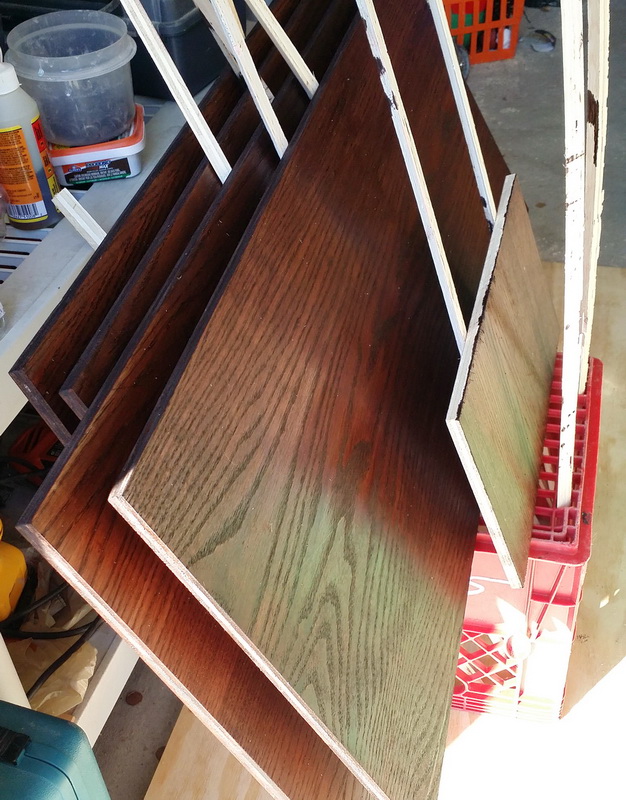
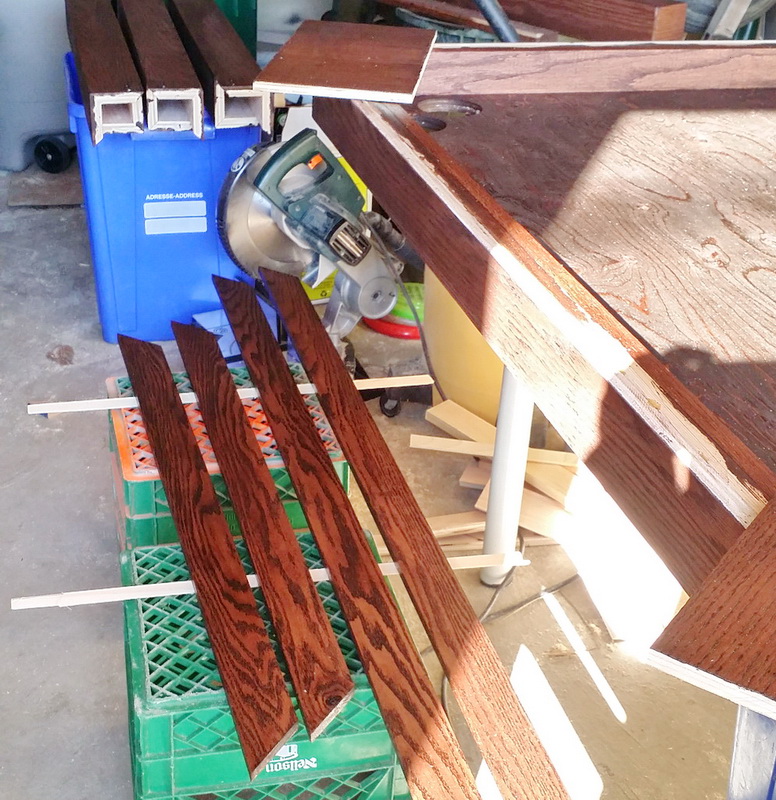
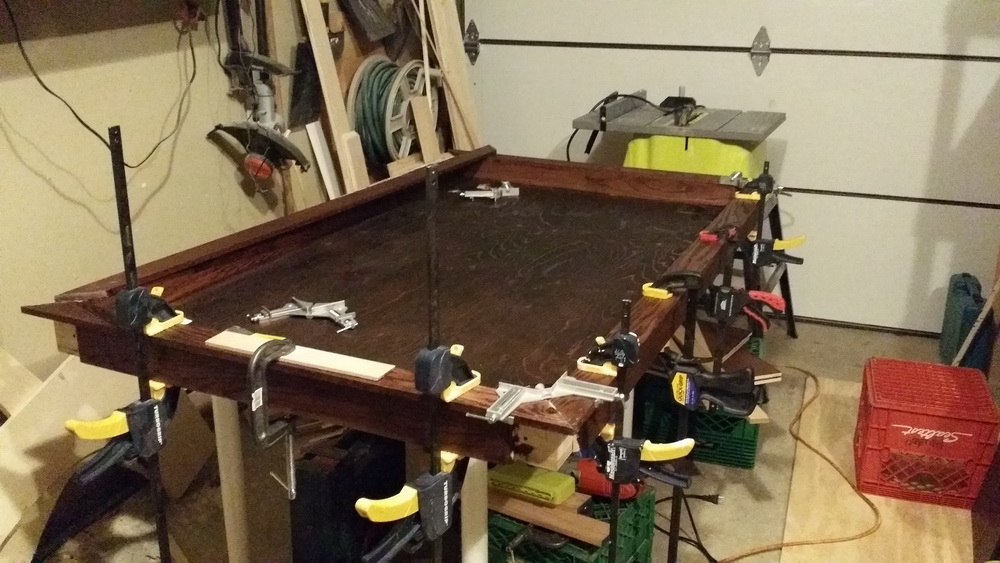
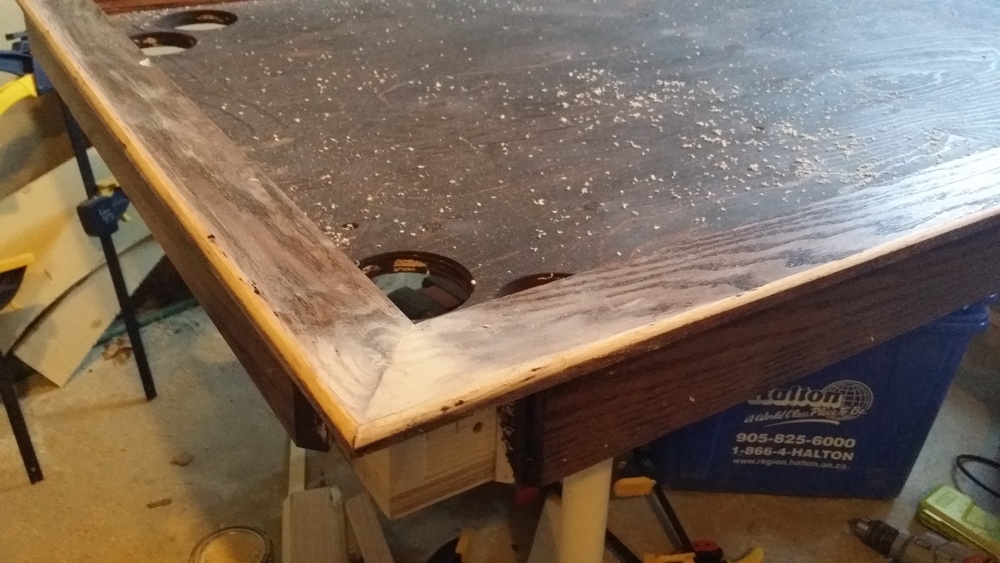
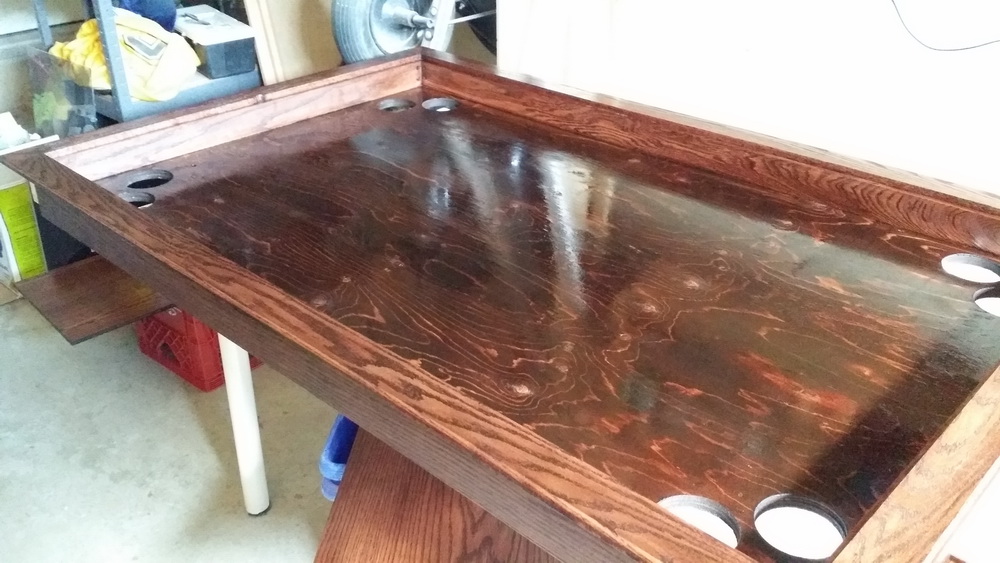
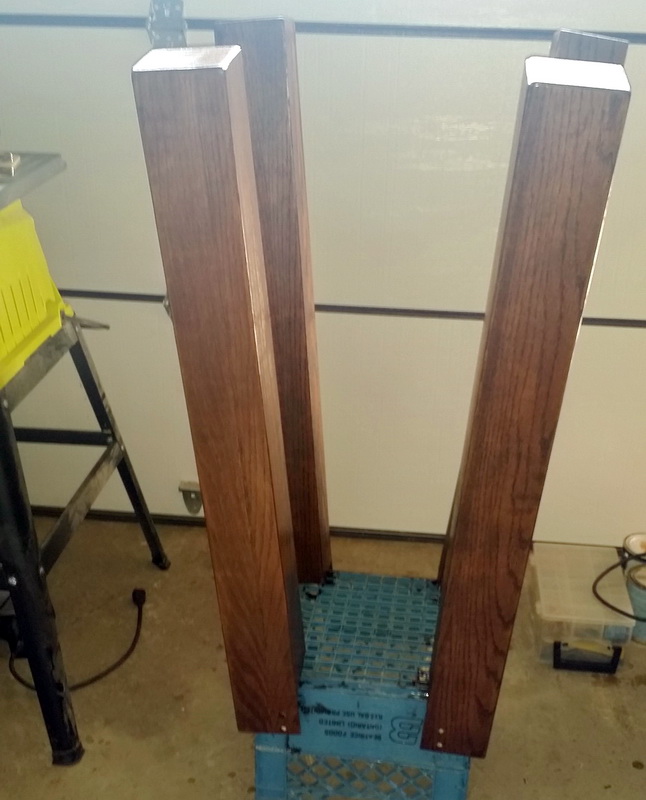
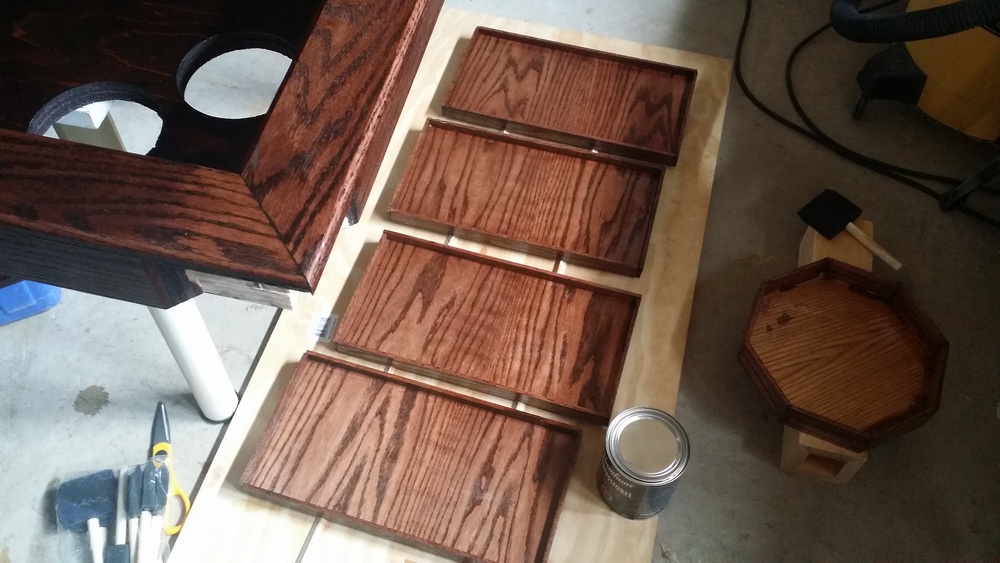
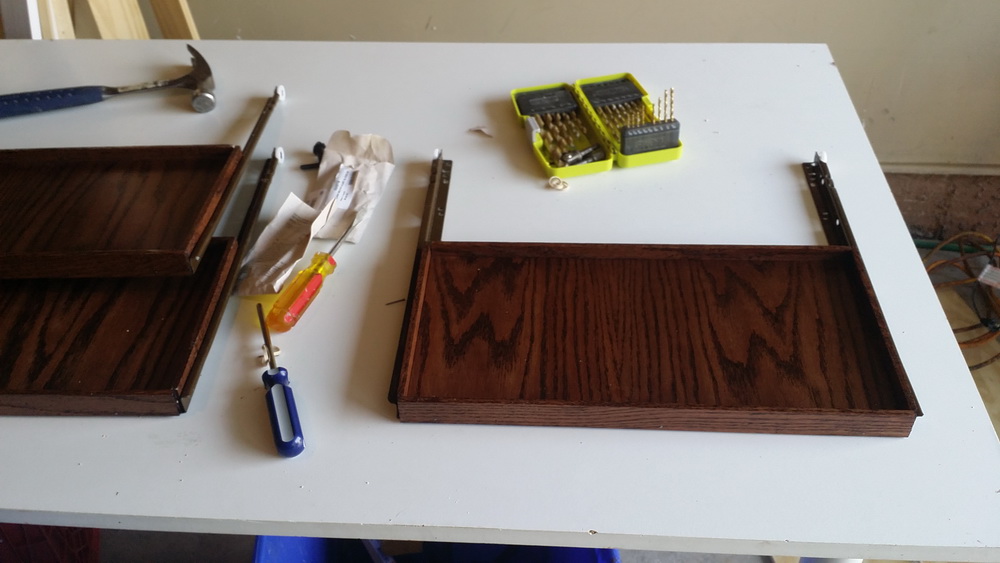
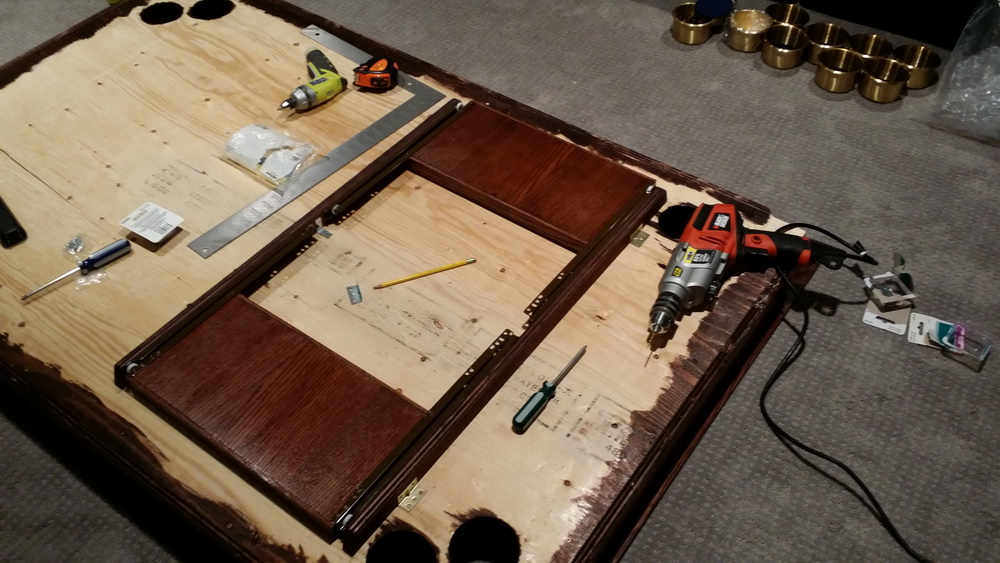
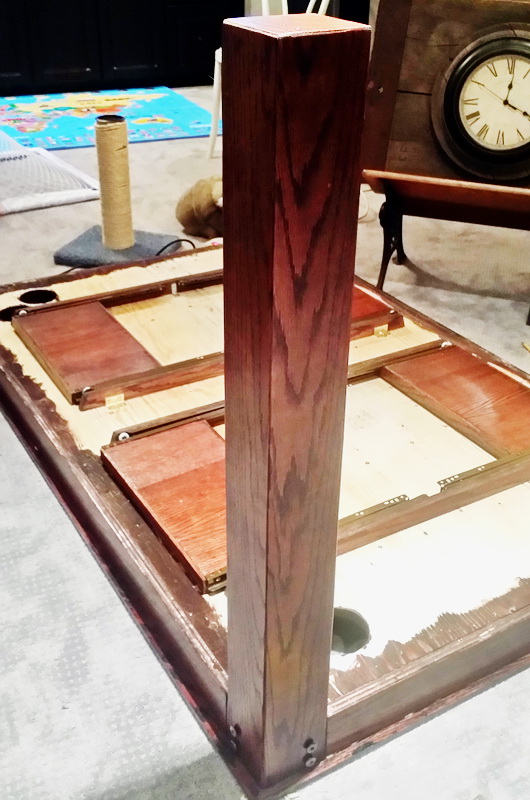
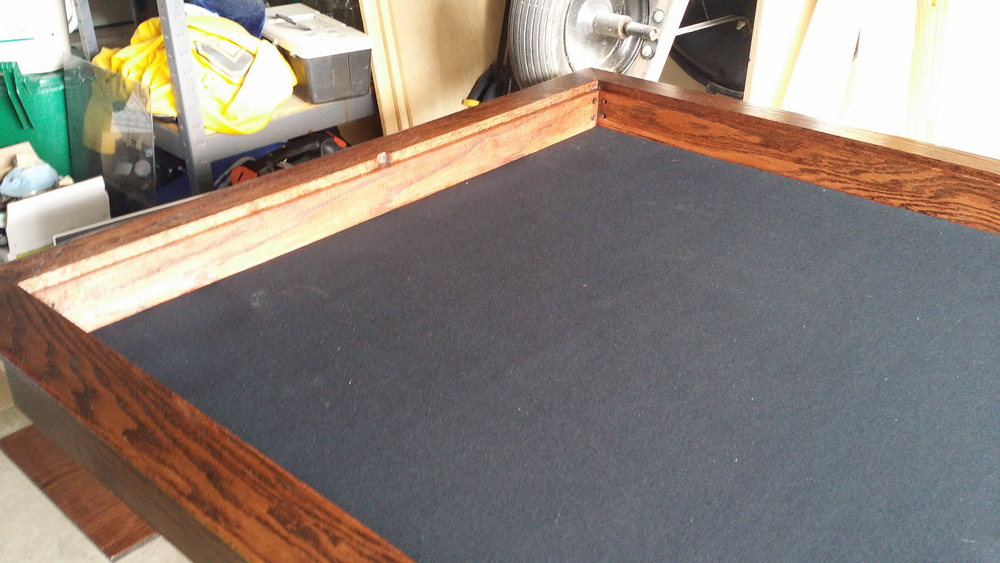
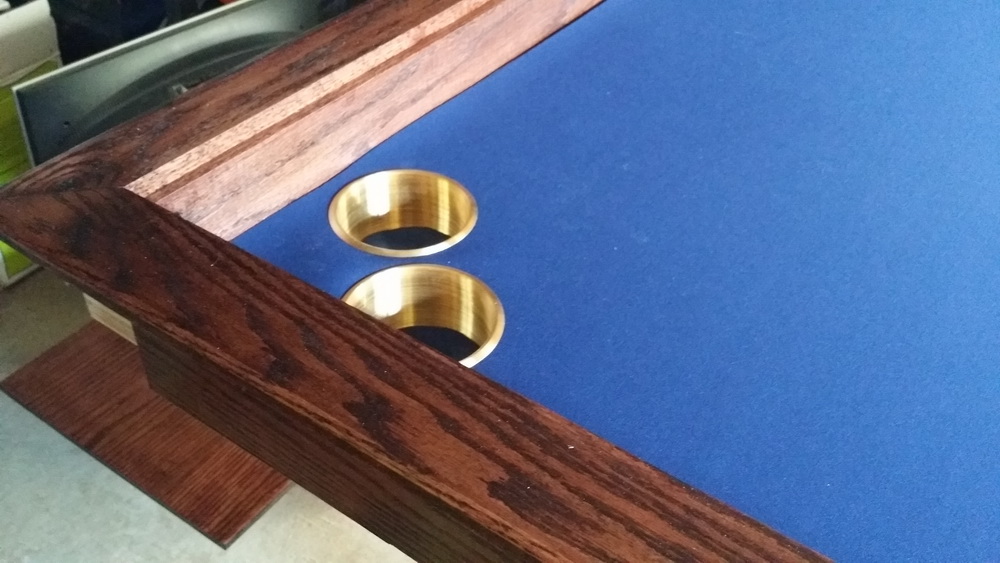
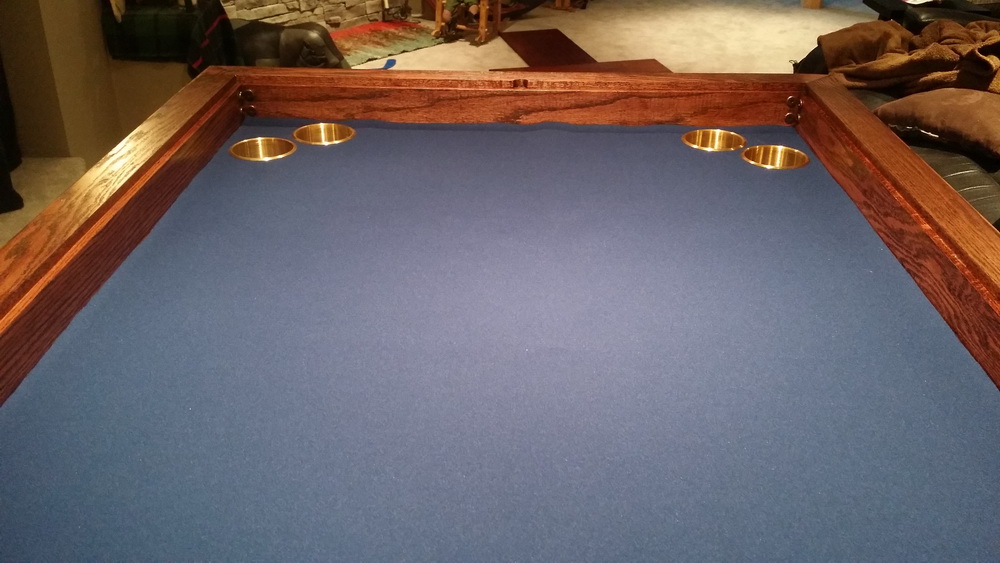
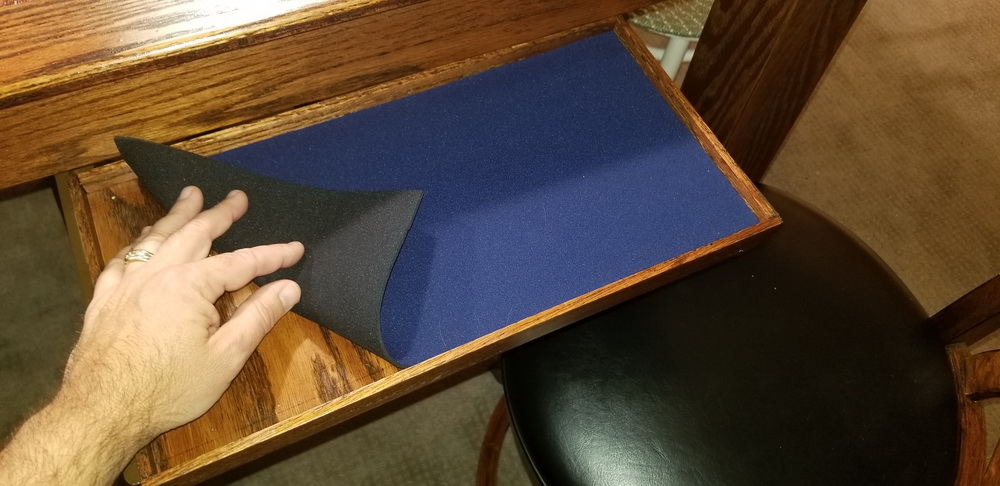
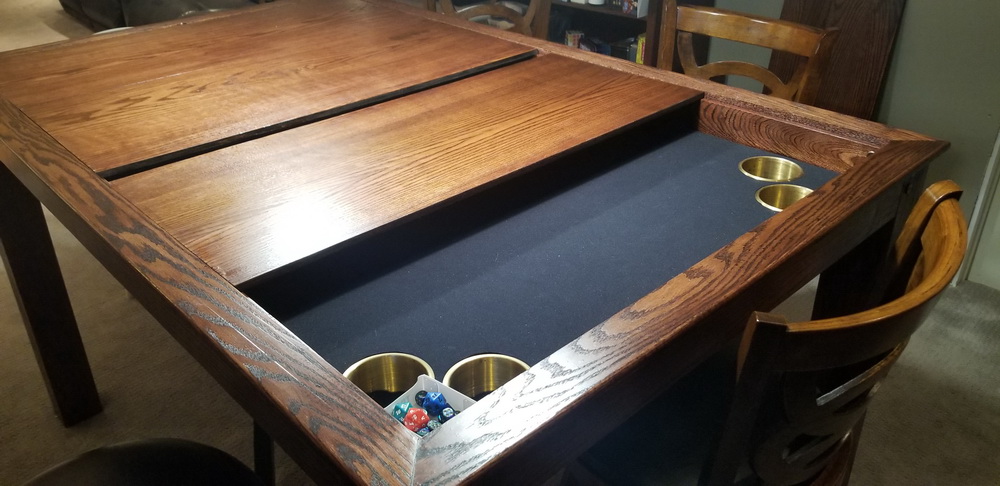
Ok – design settled. Great that i can buy the boards and they are already the correct width – just have to cut and sand them to the correct lengths. Nice strong plywood for the base.Gluing and clamping the table edges/walls along with the inner oak finishSaw something online about making the box-legs (without spending a fortune for solid oak). Four of these will form one leg. I was really worried about doing these angle rips because they have to be pretty symmetrical. (I think i only ruined 2 boards working on this)I also had to angle-rip the bottom ends so I can put a cap on it but still retain the illusion of it being solid.Just about every clamp I own gluing four of the angle-rip boards to make a leg. looks pretty good, and looked better after sanding the edges (hides the gaps). This is the bottom where I will put a square cap.To make sure that all holes are exactly the same on each leg (so I can put them on any corner) I made a drill-guide out of scrap wood.All legs assembled and attached to the table ! Note that the edges of the table each need a strip of red oak. Andrea has a test sliding drawer that will hide underneath.Gluing the oak trim on the sides (between the legs). Coming together !Got an 8 pack of these lovely little cup holders on amazon. I plan on putting 2 in each corner. I know serious gamers would be horrified that I am recessing them on the actual playing area, but this will be more convenient and I think there is less chance of knocking things over it they are actually in your field of vision (as opposed to being on the outside edge).Outlining one cup holder. I then flip the paper (around the table corner) and that makes both holes symmetrical about the corner…… and then doing the same thing with a scrap board to set the pilot hole. Drill, flip, drill.Looking good !With all the cup holder holes drilled, the table is mostly done. Time to stain (eech)Staining the table top panels and various bits for the drawers.Staining the edge trim and the main table.Clamping the trim on the table.Dang-it … something didn’t work out right and there is major lip on one of the corners. Sand sand sand.All stained and varnished. The pine of the plywood base is a bit dark / busy, but that is okay because it will be covered for the most part.Staining and finishing the legs. Another creative piece-holder made from four pieces of rebar stuck in a milk-crate Staining the drawers as well. on the right is the spare-parts project: a matching dice tray.Since I want the drawers to extend past the table (but don’t want to make mega huge drawers) I put on long sliders…I can fit two sliding drawers opposite each other, so four on the entire table. I could not figure out a way to get drawers for players on the table ends without having them hang too low where you would bang your knees.Assembling all the parts in the basement. Exciting !Table all assembled with the solid boards in place.Laying the neoprene mat in the playing cavity. Need to cut holes for the cup holders !One of the boys suggests putting the cut out holes of the neoprene in the bottom of the cup holders. Awesome idea. Looks great with the blue side of the neoprene.Rare shot of table surface with no cat fur……. Well that lasted 30 seconds.Woo hoo ! Secret drawers work great. Table looks awesome!Just like the main table, the drawers have neoprene mats that are reversible. And just like the main table it holds cat fur just as well.Showing how the leaves go in place. There are four boards that nestle into place.And luckily I thought of putting in the finger-notch before I glued all the parts together. Makes it much easier to open.And the spare parts project – the matching dice tray !
If I was to do it again, I would:
use thicker boards for the table top leaves
add a “card holding rail” (aka thin slot) along the edge
USB power in the leg (I might still do that LOL)
maybe LED lights. I thought long and hard about this in the design phase, but I didn’t want them visible so that would mean lots of extra boards and loss of playing real-estate. Kinda kitchy too.
put table-top leaf holders under the table instead of the drawers. The drawers don’t really get used that much, so they weren’t really worth the effort. (might be because they are so well hidden)
Over the years the table has had a lot of good use, especially when the boys have friends over for games and MTG.
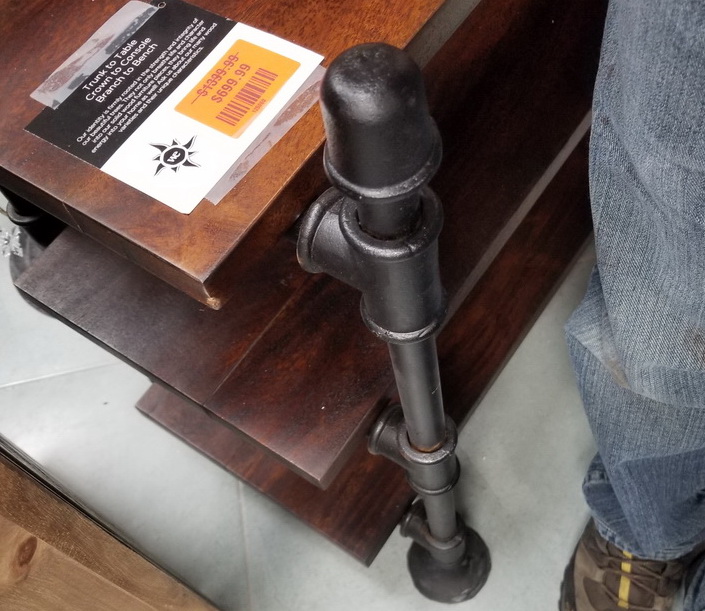
While wandering a furniture store for some end tables for the basement, I saw a neat looking shelf/buffet unit made of rustic wood and iron pipes … but it was $700! (and it was 50% off!) At this point I decided (a) this is the “look” I like, and (b) ain’t no way I am paying that – I should be able to make them myself. It’s just a bunch of piping and boards.
I could make that … !
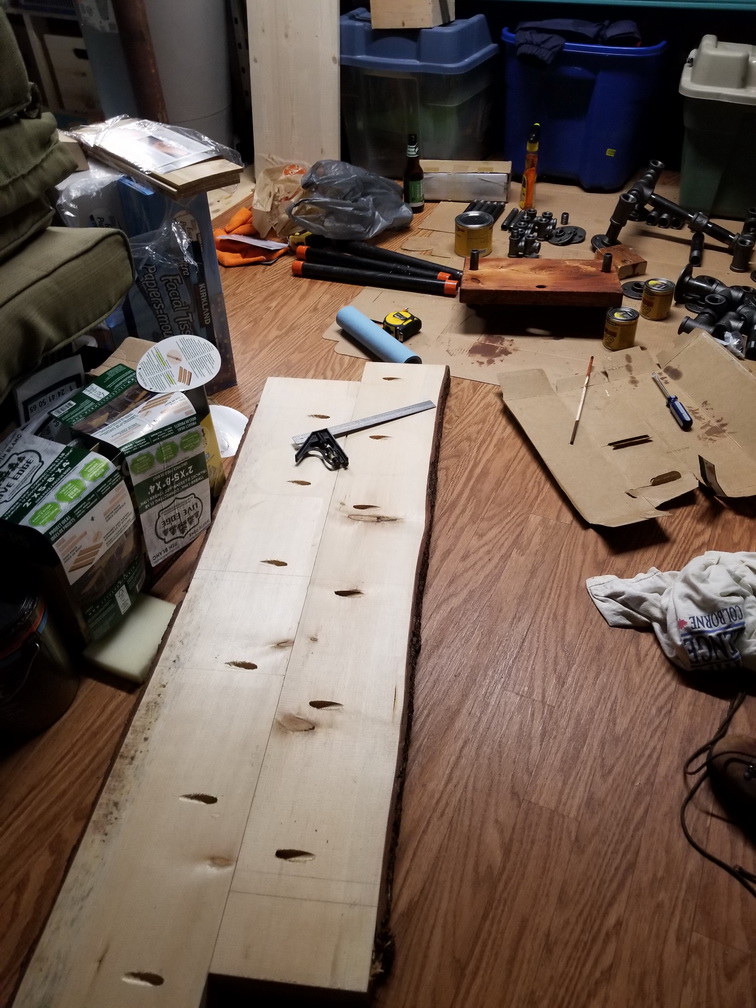
To make matters more interesting, I was looking at potential shelf boards at Lowes when I found that they were now selling live edge slabs of wood. Awesome – but they are not cheap and only a few look okay (I’m picky). I best be doing a test project first.
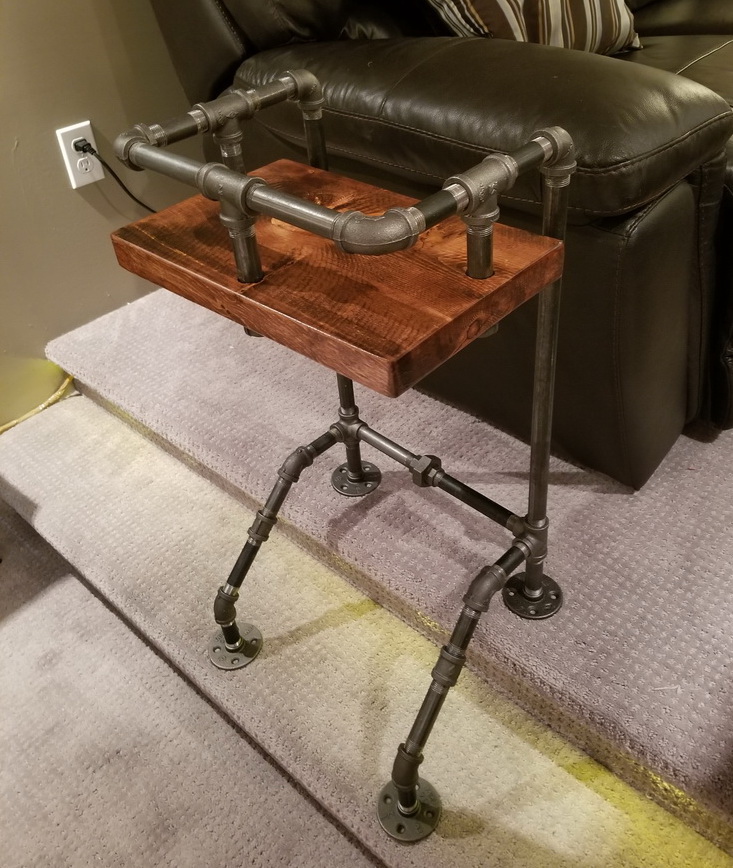
Test project – the stair table.
For the test project I am finally going to get rid of that janky drink holder that I slapped together during the basement reno years ago. The top couch is next to a step, so there was no place to put a table and no place to put your drink/popcorn. So I threw this ugly thing together that wedges under the couch:
Ugly drink holder made from leftover bits. Say buh-bye!
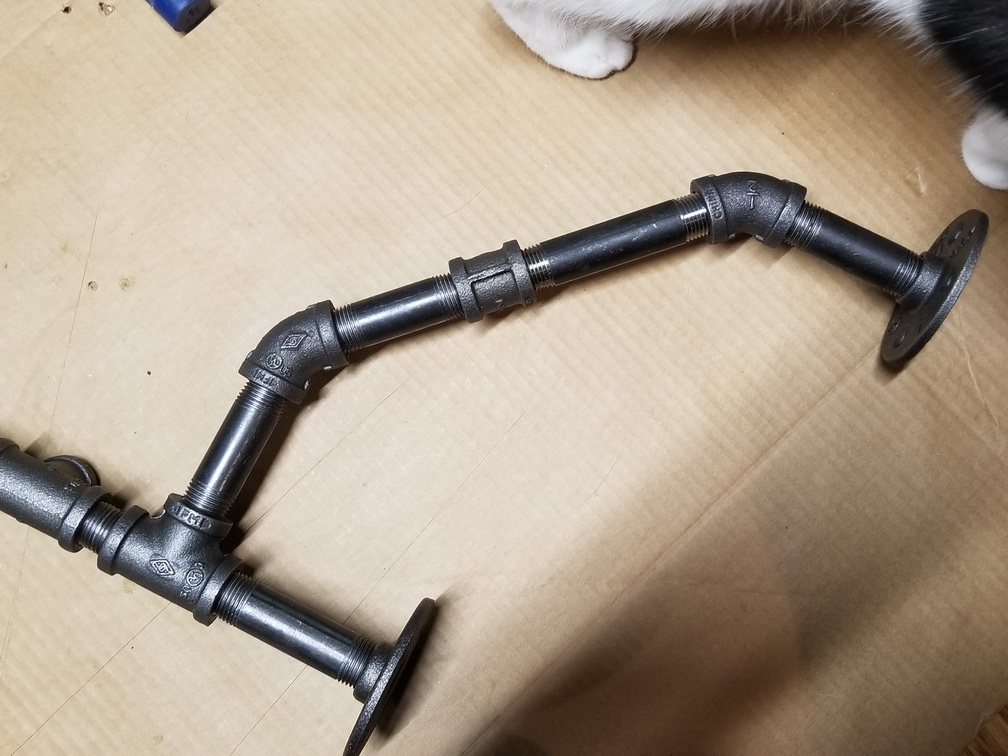
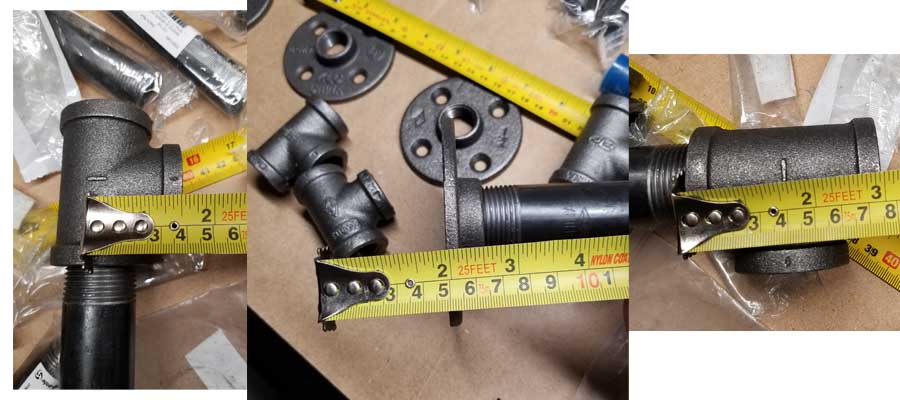
So I assembled some bits and got the basic structure down. (yes – some trigonometry was involved to get the correct lengths!). For this table i will be using 1/2″ pipe and the associated 1/2″ connectors.
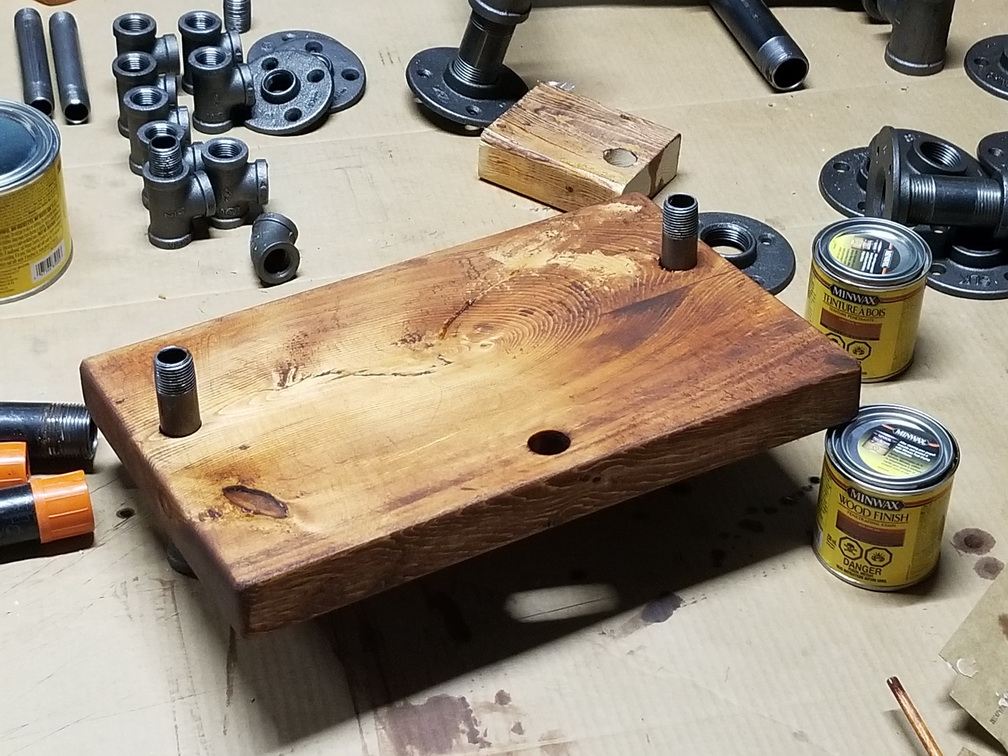
I am not going to use the live-edge wood for this, so I chopped off the end of a pine 2×12, drilled some holes for the pipes, and gave it a rustic staining…
Sloppy application of two different stains to a basic piece of pine board. Dang – that looks great !
I am going to suspend the wood from the pipes – this will give me a nice iron-pipe-railing to keep things from falling off the small surface, and also will save on pipe.
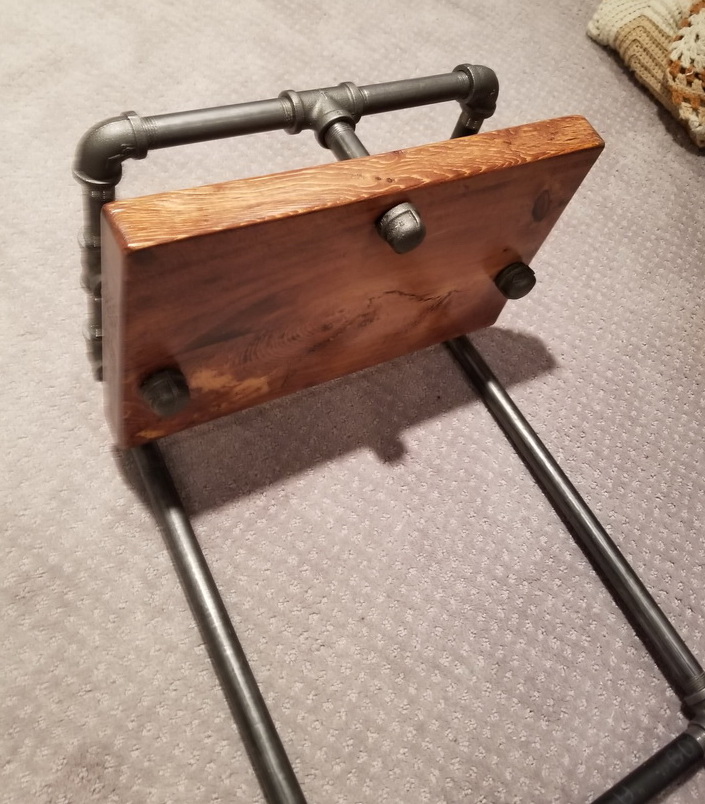
And putting it all together I am very pleased with the results. Much better than the previous thing. And since it has some weight to it, it is actually very stable.
Much better ! More room, less janky.
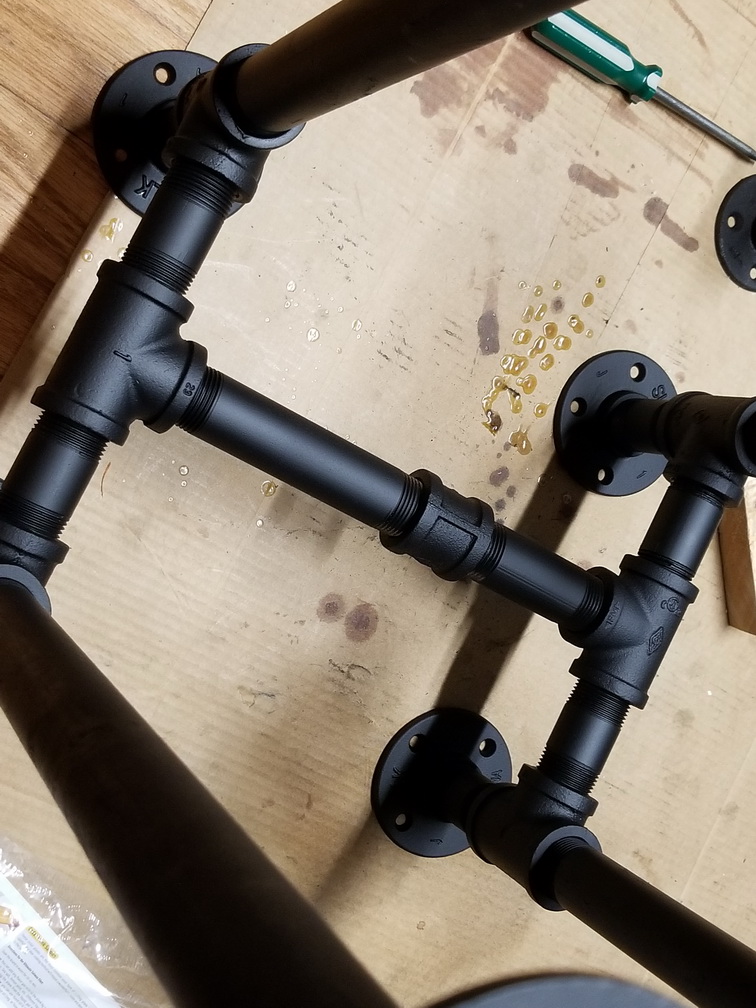
“Nipples”
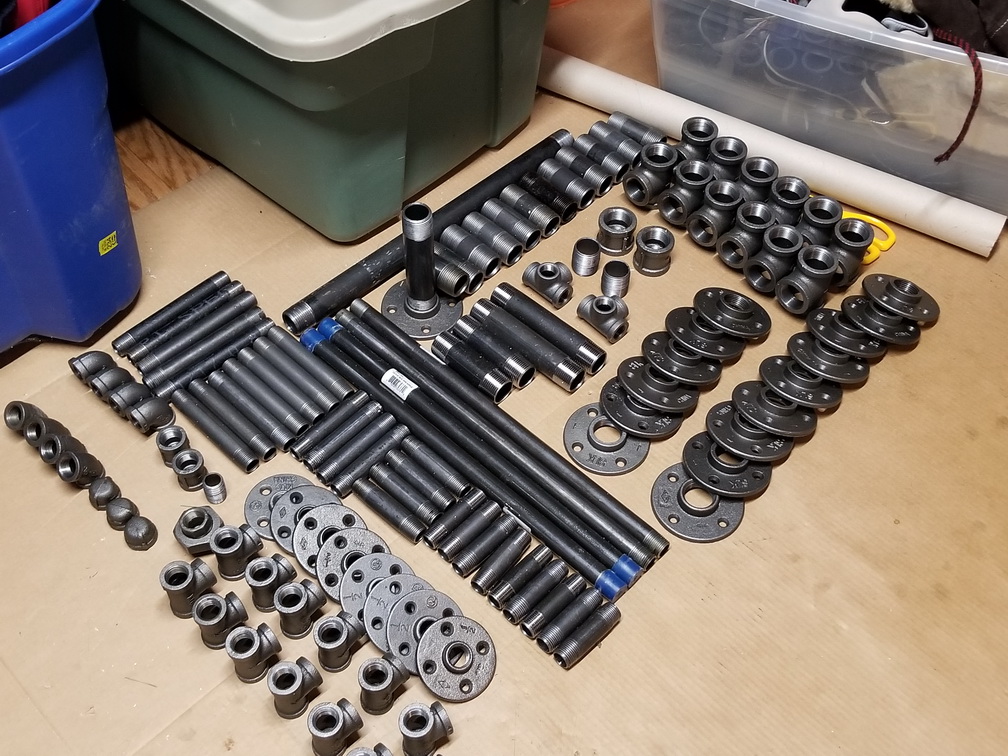
A few comments on buying parts. I am not able to cut and thread raw pipe (nor do I want to) so I am at the mercy of the pre-threaded sizes available at Canadian Tire, Home Depot, Lowes, etc. (there is great selection at the plumbing stores, but as soon as they find out you are not a contractor they add an extra $50 – just cuz – or deny you service and say bad things about your mother.) Each hardware store had their own collection of size and lengths, so I had to calculate exactly what I needed and keep a list on me everywhere I went.
For some reason, the straight lengths of pipe are called ‘nipples’. Not sure why, but made for interesting interactions when you walk into Canadian Tire and ask “do you have a 5 inch nipple?”
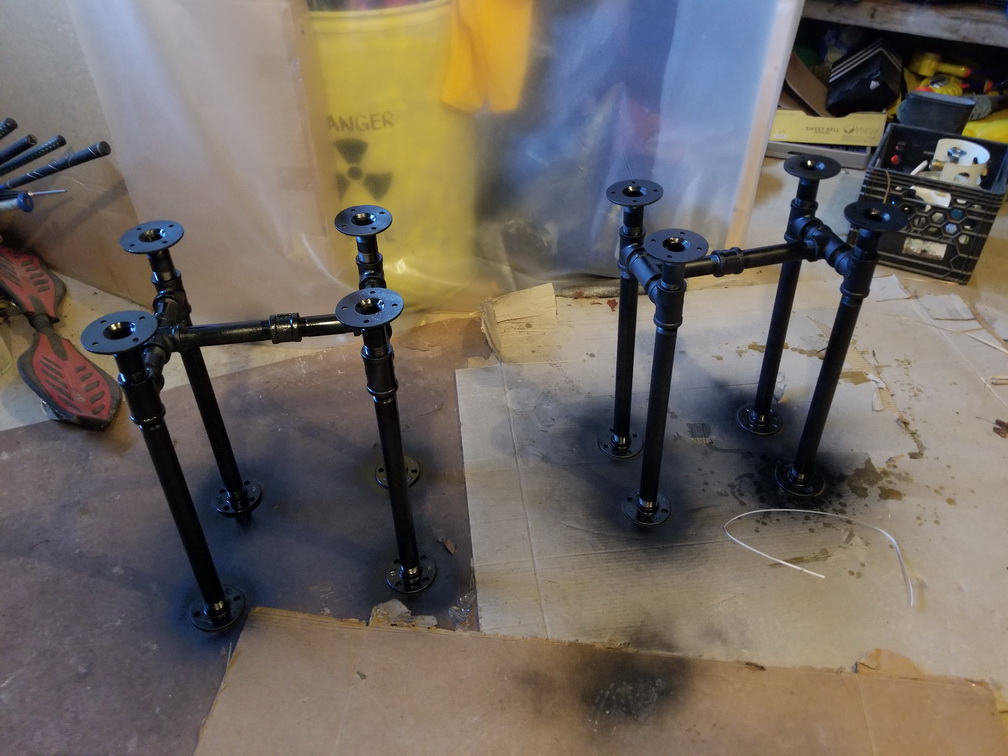
Main end tables
Once I had assembled all the pieces, then came the big job of cleaning, de-greasing, and de-labelling them. To be fair, the people who make this stuff are expecting them to end up in a wall, not on furniture. I also had to wax and/or paint them afterwards otherwise they will rust (because I removed the protective grease).
This was a big job. Thank goodness for child labour.
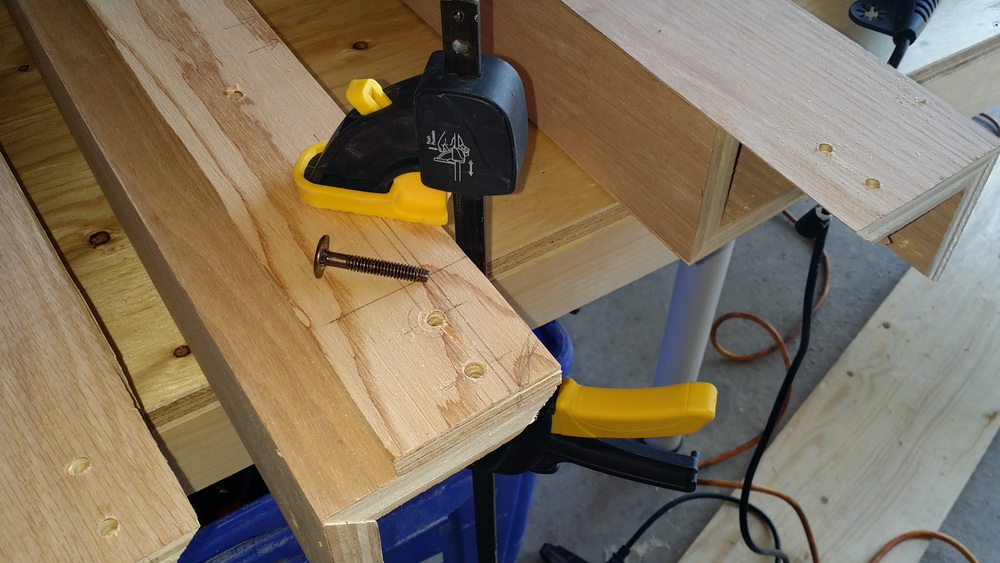
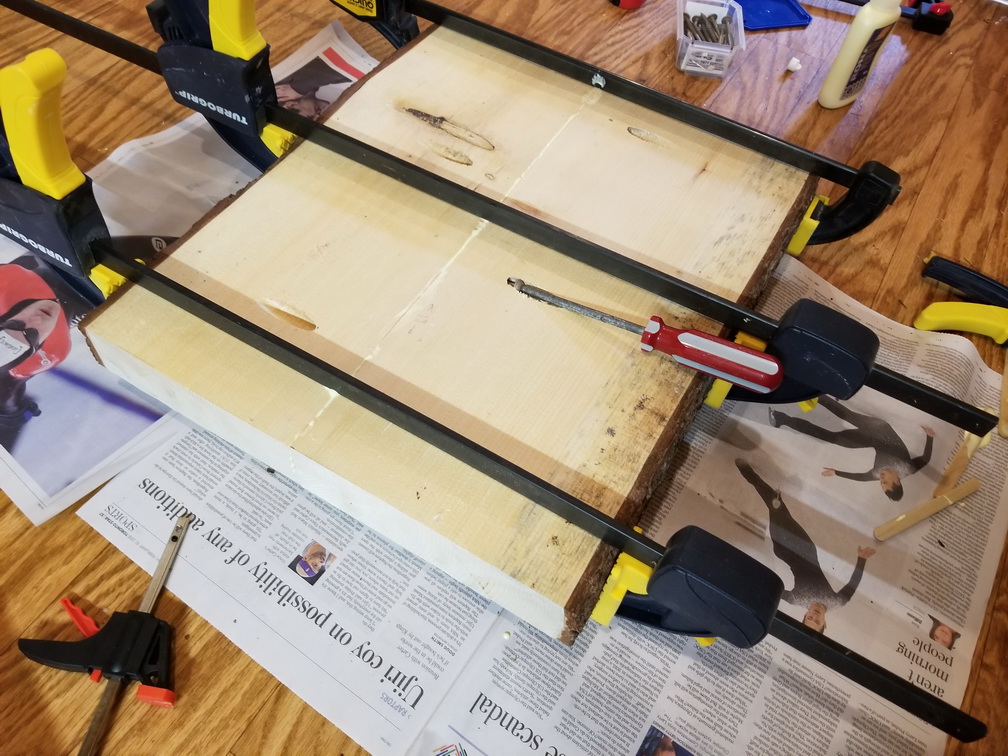
Even though they sold boards with live edge on both sides, I had rather particular width requirements, and also there really wasn’t many pieces with good clean edging on both sides. So here I am gluing the two edges together (skipping over the Quest for finding the specific pocket screws they are pre-drilled for)
glue, clamp, and screw
Assembling and painting the legs…
Mmmm… look at those bad boy pipes !
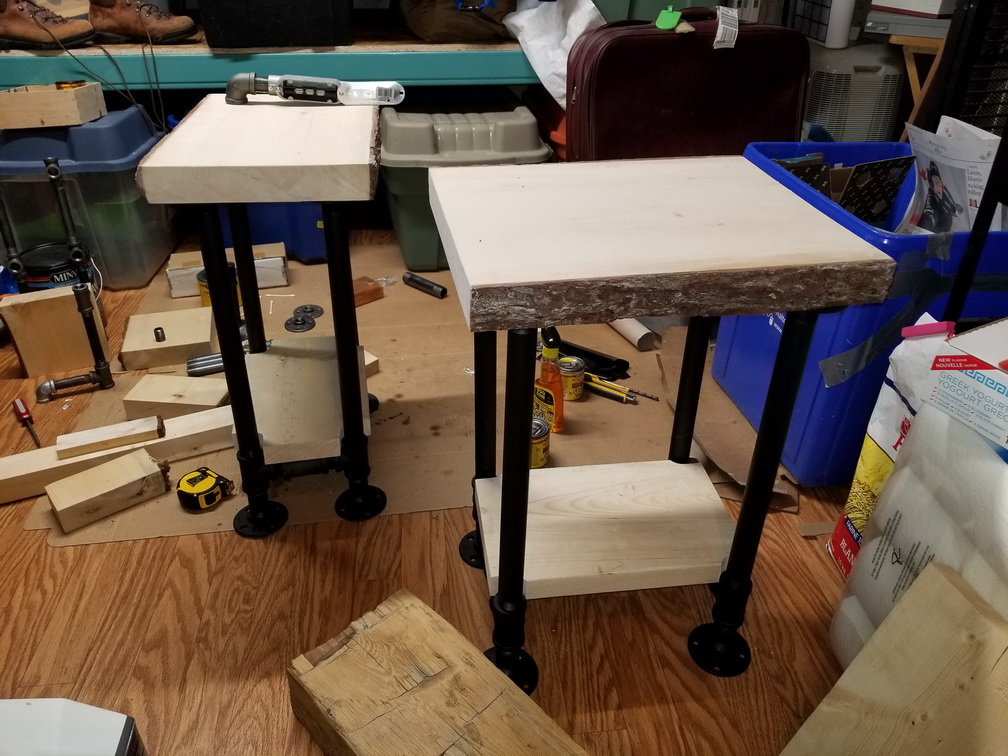
Quick test that everything is okay. Since I was in the cutting and staining mode I quickly made secondary shelves that fit between the legs. I probably won’t use them, but now is the time to make them easily.
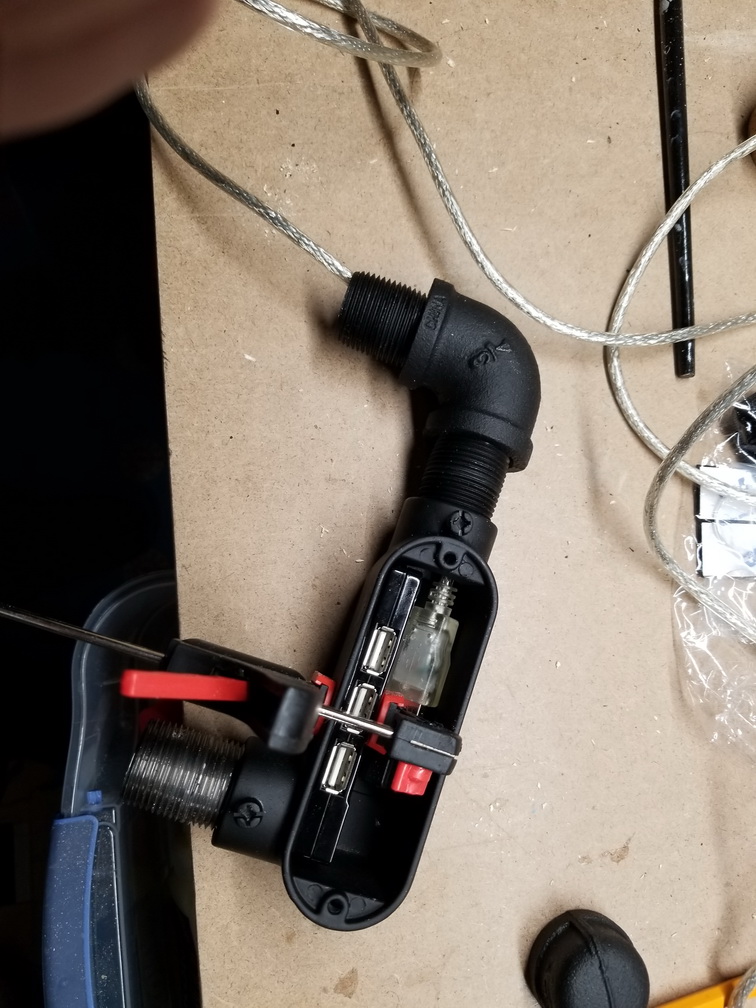
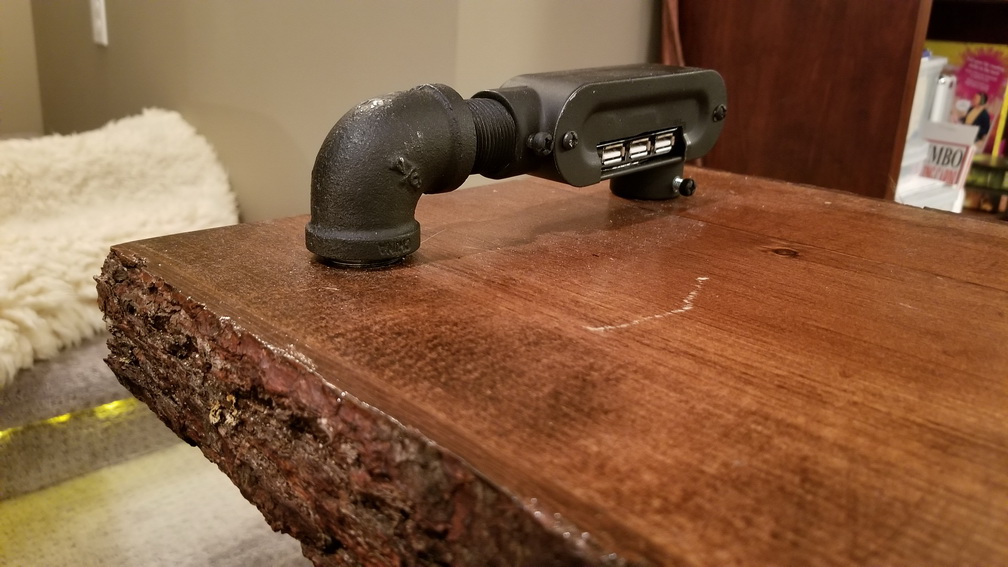
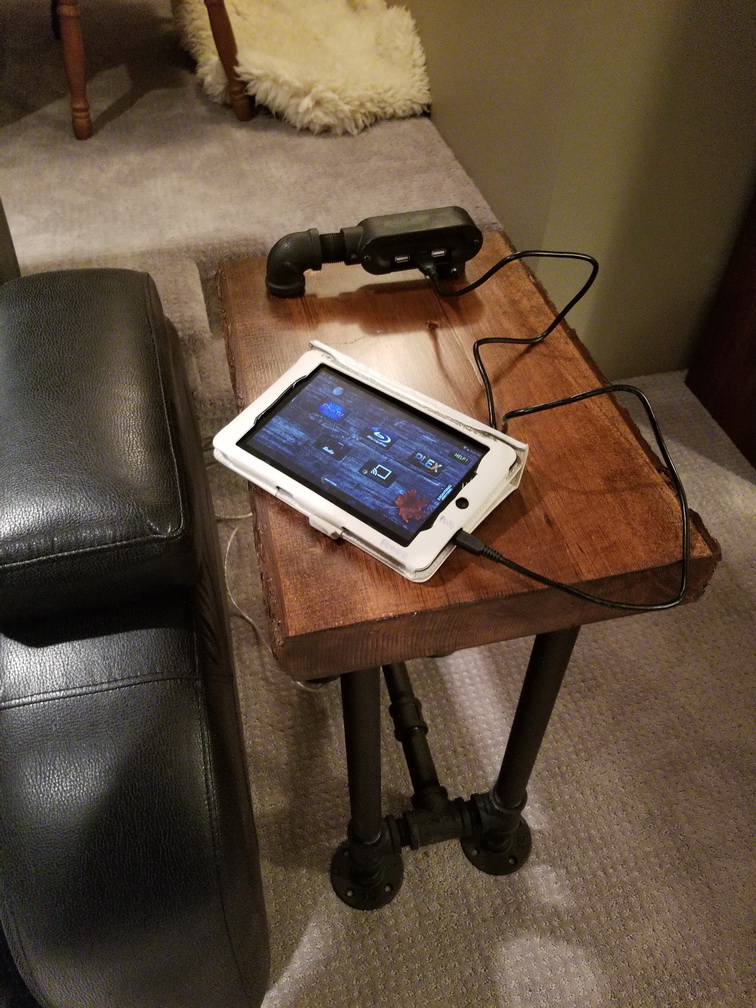
We use an android tablet to run our TV etc, and keeping track of the power cord is always a pain. So for one of the tables I will have the power delivered right to the surface. (I have all this piping … it should be easy!)
Here I am glue-clamping a USB hub into an LRL Conduit Body. Yes, this is what it has come to. I am now an expert in conduit fitting nomenclature.
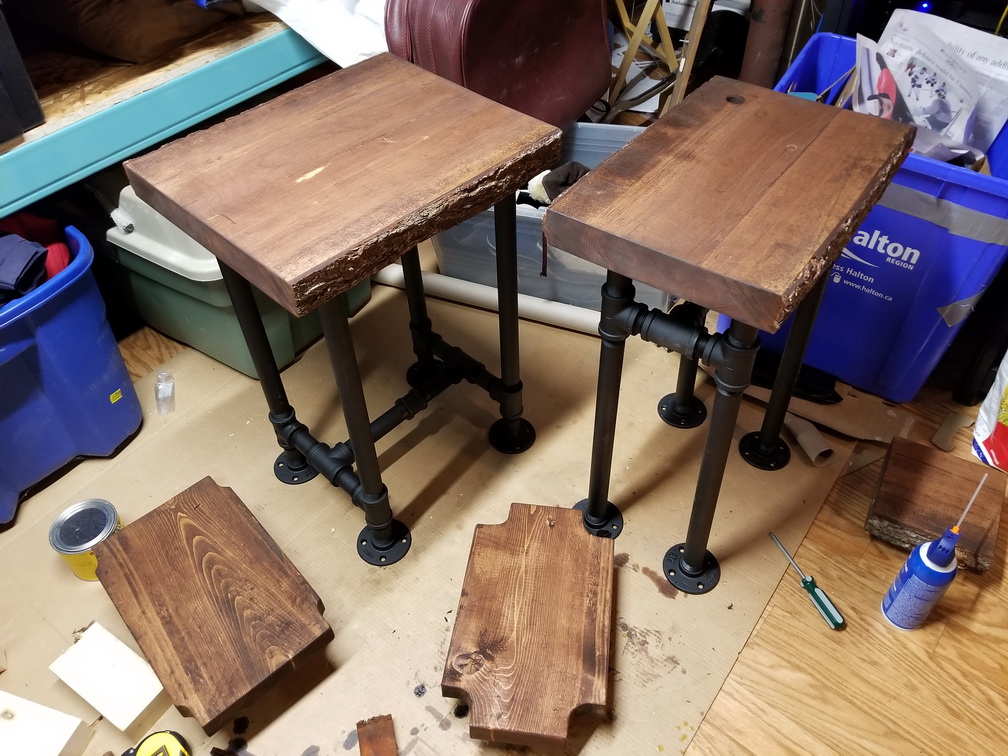
I like the industrial pipe+wood look of the power station.
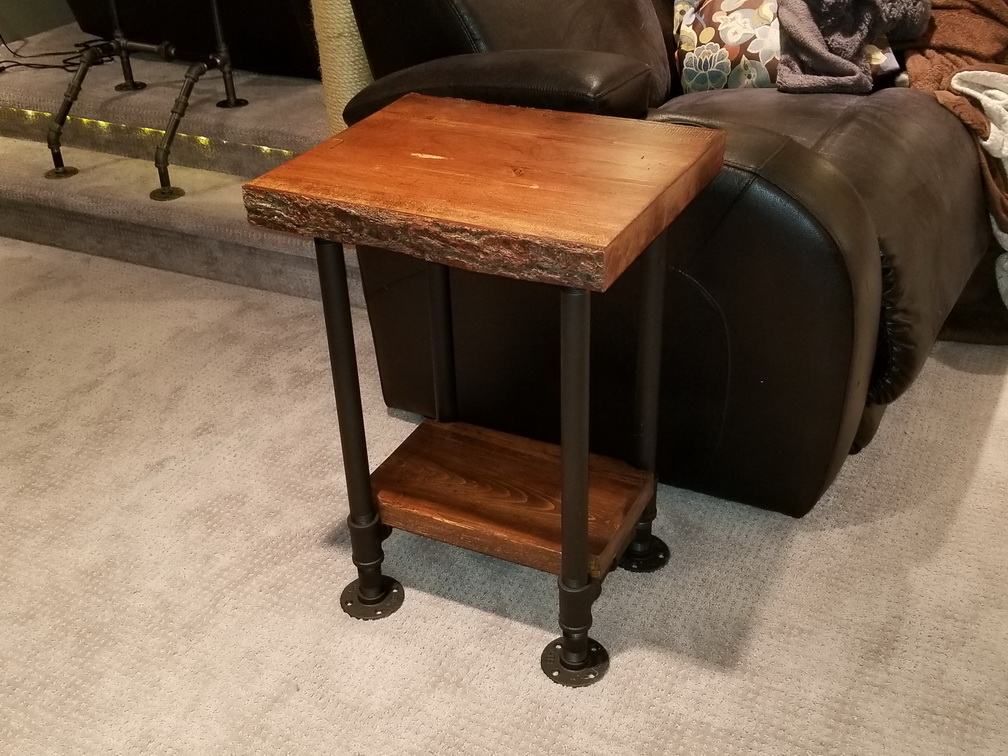
And here is the other end table. In the end I removed the lower shelf so you can see the piping, but I still have it on hand just in case.
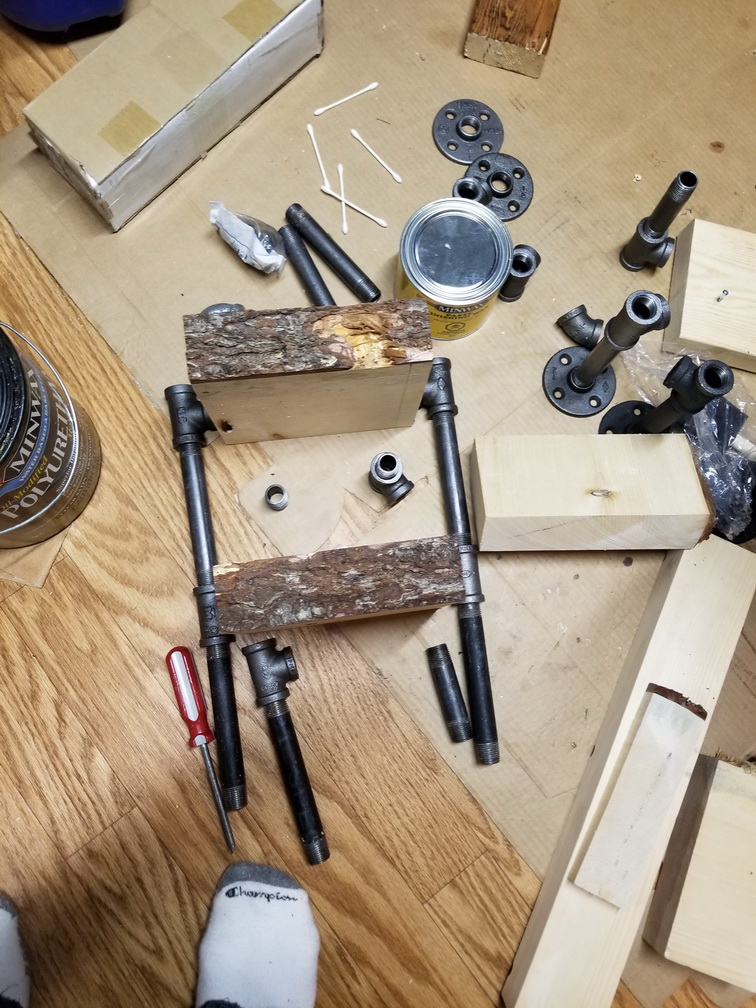
The Leftovers Project
Okay, whenever I am doing a project with custom materials and there are bits leftover I am like …” I should be able to use these for something…”. (I hate throwing stuff away). This project is not different. I have left over wood and piping …. how about a little shelf unit to hold my craft beer sample glasses !
Yep .. this will work Looking nice ! Maybe I should add a light …. 🙂