There is a specialty
wood store in Burlington that is always dangerous for me to walk into. There are so many cool slabs and chunks of
wood in there. The good thing is that for
the most part it is fairly pricey, which keeps me from really buying anything.
Once in a while,
however, I find something really nice that is fairly small and reasonable and
it ends up coming home with me.
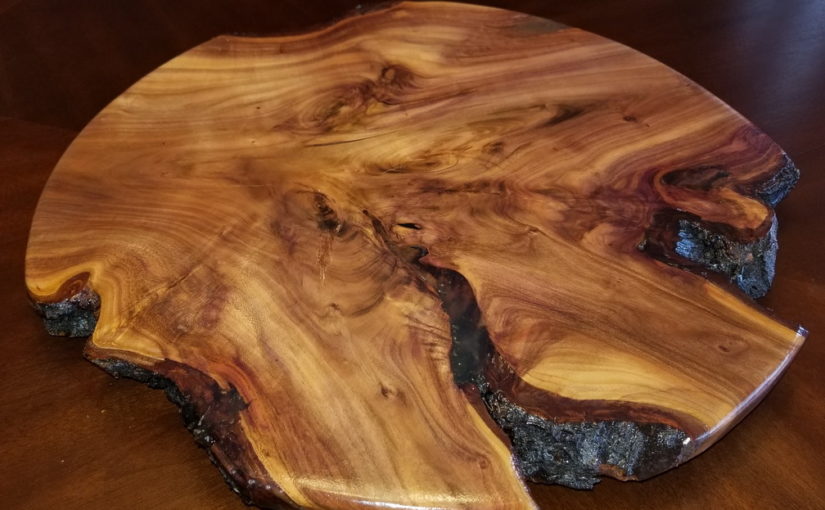
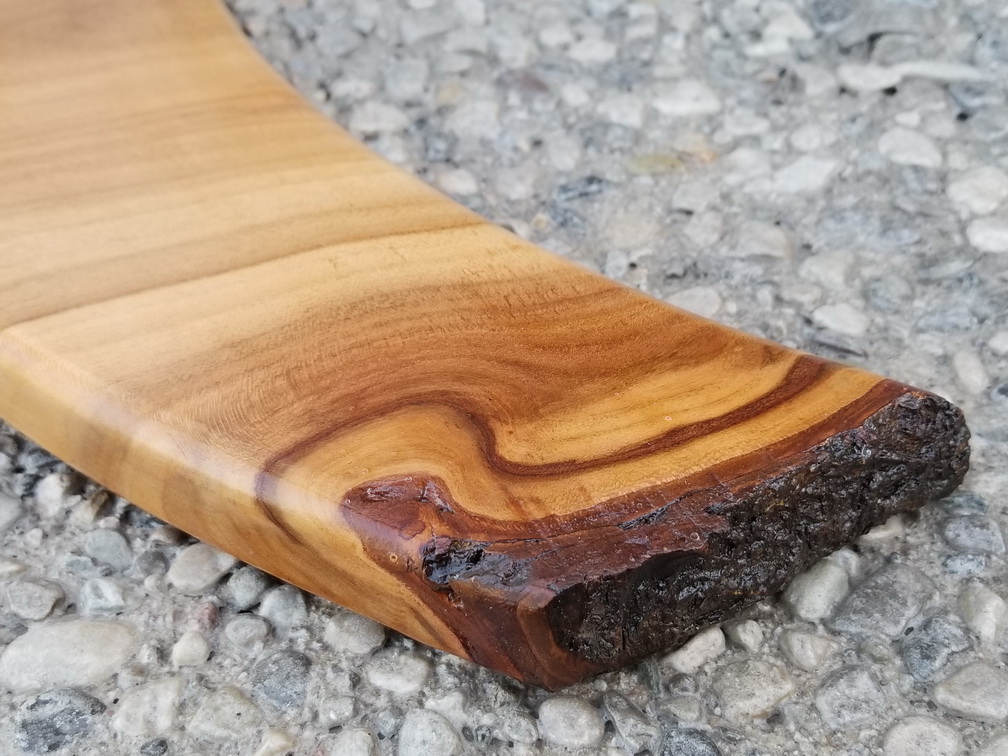
Slab of plum !
This time I found
this small slab of plum, and it was just about the right size I was looking for
to make a kitchen turntable (lazy susan).
Many meals at our kitchen table end up being a “pass the …”
exercise, and the small turntable I found at Cdn Tire seemed like a good idea
but was a bit too small to hold much.
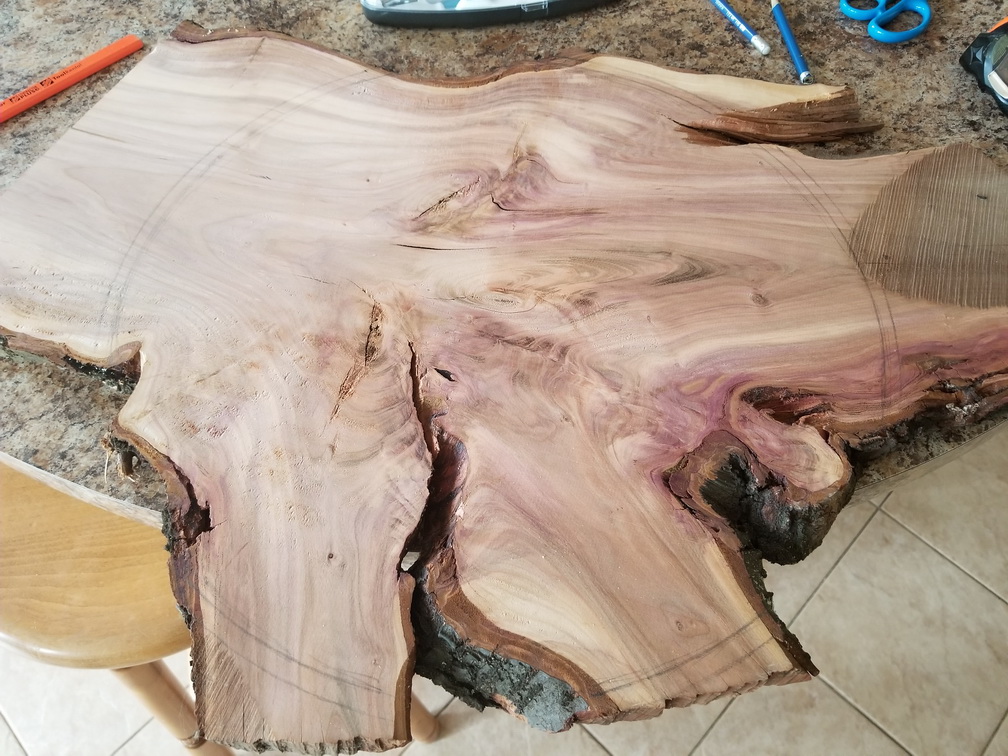
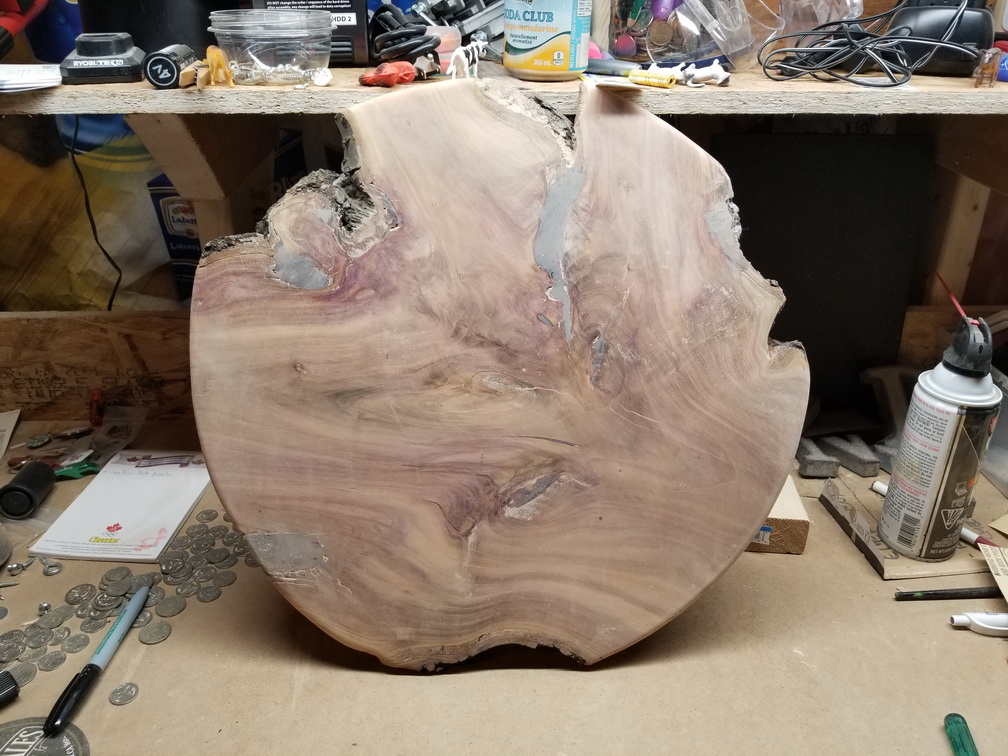
One of the trickiest
parts was positioning the circle that maximized the use of the cool bits, and
avoided some of the bad bits.
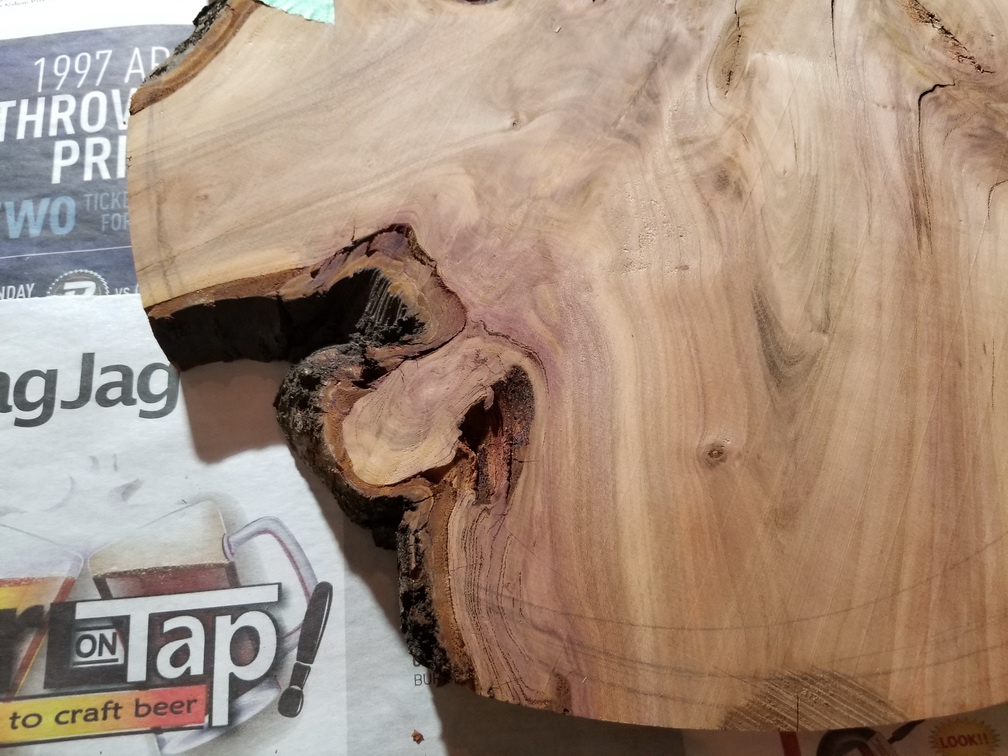
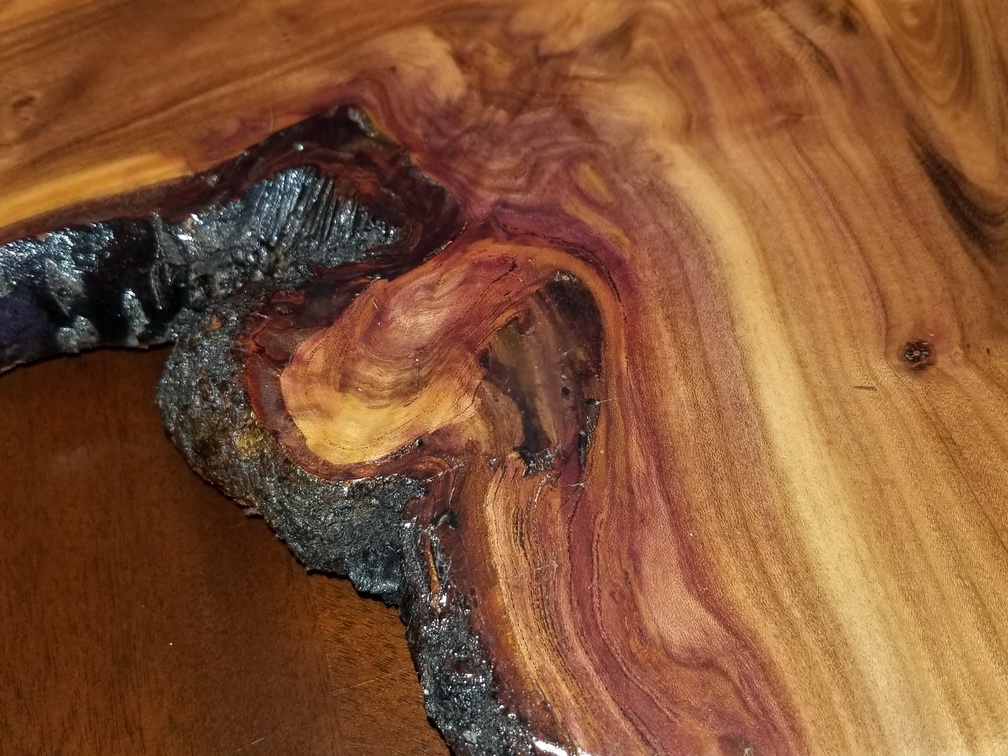
Cool looking section – but there is a bit of a hole there…
Next step was using epoxy to fill in the holes and gaps. I used tape and putty to block off any escape routes, and then poured in the epoxy. This is the first time I tried using this stuff and you don’t have a lot of time to work with it. At one point I was working a little too long with a batch (near the end, filling all sorts of little holes) and it got real hot !
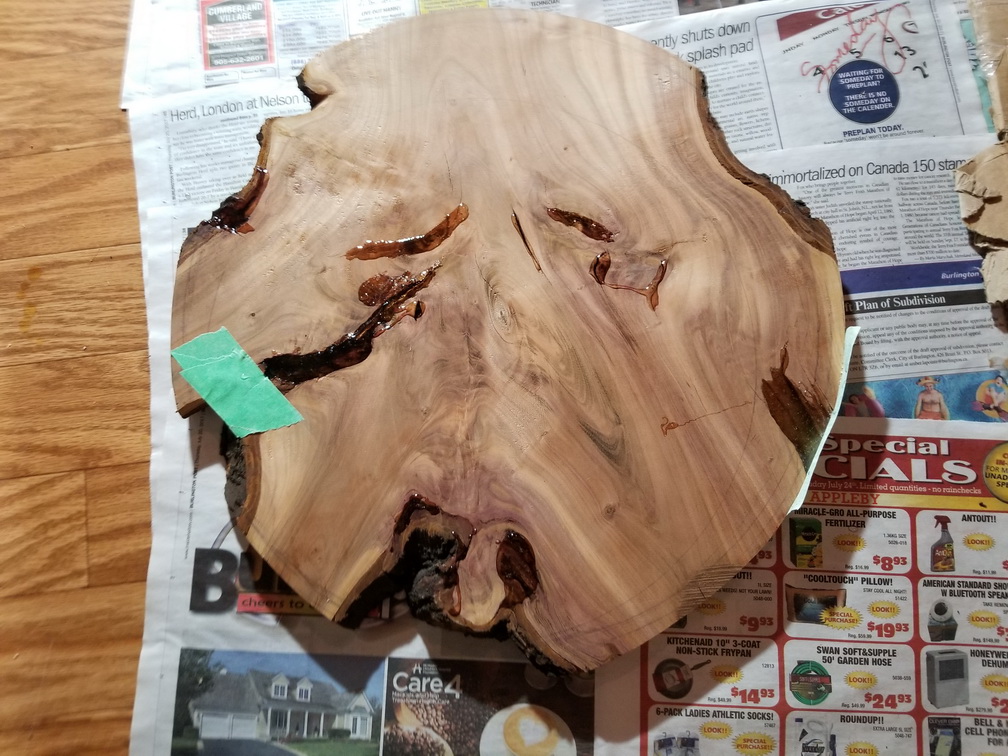
Gaps and cracks filled with epoxy
While the epoxy was drying I took one of the pieces that I cut off and used it for testing the varathane. Looking promising !
Test Piece – pretty ! (we still use this actually – it is now a small cheese board)
once all dried i sanded the whole thing and added the protective coatings.
All sanded – the epoxy needs to be cleaned prior to coating things…
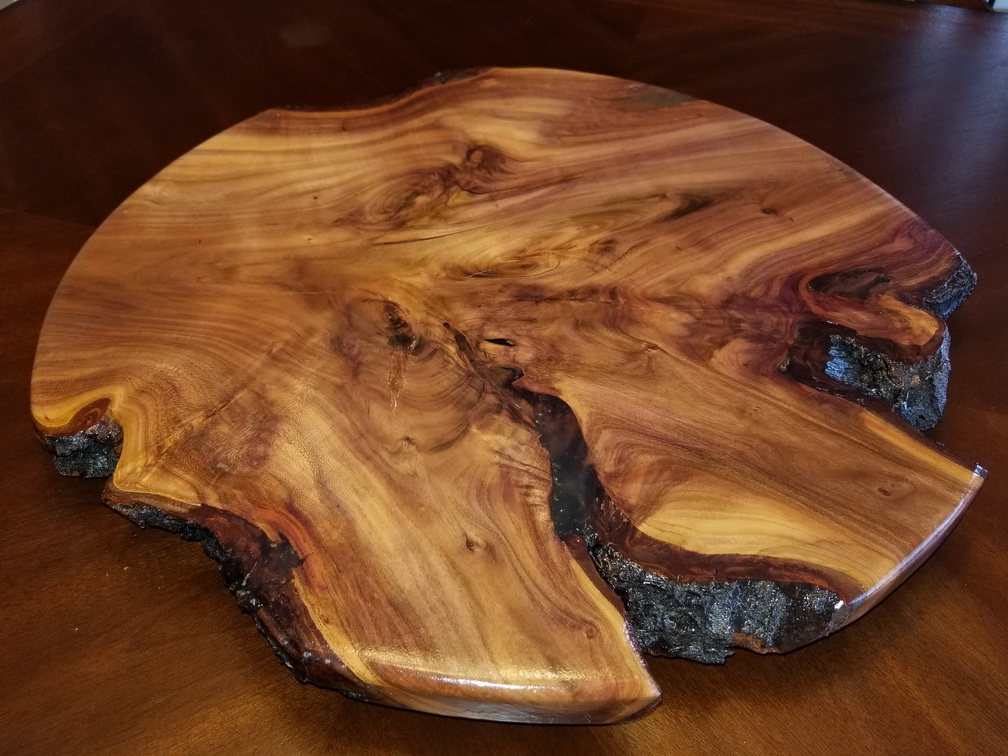
The verathane really helped make the colours pop – it looks great! I picked up the turntable hardware from Lee Valley and voila.
She’s a beaut ! Spins and everything cool section now filled with epoxy and varathaned.
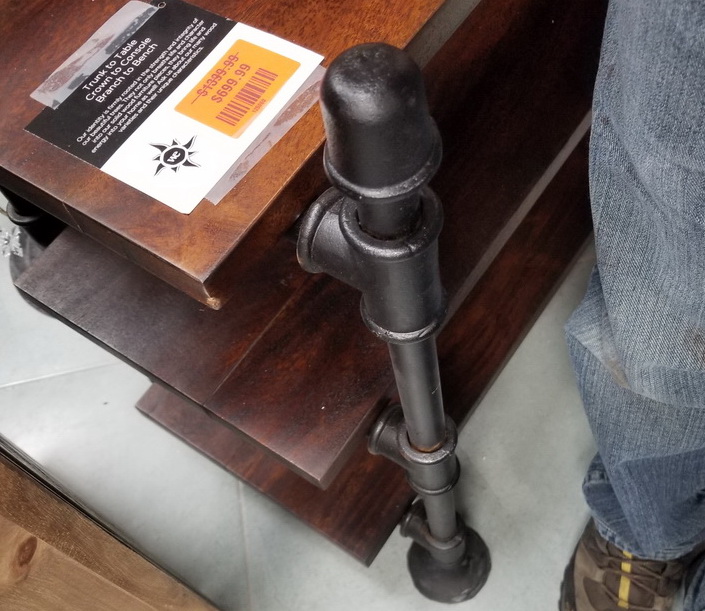
While wandering a furniture store for some end tables for the basement, I saw a neat looking shelf/buffet unit made of rustic wood and iron pipes … but it was $700! (and it was 50% off!) At this point I decided (a) this is the “look” I like, and (b) ain’t no way I am paying that – I should be able to make them myself. It’s just a bunch of piping and boards.
I could make that … !
To make matters more interesting, I was looking at potential shelf boards at Lowes when I found that they were now selling live edge slabs of wood. Awesome – but they are not cheap and only a few look okay (I’m picky). I best be doing a test project first.
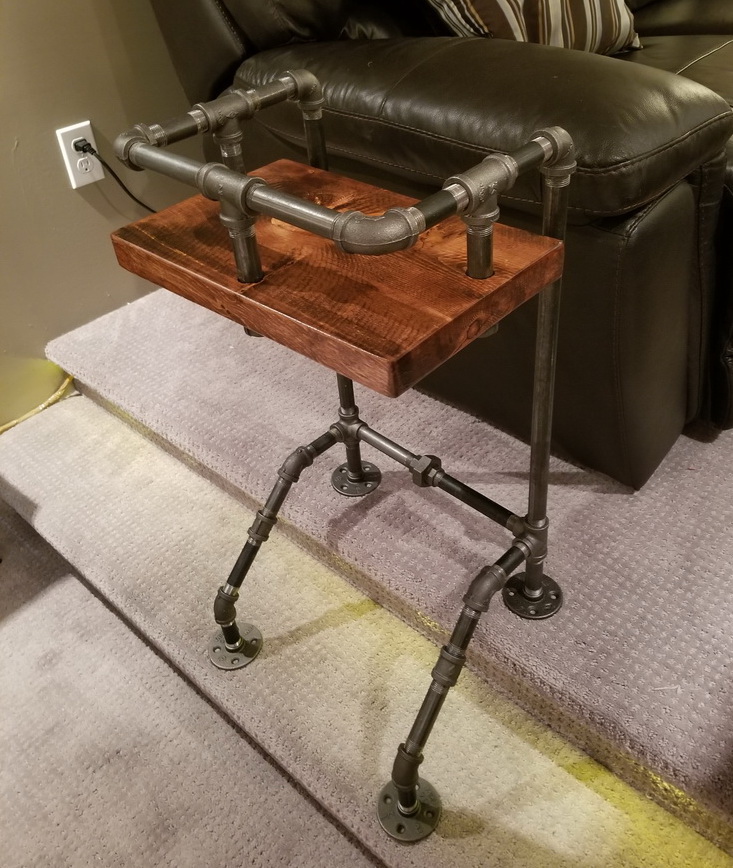
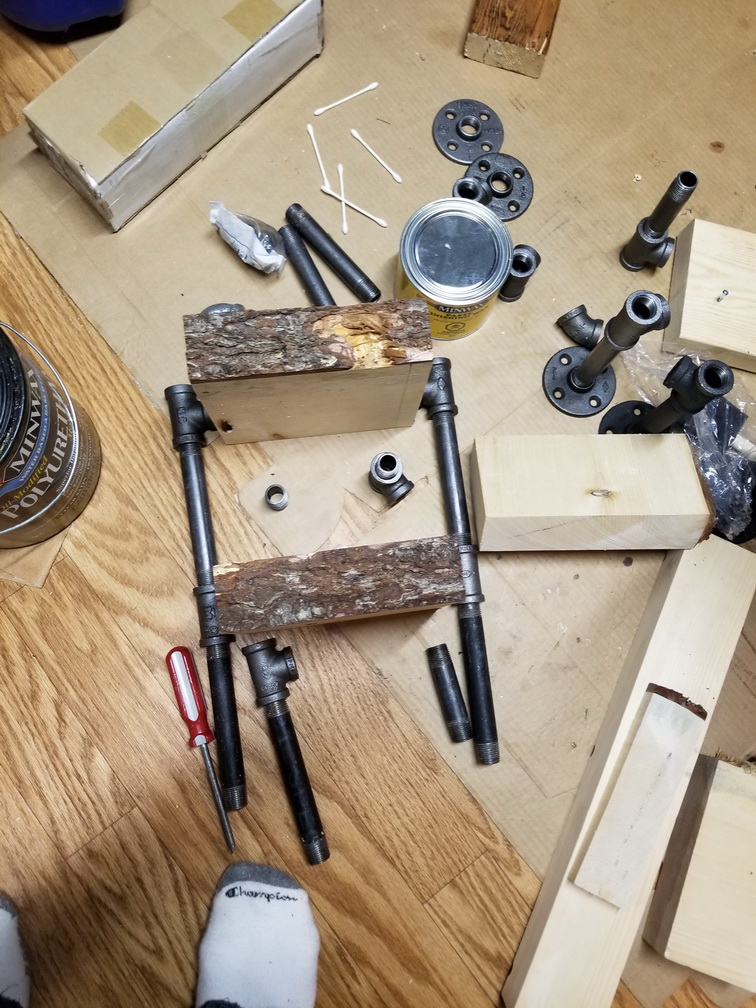
Test project – the stair table.
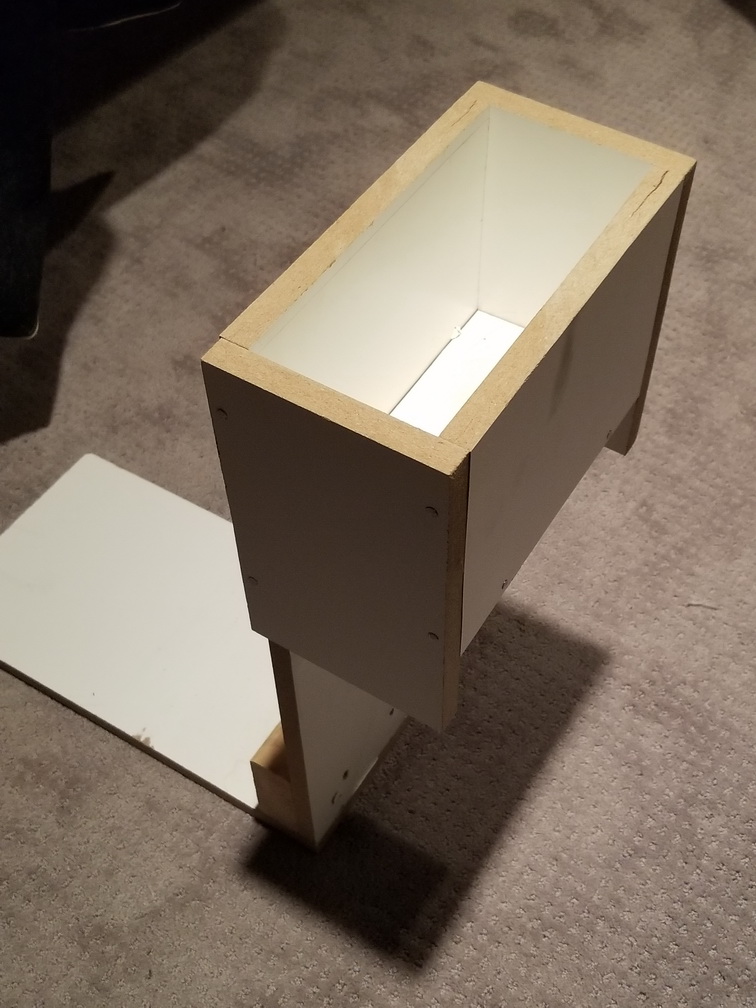
For the test project I am finally going to get rid of that janky drink holder that I slapped together during the basement reno years ago. The top couch is next to a step, so there was no place to put a table and no place to put your drink/popcorn. So I threw this ugly thing together that wedges under the couch:
Ugly drink holder made from leftover bits. Say buh-bye!
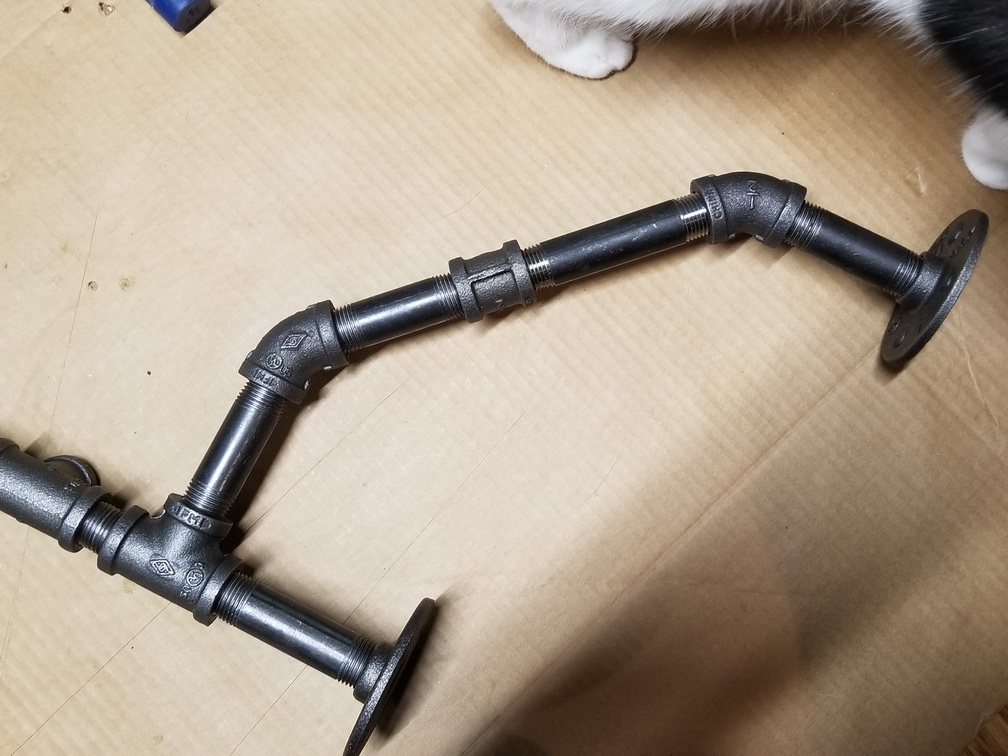
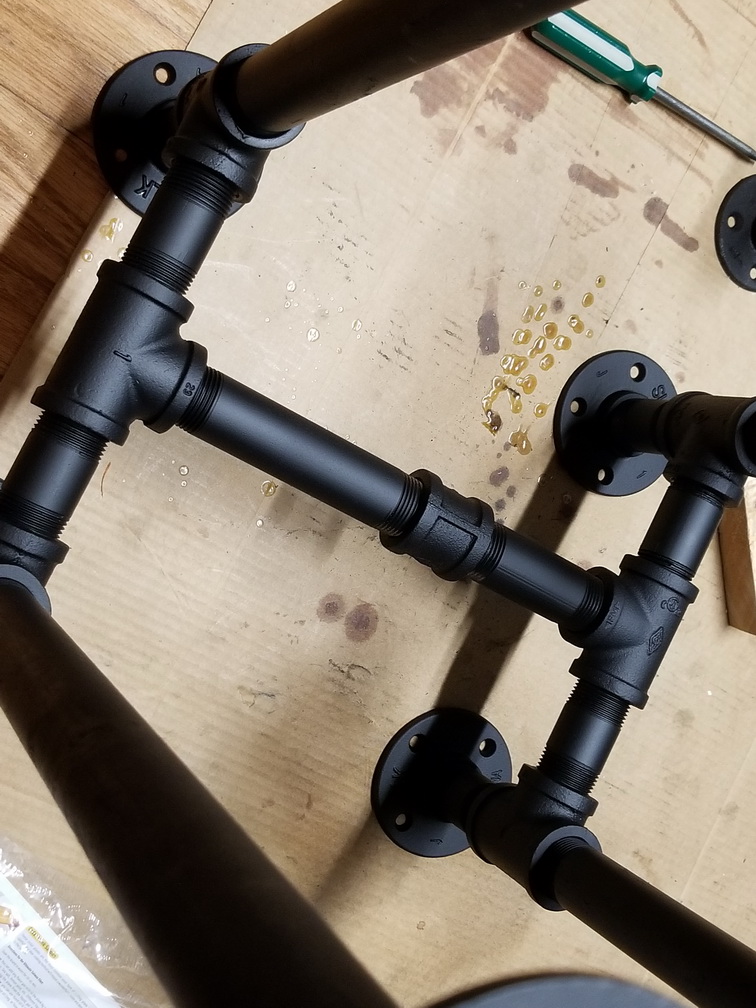
So I assembled some bits and got the basic structure down. (yes – some trigonometry was involved to get the correct lengths!). For this table i will be using 1/2″ pipe and the associated 1/2″ connectors.
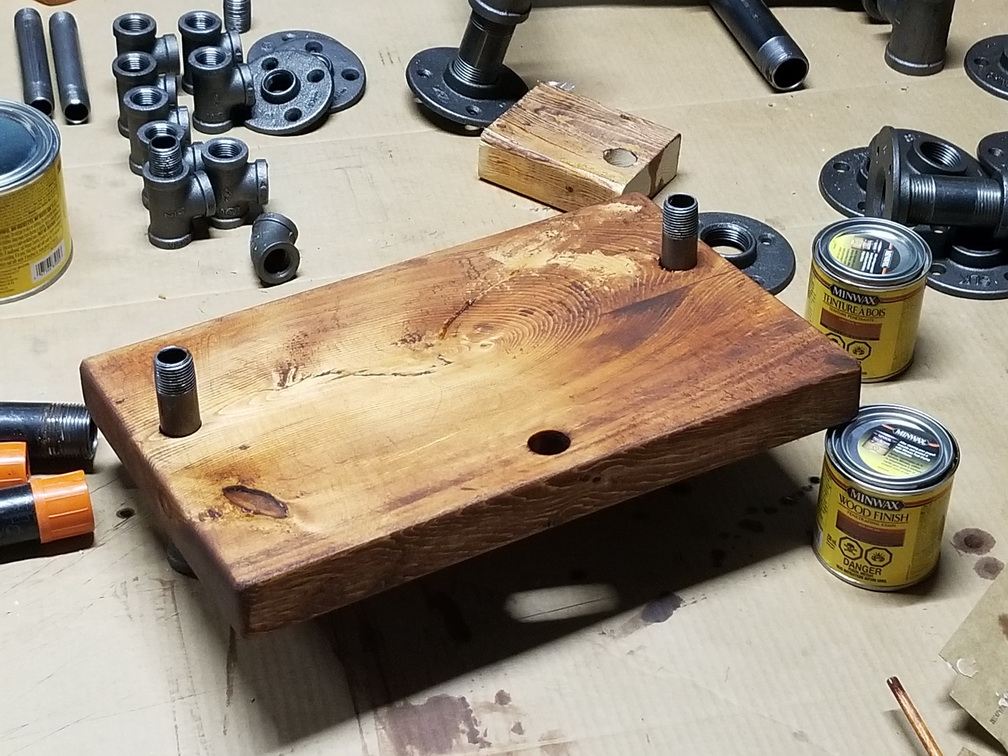
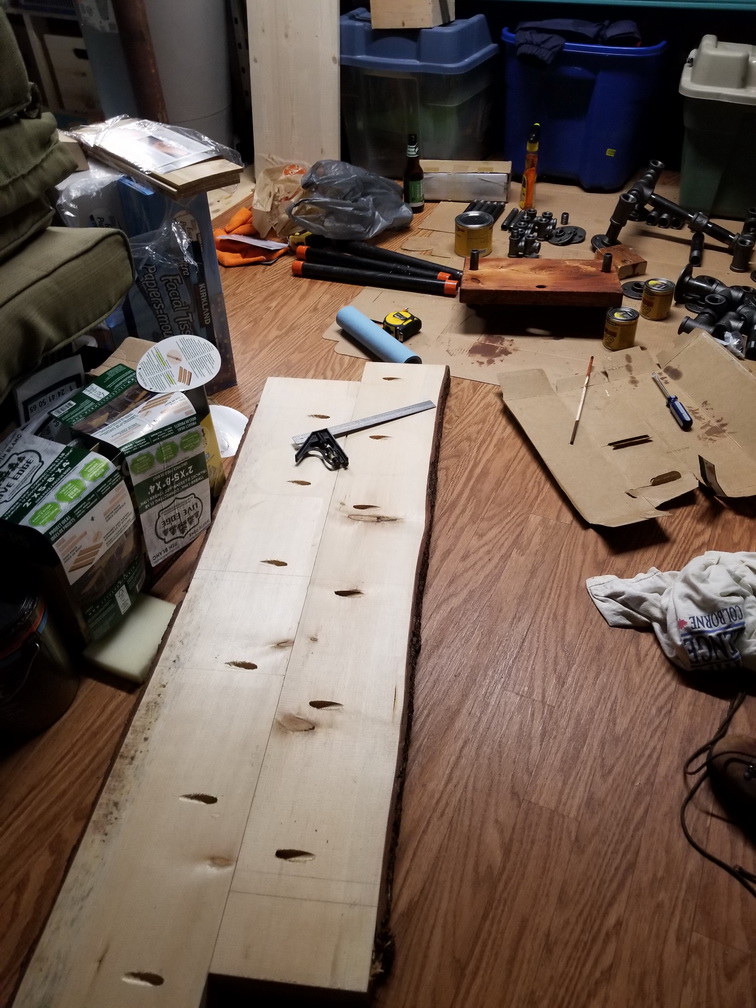
I am not going to use the live-edge wood for this, so I chopped off the end of a pine 2×12, drilled some holes for the pipes, and gave it a rustic staining…
Sloppy application of two different stains to a basic piece of pine board. Dang – that looks great !
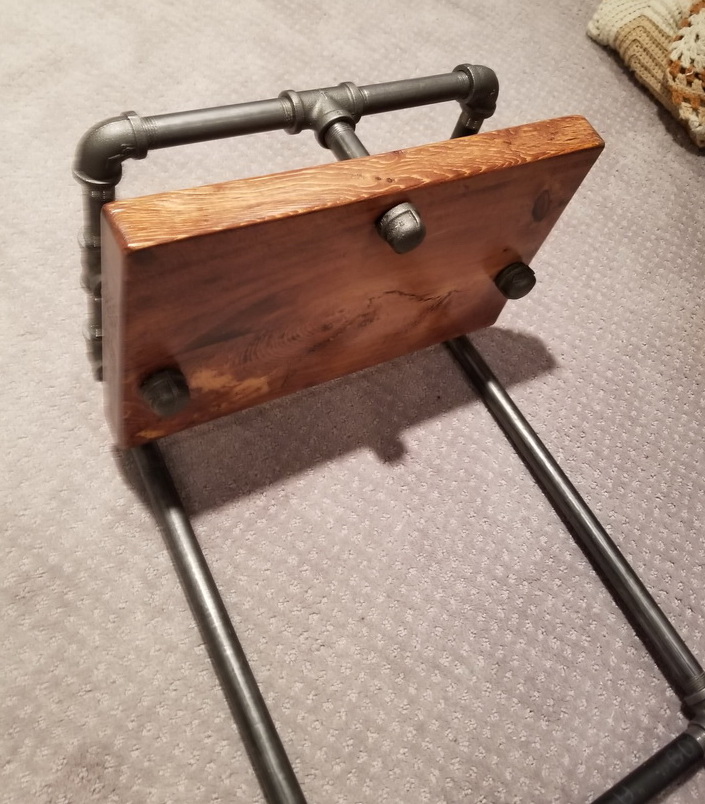
I am going to suspend the wood from the pipes – this will give me a nice iron-pipe-railing to keep things from falling off the small surface, and also will save on pipe.
And putting it all together I am very pleased with the results. Much better than the previous thing. And since it has some weight to it, it is actually very stable.
Much better ! More room, less janky.
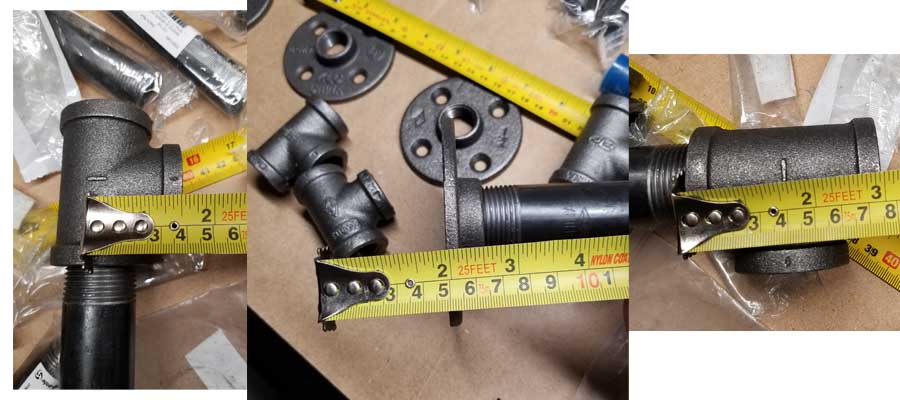
“Nipples”
A few comments on buying parts. I am not able to cut and thread raw pipe (nor do I want to) so I am at the mercy of the pre-threaded sizes available at Canadian Tire, Home Depot, Lowes, etc. (there is great selection at the plumbing stores, but as soon as they find out you are not a contractor they add an extra $50 – just cuz – or deny you service and say bad things about your mother.) Each hardware store had their own collection of size and lengths, so I had to calculate exactly what I needed and keep a list on me everywhere I went.
For some reason, the straight lengths of pipe are called ‘nipples’. Not sure why, but made for interesting interactions when you walk into Canadian Tire and ask “do you have a 5 inch nipple?”
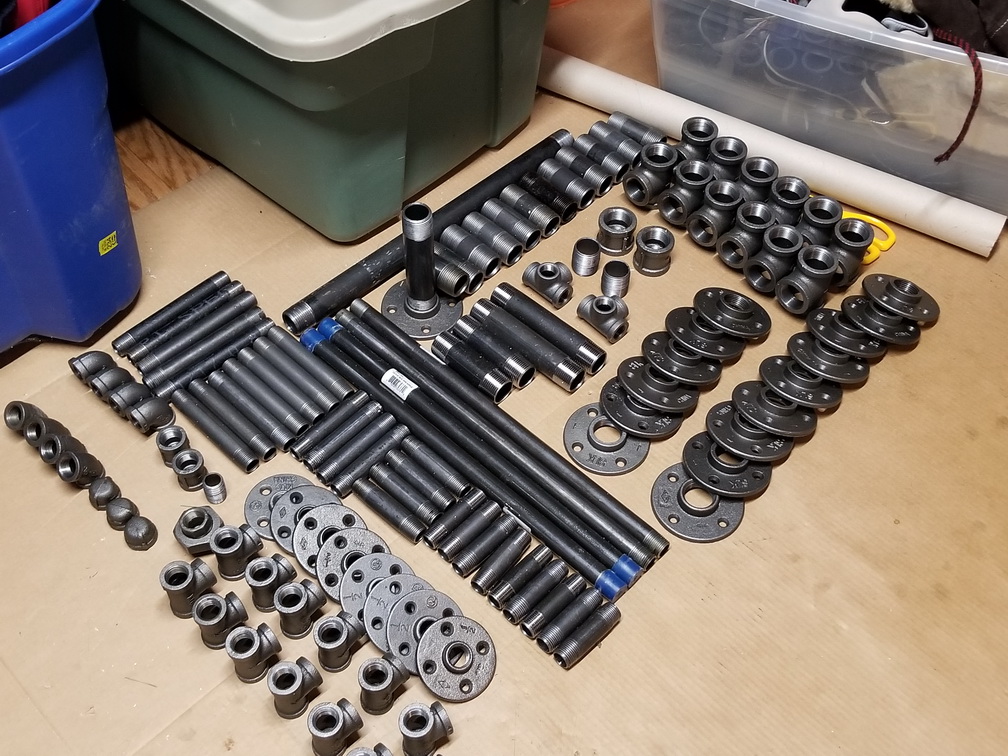
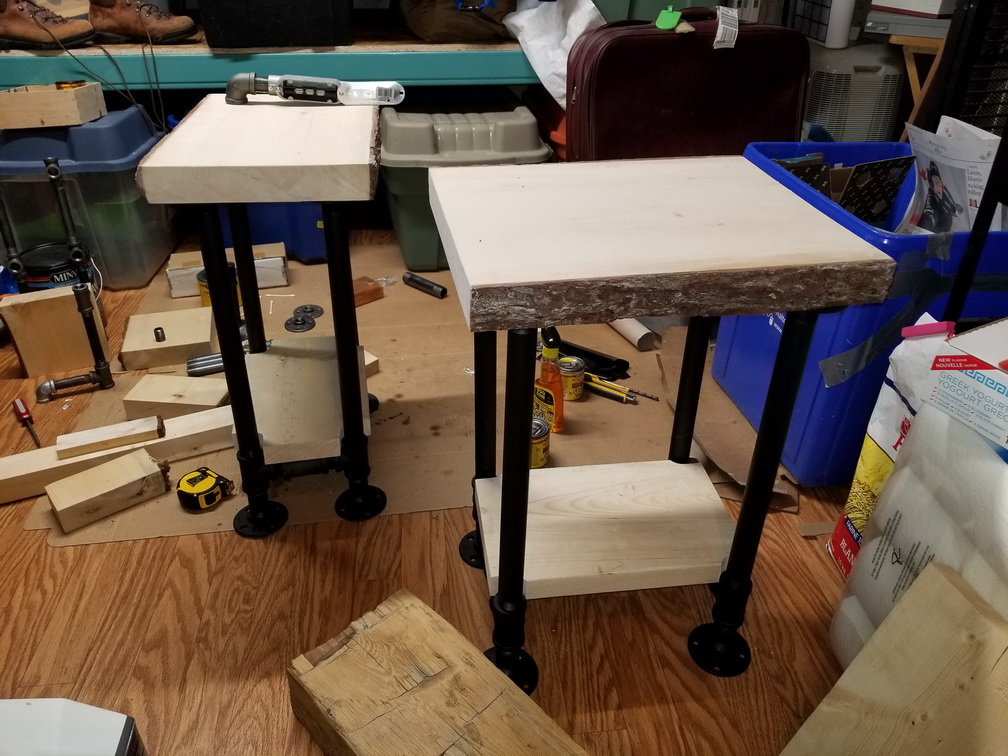
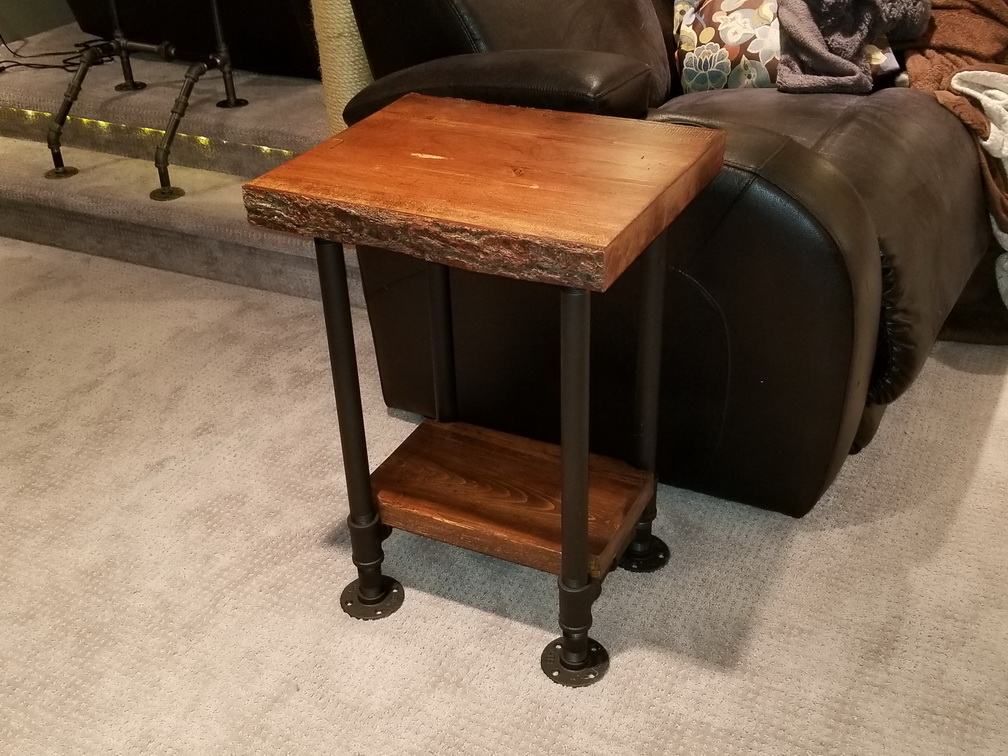
Main end tables
Once I had assembled all the pieces, then came the big job of cleaning, de-greasing, and de-labelling them. To be fair, the people who make this stuff are expecting them to end up in a wall, not on furniture. I also had to wax and/or paint them afterwards otherwise they will rust (because I removed the protective grease).
This was a big job. Thank goodness for child labour.
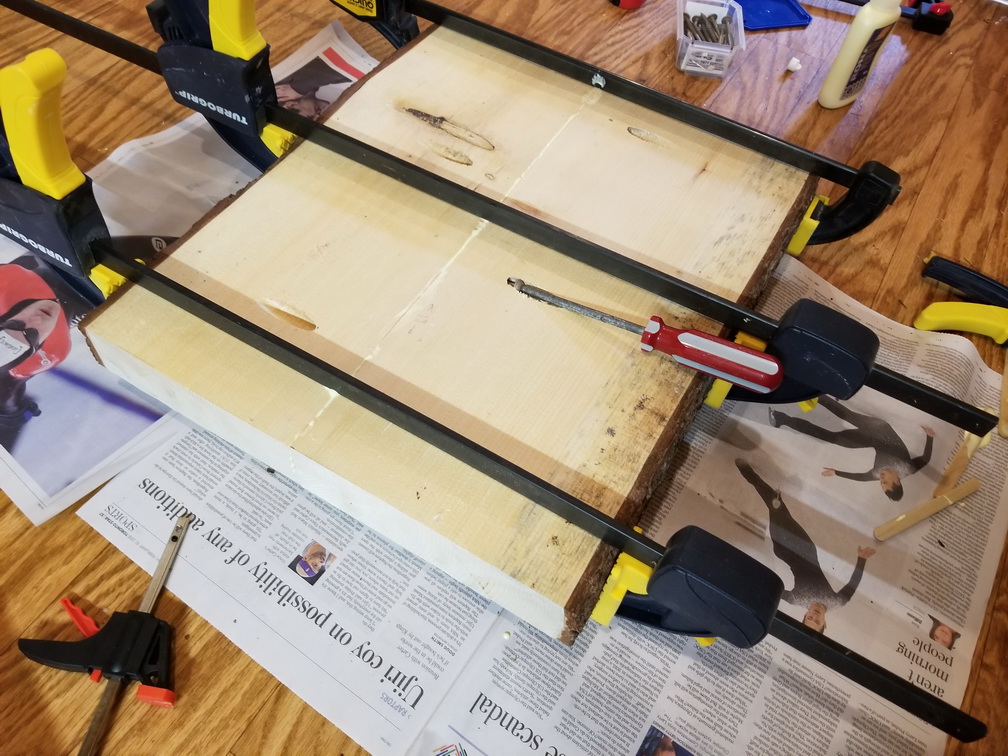
Even though they sold boards with live edge on both sides, I had rather particular width requirements, and also there really wasn’t many pieces with good clean edging on both sides. So here I am gluing the two edges together (skipping over the Quest for finding the specific pocket screws they are pre-drilled for)
glue, clamp, and screw
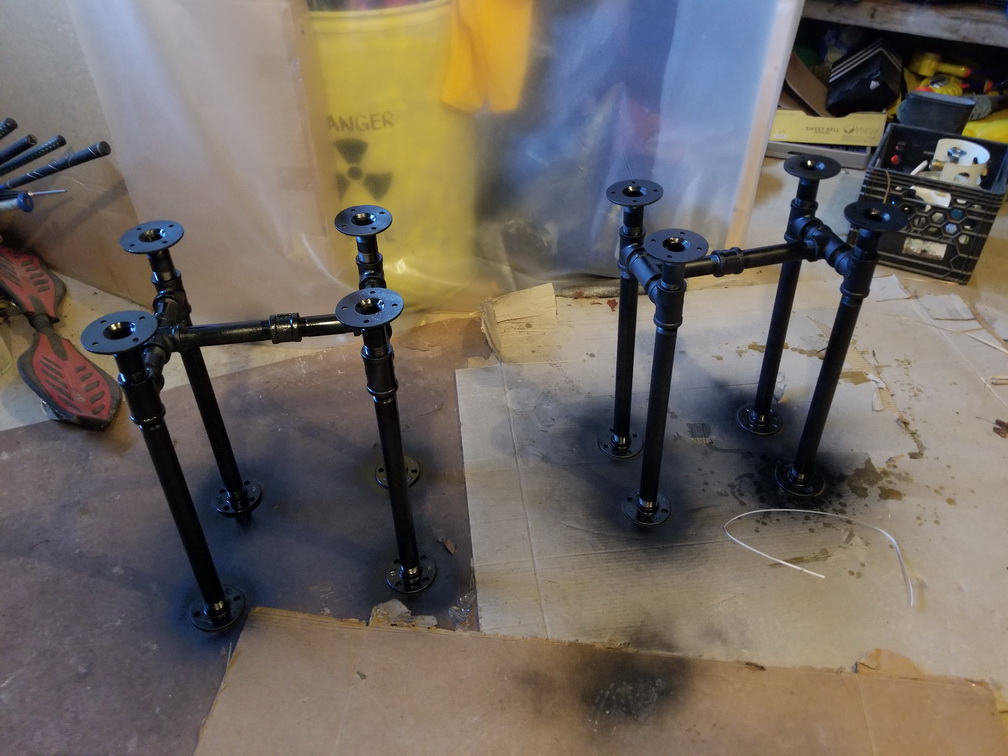
Assembling and painting the legs…
Mmmm… look at those bad boy pipes !
Quick test that everything is okay. Since I was in the cutting and staining mode I quickly made secondary shelves that fit between the legs. I probably won’t use them, but now is the time to make them easily.
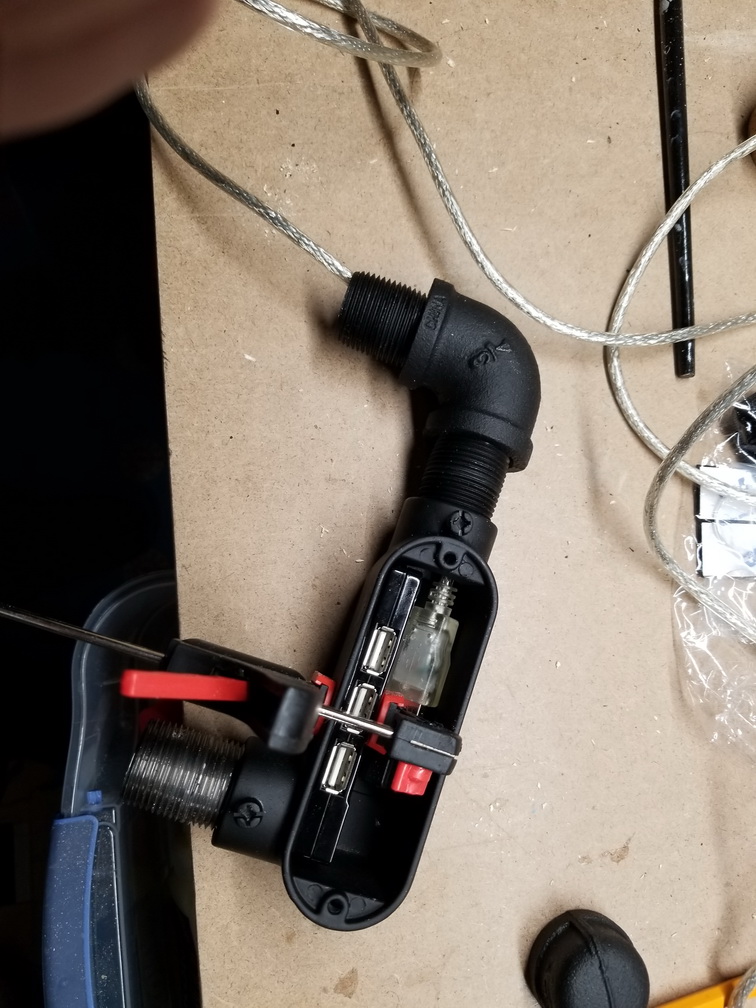
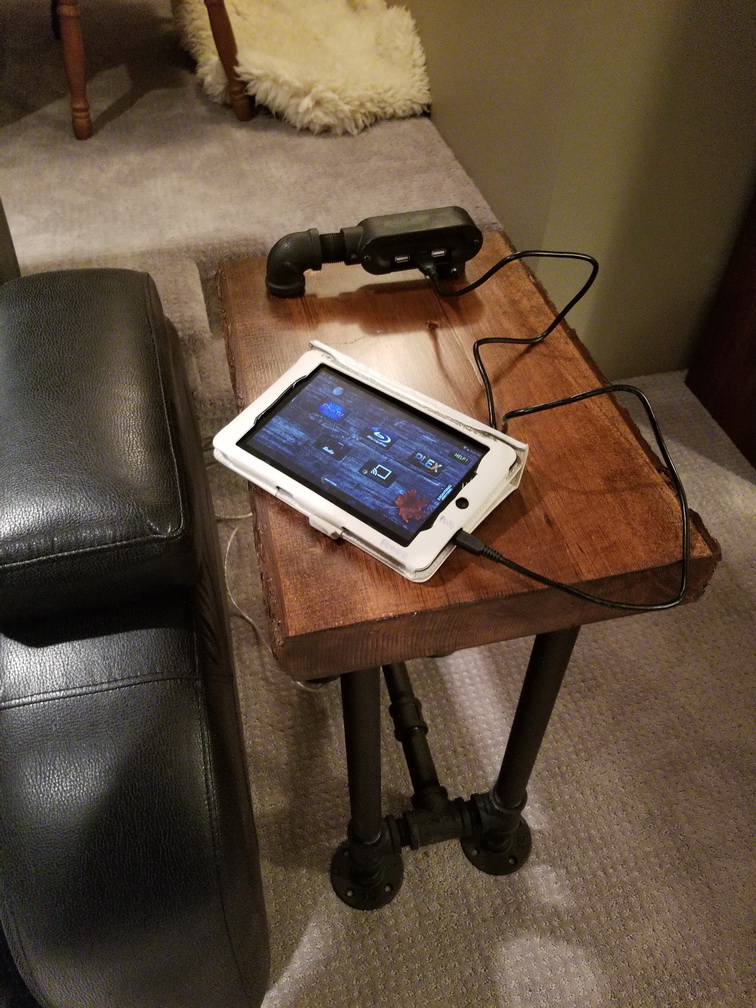
We use an android tablet to run our TV etc, and keeping track of the power cord is always a pain. So for one of the tables I will have the power delivered right to the surface. (I have all this piping … it should be easy!)
Here I am glue-clamping a USB hub into an LRL Conduit Body. Yes, this is what it has come to. I am now an expert in conduit fitting nomenclature.
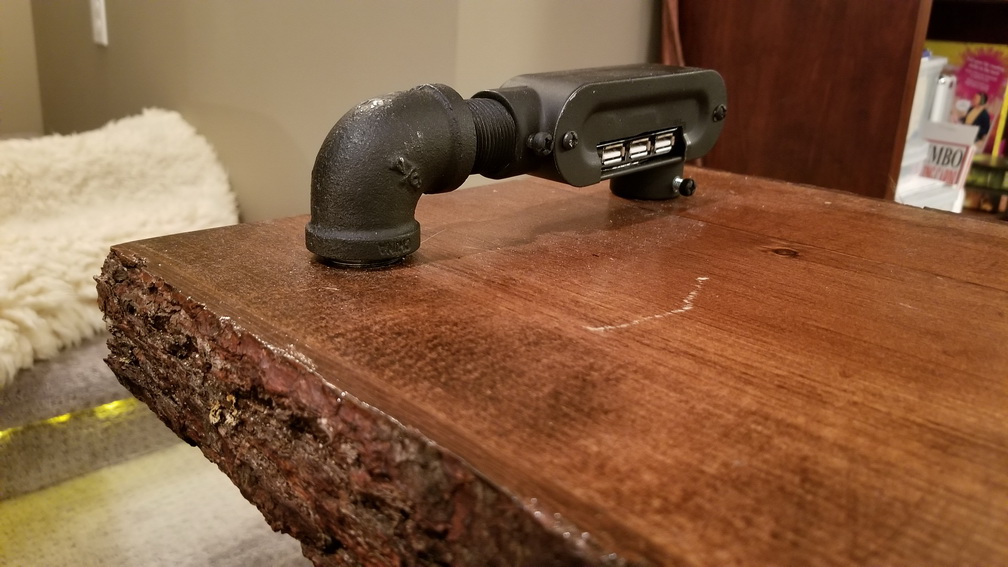
I like the industrial pipe+wood look of the power station.
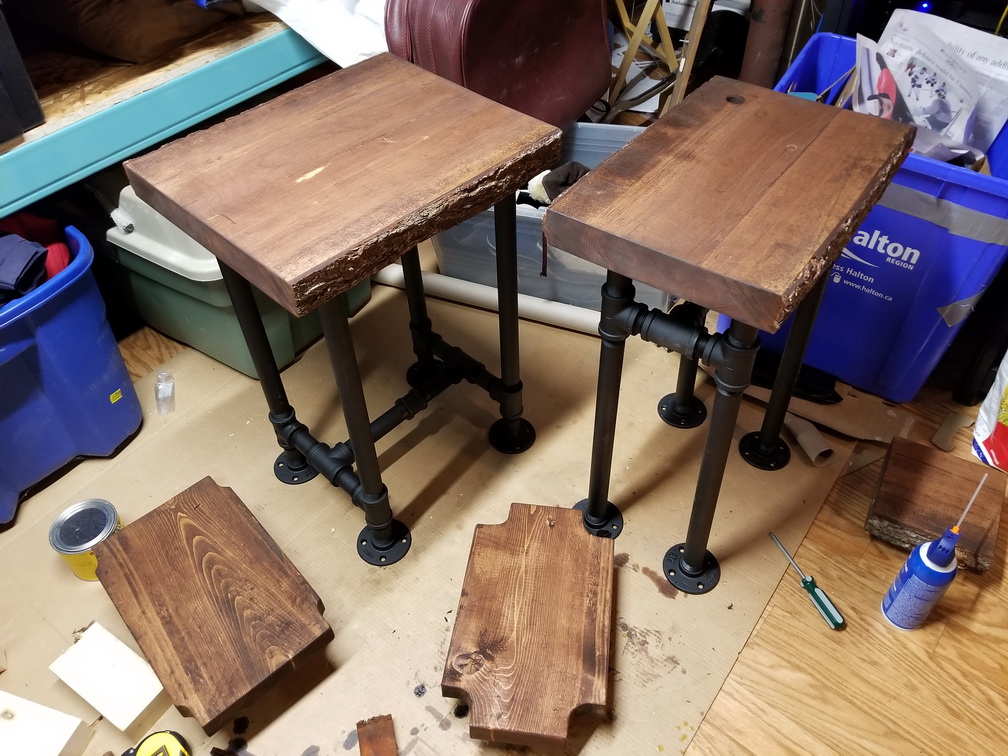
And here is the other end table. In the end I removed the lower shelf so you can see the piping, but I still have it on hand just in case.
The Leftovers Project
Okay, whenever I am doing a project with custom materials and there are bits leftover I am like …” I should be able to use these for something…”. (I hate throwing stuff away). This project is not different. I have left over wood and piping …. how about a little shelf unit to hold my craft beer sample glasses !
Yep .. this will work Looking nice ! Maybe I should add a light …. 🙂
Unfortunately the cat has finally discovered the shelf that holds the basement TV projector. I have no idea how this lasted so long (nice warm fan, good view) but it is time to finally do the projector shelf panel I have meant to do for a long time. Projectors do not mix well with cat fur !
One of the main reasons I have been putting it off is that it will likely involve fiddly hole cutting. But recently i have discovered that the main branch of our city library has a laser cutter, and this would be a good project to go try that sucker out.
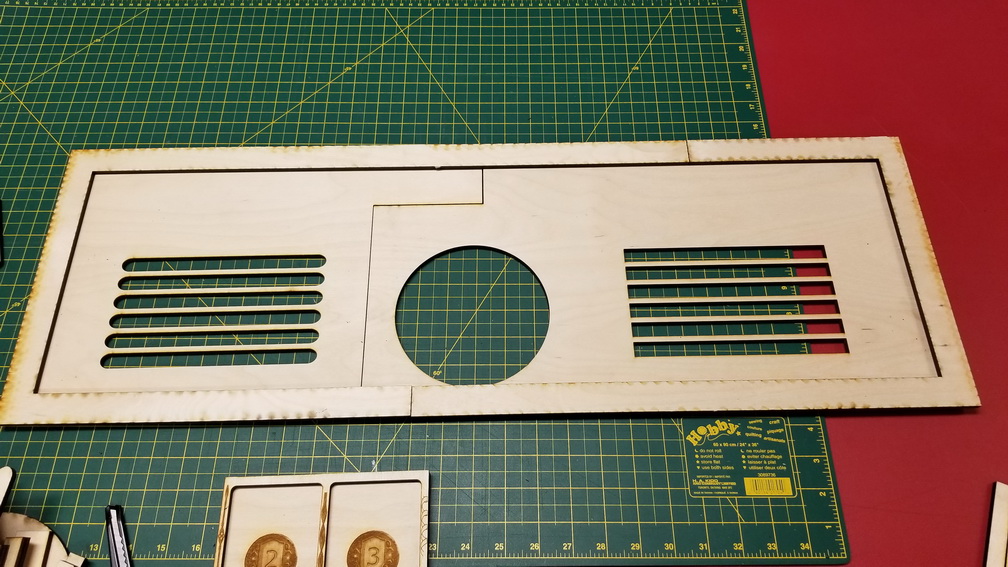
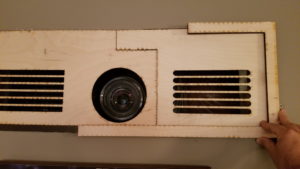
The trick though, was that the maximum size sheet that the laser cutter can hold is 24″ x 12″, and my opening is much bigger. So I had to make it in two pieces, and use an overlapping frame to hold it together (and make it look nice). I had to do some fiddling in Inkscape to come up with the shapes that would overlap each other so that none of the joins would be in the same place. I also wanted to use as few sheets as possible, since there always seems to be a lineup for the laser cutter and i want to be as efficient as possible (and I pay by the minute). The result was something like this :
(if i am sending something to a machine i hate to waste an opportunity, so I put a bunch of test pieces for other projects in that blank space)
Once happy with the design, I put 1/4″ ply into the laser cutter and I am pleased with the results:
You may notice that the vents are not rounded on the right piece. That seems to be from a bug when I print to the laser directly from Inkscape. For some reason the rounding on some shapes disappears, so for the second piece i imported it into Corel and printed from there. All good learnings.
Everything fits well into the wall:
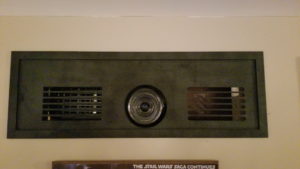
So I spray paint it flat black, glue it all together, and voila !
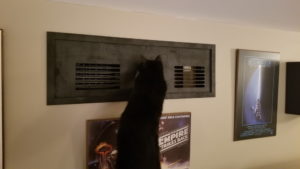
Looks great ! And the cat is not happy LOL :
He was seriously trying every angle to see how to get past/remove it.
Good first laser cutting project. Working with the 1/4″ ply is not so great though since it is only a 40W laser. At that thickness little pockets of glue melt-then-rejoin after the laser goes by, so most of the pieces didn’t detach quite easily and I had to wrangle it with a box-cutter.
My home office desk is a mess. The sedimentary layers of paper/cards/things/devices all represent stuff that I am working on, or waiting for something, or as a reminder of something that I should get to pretty soon. It also doesn’t help that I lose almost 25% of my desk space to the cat. (I have a towel down to encourage him to stay to the side instead of him flumping all over everything in front of me). Let’s not even mention the piles surrounding my desk of other things in the queue (like piles of old photos to scan, bills to file, cassettes to record…)
As a consequence of this entropic-organization I often lose track of my mouse-pen when I put it on my desk. I needed to make a holder.
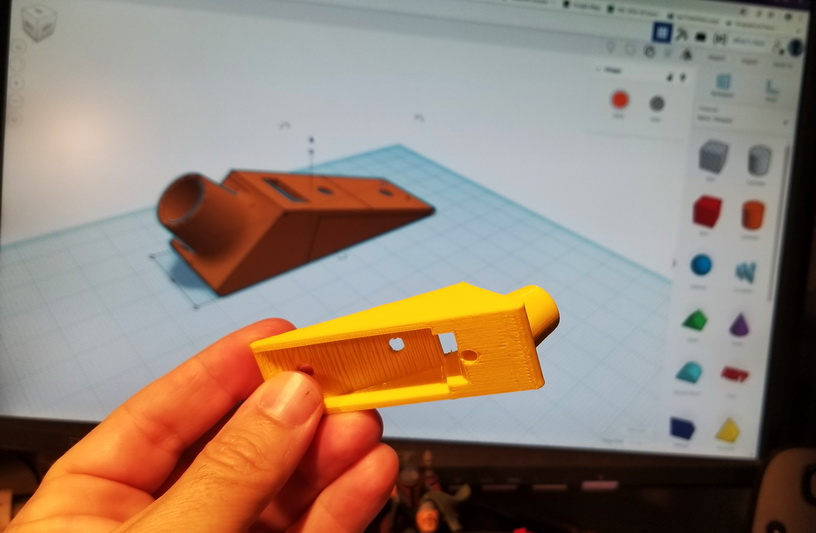
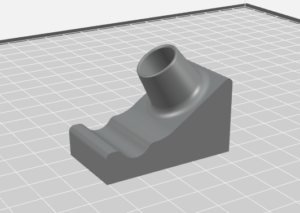
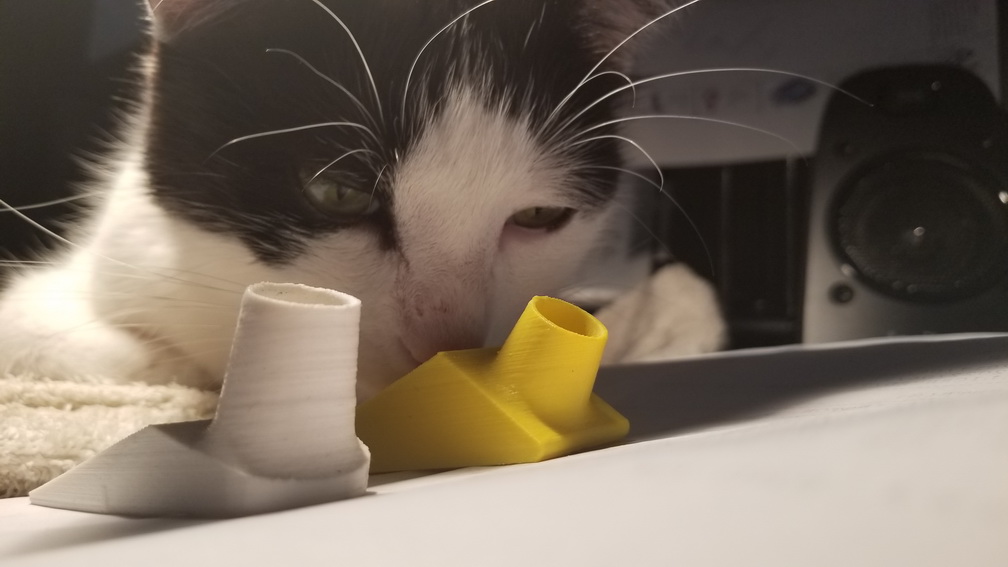
So I found a design on Thingiverse that someone had made:
and remixed it to something that I can mount under the lip of my desk and then printed it at the local public library:
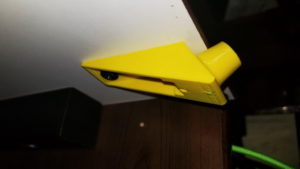
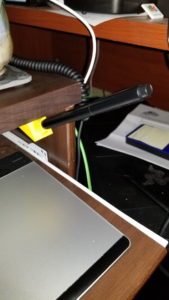
installing it:
and voila – a place to put my mouse-pen, right above the tablet:
Works great. If I were to make it again (doubtful since I only need the one) I would make the collar deeper.
—
(update)
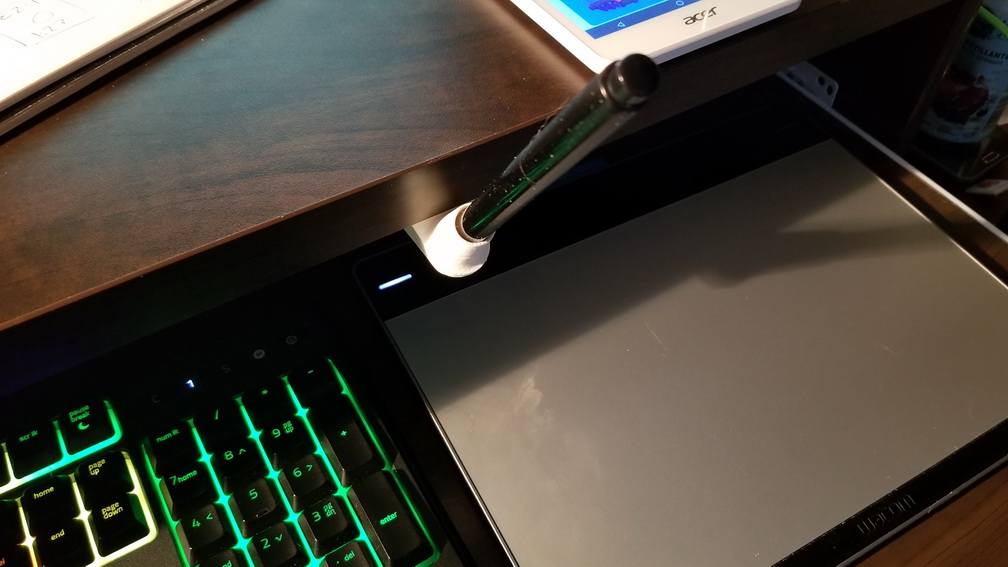
ok – I did make it again. Combination of the bad angle of the pen, the sharp corners, and the fact that I use it everyday drove me to make some quick mods. But this version is more or less perfect.
New vs Old. Houdini thinks they smell the same.The new design holds the pen much better, and is more discreet. I have since moved it over to the right and it can use it now without thinking. No more lost pens !